

Shop Tested 2 Inch Rule: Tubeless Sidewall Repairs for Riders
Posted by Matt Russ on 25th Sep 2026
Shop Tested 2 Inch Rule: Tubeless Sidewall Repairs for Riders

A tubeless sidewall puncture is sometimes fixable, but only within limits. A plug can seal a small, clean hole near the center of the sidewall long enough to finish a ride, while a long cut or torn cords almost always calls for a tube to get home and a replacement afterward. Carry a spare tube on every ride. It’s the cheapest insurance against a sidewall failure that sealant and plugs can’t fix.
TL;DR:
- A tubeless plug can seal small, clean sidewall punctures near the centerline, but larger cuts or tears require a tube or tire replacement.
- Home repairs for bigger sidewall gashes involve cleaning, roughening, patching, or patching with a boot, but should be tested before long-term use.
- Replacing the tire is safest if cords are exposed, the gash exceeds two inches, or the tire has already failed a previous repair.
- Carrying a spare tube, a multi-size plug kit, and basic tools remains the most reliable plan for trail side repairs.
- Better casing or sidewall protection is advised if puncture repairs happen frequently on rough terrain.
Table of Contents
- How Do You Fix a Sidewall Puncture Tubeless on the Trail?
- Can You Patch a Sidewall Gash at Home?
- When Should You Replace a Tire Instead of Repairing It?
- What Should You Carry for Sidewall Emergencies?
- Sport Factory Pro Shop’s Take on Sidewall Repair Kits
- A Rider’s Honest Rule for Sidewall Repairs
- Where to Find the Gear This Guide Recommends
- Sources
- FAQ
How Do You Fix a Sidewall Puncture Tubeless on the Trail?
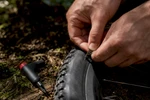
A plug has a real shot at working when the hole is small, roughly the width of a thorn or a sharp rock chip, and sits close to the tire’s centerline rather than down near the bead. Once a cut stretches past a half inch or you can see the casing cords poking through, a plug won’t hold. The sidewall flexes with every pedal stroke, and that constant movement works a plug loose in ways a tread puncture never does.
The trailside workflow is straightforward if you’ve practiced it once at home:
- Find the hole and pull out any debris still lodged in it.
- Wipe away sealant so you can see the actual cut.
- Ream the hole if your kit includes a reamer. This roughs up the opening so the plug’s rubber strip grips the casing.
- Insert the plug, then pull the tool straight out while holding the plug in place.
- Trim the excess plug flush with the tire.
- Reinflate and rotate the wheel to work sealant into the repair, then check for bubbles or hissing.
Tool tests from Singletracks found that most plug kits handle small punctures reliably, though ergonomics vary a lot between sticky strip kits and dart style tools like Dynaplug. Bikepacking treats plugs strictly as trail fixes, not permanent solutions, especially on sidewalls where flex and pullout risk are highest.
If the cut is too big for a plug, don’t waste time on improvisations. Duct tape over a sidewall gash won’t hold air, and stuffing the tire with grass or a gel wrapper is a last-resort trick that rarely survives more than a mile. Your fastest, most reliable fix at that point is pulling the tubeless valve core, pushing sealant out of the way, and fitting a spare tube.
Pro Tip: Preload one plug into your tool before you leave the house. Fumbling with a dry, stiff plug strip on the trailside with cold fingers costs more time than the repair itself.
Can You Patch a Sidewall Gash at Home?
A sidewall gash that’s too big for a trailside plug isn’t necessarily a dead tire, provided the cords underneath are still intact. Home repairs buy you extra miles from a tire, though they demand more prep than a quick trail fix.

Start by cleaning the area thoroughly. Wipe out residual sealant and roughen the inner surface around the cut with sandpaper so glue or cement actually bonds instead of sliding off a smooth rubber liner. Skipping this step is the most common reason home patches fail.
From there, pick your method based on the damage:
- Small to medium holes: apply a vulcanizing patch the same way you’d patch a tube, using vulcanizing cement and firm pressure while it cures.
- Larger holes: cut an internal boot from an old tire sidewall or a dedicated tire boot, and glue it in place with something like Shoe Goo for flexible, durable adhesion.
- Long gashes, two to three inches: Bikepacking.com’s field guide recommends stitching the cut closed with a heavy curved needle and strong thread, sealing the stitching with Shoe Goo, then adding an internal boot over the top for a layered repair.
Once the glue has cured, install a tube inside the repaired tire and inflate it overnight. Check the next day for any bulging, separation, or air loss at the repair site before you trust it on a real ride. If you’re prepping the tire interior for a patch, our guide to removing old tubeless tape residue covers getting the casing surface clean enough for glue to actually stick.
Pro Tip: Test a home repair on a short, low-stakes ride before you take it anywhere remote. A repair that fails in your driveway is an inconvenience; one that fails 20 miles from the trailhead is a very different problem.
When Should You Replace a Tire Instead of Repairing It?
Sidewall damage sits in a different category from tread punctures because the sidewall is the tire’s most flexible, most structurally loaded section. Park Tool and Continental both advise against relying on sidewall repairs for continued use, and mechanics who’ve watched repairs fail under load echo the same caution: a patched sidewall stays weaker than the original casing and can let go without warning.
Replace the tire if you see any of the following:
- Cords exposed or visibly broken, not just the outer rubber cut
- A bulge or soft spot near the repair when inflated
- A gash longer than roughly two inches
- A repair that’s already failed once and been redone
High speed road descents and heavily loaded touring setups are the worst places to trust a repaired sidewall. When in doubt, especially if structural compromise seems even slightly possible, replacement is the safer call every time.
What Should You Carry for Sidewall Emergencies?
A tight kit beats a heavy one. Pack for the ride you’re actually doing, not every possible failure.
On the trail:
- A tubeless plug kit with multiple plug widths, since Cycling UK’s group test found kit sizing varies a lot between brands
- One spare tube sized for your wheel and tire combo
- A valve core tool
- A pump, CO2 inflator, or compact e-flator for fast reinflation
- A small tire boot or strip of duct tape as a stopgap
At home:
- A vulcanizing patch kit and cement
- Shoe Goo or an equivalent flexible adhesive
- A heavy curved needle and strong thread for stitched repairs
- Spare sealant, since fresh sealant seats plugs and patches far better than old, thickened sealant does
Road, gravel, and MTB riders should size plugs differently. Wider MTB tires can usually accept larger plugs without trouble, while narrower road and gravel casings do better with thinner strips. Check your sealant levels before every ride, since a tire running low on sealant gives a plug nothing extra to bond with.
Sport Factory Pro Shop’s Take on Sidewall Repair Kits
We’ve watched enough sidewall failures to know the difference between a kit that works and one that just looks complete on a shelf. Our recommended setup pairs a multi-size plug kit with a pocket inflator for trail use, then a full patch and stitching kit for the workbench.
If you’re chasing a slow leak rather than a clean cut, our post on diagnosing overnight air loss walks through separating a sealant issue from an actual puncture. And if sidewall damage keeps finding you on rough terrain, our breakdown of casing protection strategy explains when a tougher casing or insert is worth the added weight. We carry the tires, plug kits, and inflators behind every recommendation in this guide, because we use the same gear ourselves.

A Rider’s Honest Rule for Sidewall Repairs
My threshold shifts with the stakes. A commute tire with a clean, small sidewall patch can keep rolling. A race or a remote bikepacking route gets a new tire, full stop. The rule that’s never failed me: if you depend on the ride’s outcome, replace the tire; for low-risk rides, a properly patched sidewall may hold temporarily. Either way, carry a tube.
— Matt
Where to Find the Gear This Guide Recommends
A shop specializing in cycling gear often stocks the categories this guide points to, so you’re not piecing together a kit from multiple stores after a bad ride. If your sidewall damage crossed the line into “replace it” territory, start with our tire selection built for road, gravel, and MTB casings that hold up better against cuts. If your kit is thin on trail tools, our pumps and inflation systems page covers the CO2 and e-flator options worth carrying.

Quick categories worth checking before your next ride:
- Tubeless-ready tires across road, gravel, and MTB widths
- Compact inflators and pumps sized for a saddle bag
- Maintenance tools for home patch and boot repairs
Browse the tire lineup directly, or head to the full bike category to build out a complete emergency and home repair kit in one order.
Sources
- Tubeless tire mounting and repair - Park Tool
- Tire repair | Continental Tires
- Bikepacking
- I tested 10 tubeless tire plugs and tools, and one stands out as my favorite. - Singletracks
FAQ
What Should You Do if You Get a Sidewall Puncture on a Tubeless Tire?
Try a plug only if the hole is small and near the center of the sidewall. For anything larger, pull the valve core, clear the sealant, and fit a spare tube to get home safely.
What Can You Do if Your Tubeless Sidewall Keeps Leaking After a Plug?
A leaking plug usually means the hole was too large for the plug or the sidewall’s flex worked it loose. Fit a tube as a fail-safe, then plan a proper patch, boot, or replacement once you’re off the trail.
Can a Sidewall Puncture in a Tire Be Fixed?
Small, clean cuts can sometimes be patched or stitched at home, but Park Tool and Continental both consider sidewall damage generally non-repairable for safe continued use. When cords are exposed or the cut runs long, replacement is the recommended path.
What Happens if You Get a Puncture With Tubeless Tires?
Sealant closes most small tread punctures on its own within seconds of rotation. Sidewall punctures behave differently since the flex there tends to push sealant and plugs out rather than let them seal.