

Terrain Driven Tire Sidewall Protection: Casing First, Inserts Later
Posted by Matt Russ on 28th Aug 2026
Terrain Driven Tire Sidewall Protection: Casing First, Inserts Later
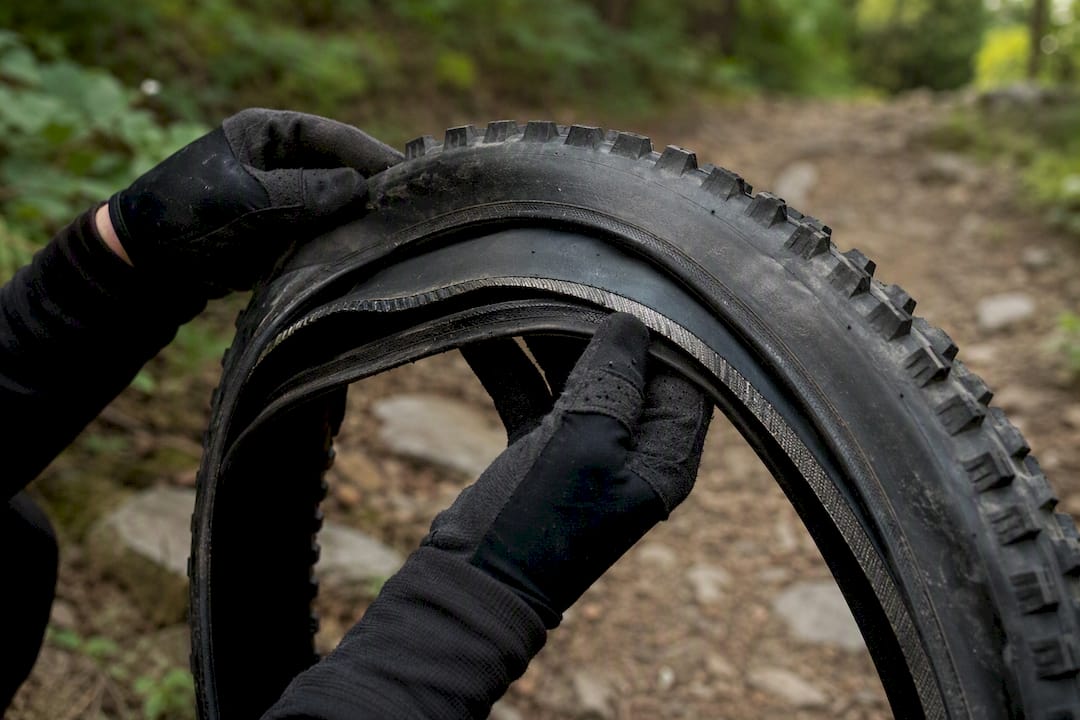
Tire sidewall protection comes from reinforced casings, sidewall layers, bead-to-bead breakers, and tubeless inserts working together to guard against cuts and pinch flats. The fastest path to fewer flats: match a reinforced casing to your terrain first, then add an insert if you’re running aggressive enduro lines or want to drop pressure well below normal. Skipping straight to an insert without the right casing underneath still leaves you exposed to sidewall slashes, and every layer you add costs weight and installation ease.
TL;DR:
- For rocky or technical terrain, a reinforced casing with a low TPI like 60 offers better puncture resistance than high-TPI casings, which are more supple but less durable.
- Adding a bead-to-bead protection layer is most effective for preventing deep sidewall slashes during fast, aggressive riding on sharp rock edges.
- Inserts are most beneficial for aggressive enduro and downhill riding, as they allow for lower pressures and better rim protection but increase weight and mounting difficulty.
- Proper tiered protection starts with the casing construction; only add inserts if terrain or pressure goals justify the extra weight and mounting complexity.
- Relying solely on inserts on weak casings offers limited protection, so always prioritize robust casings first for most riding disciplines.
Table of Contents
- What Types of Tire Sidewall Protection Actually Exist?
- How Do These Protection Methods Actually Work?
- How Should You Choose Sidewall Protection for Your Terrain?
- How Do You Install and Repair Protected Tire Setups?
- Should You Choose an Insert or Just a Tougher Casing?
- What the Shop Floor Teaches You About Sidewall Protection
- Where to Buy Protected Tires, Inserts, and Sealant
- Sources
What Types of Tire Sidewall Protection Actually Exist?
Sidewall armor shows up in a few distinct forms, and knowing what you’re looking at on a spec sheet saves you from buying the wrong tire. Sidewall layers are woven fabric plies bonded into the casing itself, adding cut resistance without changing the tread. Breaker belts sit under the tread cap rather than the sidewall, stopping punctures before they reach the casing. Bead-to-bead protection wraps reinforcement from one bead all the way to the other, covering the full width of the tire rather than just the tread zone. Manufacturers like Maxxis build these into distinct product lines, layering sidewall fabric, butyl inserts, and bead-to-bead breakers depending on how much protection a given model targets.
Inserts work differently. They sit inside the tire rather than being part of it:
- Full-volume inserts fill most of the tire’s internal cavity, offering the most rim protection but adding the most weight.
- Partial inserts protect only the impact-prone lower sidewall zone, trading some protection for lighter weight and easier mounting.
- Rim-locking designs clip or seat directly onto the rim bed, helping prevent burping at low pressure.
On a spec sheet, look for terms like “dual ply,” casing TPI count, or named protection tiers. These tell you more than marketing copy ever will.
How Do These Protection Methods Actually Work?
Each protection type targets a different failure mode, and none of them cover everything. Bead-to-bead layers and dual-ply casings resist deep sidewall slashes, the kind that come from a sharp rock edge catching the tire at speed. Breaker belts stop tread punctures but do nothing for a sidewall cut. Inserts address a different problem entirely: they cushion rim strikes and prevent the tire from folding over on hard impacts, which is why inserts allow riders to run meaningfully lower pressure without risking a pinch flat or bent rim.
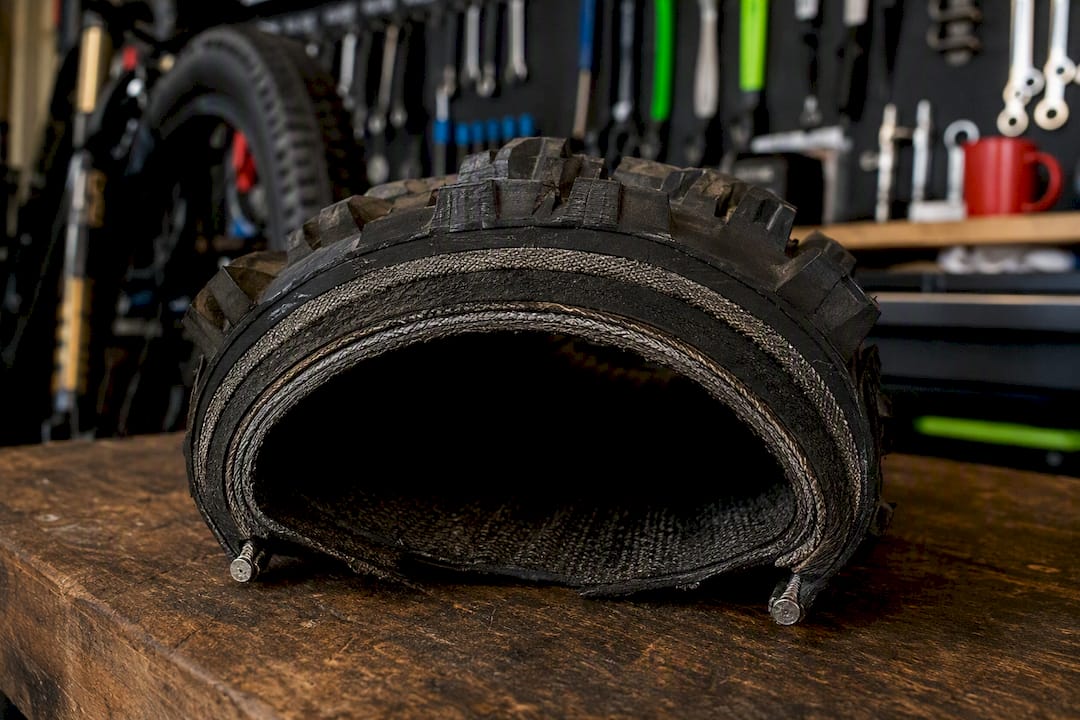
None of this comes free. Heavier casings and inserts both add rotational weight, which you feel most on climbs. Inserts also make mounting harder, since you’re working a tighter, stiffer package over the bead.
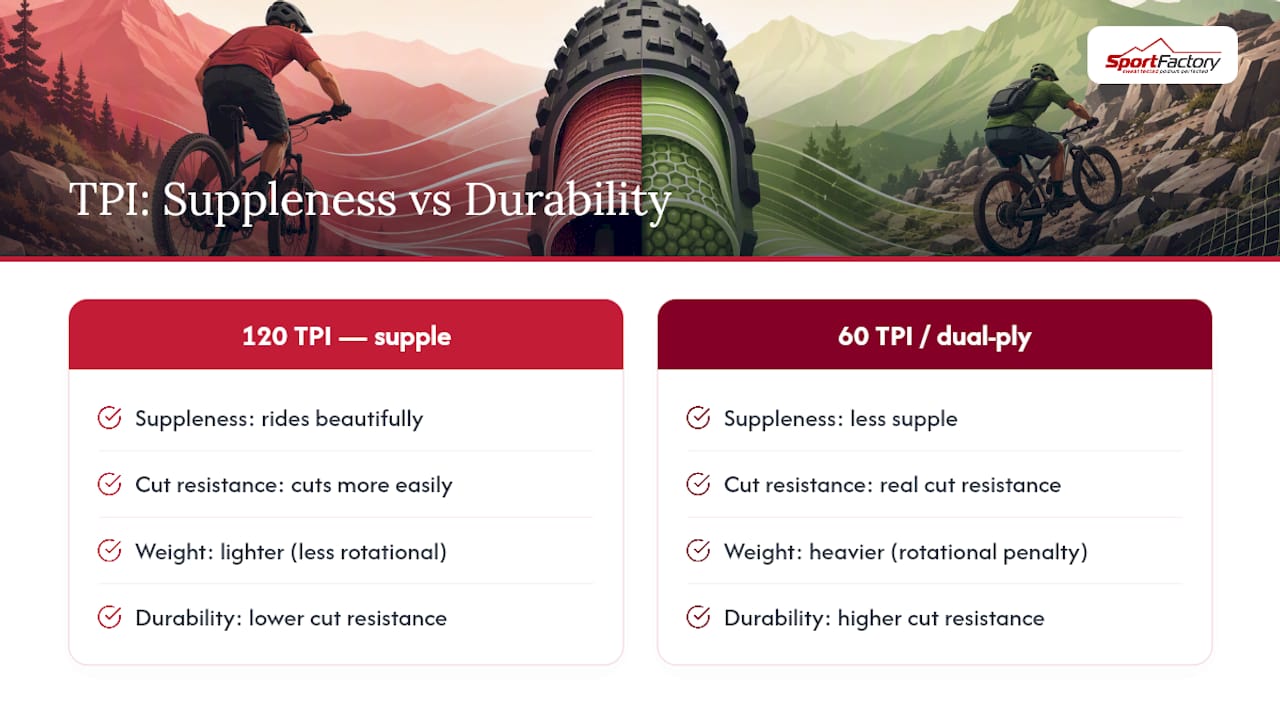
TPI matters more than most riders realize. A supple 120 TPI casing rides beautifully but cuts more easily than a coarser 60 TPI or dual-ply casing, which sacrifices a little suppleness for real cut resistance.
Pro Tip: If you’re torn between a lighter high-TPI tire and a tougher low-TPI option, ride the coarser casing for one season on your gnarliest local trail before you decide the weight penalty isn’t worth it. Most riders find it is.
How Should You Choose Sidewall Protection for Your Terrain?
Start with the casing, not the insert. That order matters because a weak casing under a heavy insert still splits open on a sharp rock strike, while a tough casing without an insert survives plenty of terrain on its own. Here’s the priority sequence to follow when comparing tires:
- Casing construction first — dual-ply or 60 TPI for anything rocky or technical, higher TPI single-ply for smoother gravel and XC.
- Under-tread protection second — a breaker belt matters more if you’re riding flint, chip-seal, or broken pavement regularly.
- Sidewall layer third — bead-to-bead coverage earns its weight on rock gardens and loose scree.
- Insert last — add one only if your terrain or pressure goals justify the extra weight and mounting hassle.
Match that sequence to your discipline:
- Gravel endurance: lighter dual-purpose casing, skip the insert, run sealant and moderate pressure.
- Mixed trail riding: reinforced sidewall layer, insert optional depending on rock exposure.
- Aggressive enduro or downhill: dual-ply casing plus a full or partial insert, non-negotiable on rock-heavy tracks.
- E-MTB: heavier casing is worth the weight given the added torque and speed; inserts help control the extra mass at impact.
Adding protection changes your pressure math. A well-protected setup with an insert often lets you drop several PSI below your normal range while reducing rim damage and pinch flats, since the insert takes the impact the rim would otherwise absorb. Check the tire’s casing name, TPI count, and any named protection tier before buying. Rim material matters too: carbon rims are less forgiving of hard strikes, which makes an insert a stronger case on carbon wheels than on alloy.
How Do You Install and Repair Protected Tire Setups?
Protected casings and inserts both change your mounting and repair routine. Follow these steps to get it right the first time:
- Check bead compatibility before you commit. Some inserts need specific bead geometry, and a tight tire-and-rim combo with an insert installed can be nearly impossible to seat without soapy water and a firm set of tire levers.
- Set your baseline pressure and ride-test it. Drop pressure gradually over a few rides, checking for burping on hard cornering before you settle on your final number.
- Carry a tire boot and sealant on every ride. Tubeless sealant seals most small punctures automatically, but a deep sidewall slash needs a boot placed against the inside of the casing before you add sealant and limp home.
- Know that inserts slow down trail repairs. Pulling a tire off the bead is harder with an insert in place, so mechanics recommend practicing the repair once at home before you need it on a ride.
- Recheck sealant levels monthly. Dried-out sealant is the most common cause of “mystery” flats on setups that should otherwise be bulletproof.
If a slash goes through to the casing, stop riding immediately, boot it, add sealant, and ride out slowly rather than pushing pace, which risks wrecking both tire and rim.
Should You Choose an Insert or Just a Tougher Casing?
The honest answer depends on how aggressive your riding gets and how low you want to run pressure. Reinforced casing alone handles most gravel and cross-country riding just fine, and it’s lighter, cheaper, and far easier to mount than any insert. Inserts start paying off once you’re riding rough enduro tracks or want pressures low enough that rim strikes become a real risk.
- Gravel endurance: casing alone, skip the insert.
- Mixed trail: casing first, insert optional if the terrain gets sharp.
- Enduro or downhill: casing plus insert, since the practical benefit scales with how aggressively you ride.
- E-MTB: casing plus insert, given the added speed and torque.
The simple rule: casing first, always. Add an insert only when gravity riding or very-low-pressure goals demand it.
What the Shop Floor Teaches You About Sidewall Protection
Working with riders across gravel, trail, and enduro disciplines, one pattern holds: the riders who flat least aren’t the ones with the fanciest insert. They’re the ones who bought the right casing for their terrain first. Sport Factory Pro Shop curates tires and inserts around that same terrain-first logic, weighing rim material, riding style, and pressure goals before recommending a setup rather than defaulting to the heaviest option available. If you’re unsure where your riding falls on that spectrum, that’s worth a direct conversation before you buy.
— Matt
Where to Buy Protected Tires, Inserts, and Sealant
Sport Factory Pro Shop stocks reinforced tubeless tires, inserts, and sealant chosen specifically for riders who’ve already been burned by a sidewall slash or a rim strike on the wrong setup.

You’ll find tires organized by casing construction and protection tier, along with insert options ranging from full-volume to partial coverage, so you can follow the same casing-first, insert-second logic covered above without guessing at spec sheets. If your terrain doesn’t match anything you’ve run before, whether that’s your first enduro season or a new gravel route with more rock exposure than you’re used to, the staff can walk through rim material, riding style, and pressure targets to land on a setup that fits. Start by browsing the tire and insert selection at Sport Factory Pro Shop and filter by casing type to narrow things down fast.
Sources
For deeper technical detail beyond this guide, consult Maxxis’s tire technology documentation for casing construction terms, BikeRadar’s carcass explainer for TPI comparisons, and Michelin’s puncture resistance guide for sealant and repair specifics. Manufacturer tech docs and specialist test reviews remain the best source for model-specific claims.