

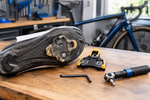
When Should You Replace Your Bicycle Cleats? A Shop Tested Checklist for Cyclists
Posted by Matt Russ on 22nd Sep 2026
Replace Cleats Every 2–3 Seasons? Shop Tested Checklist for Cyclists
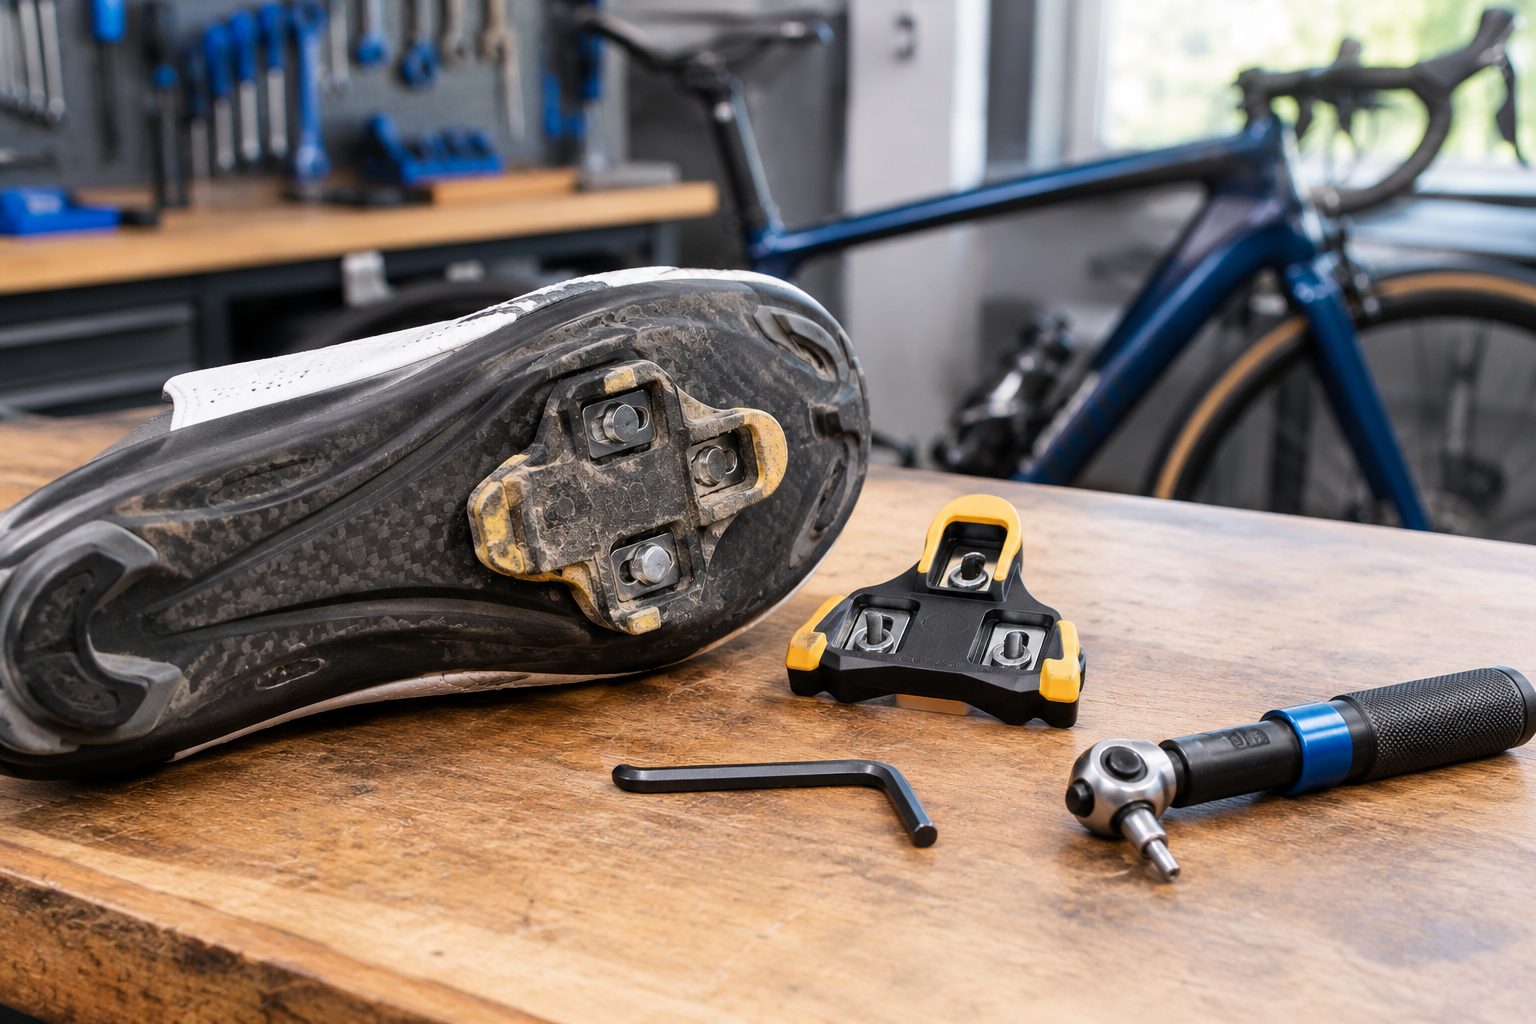
Replace your cleats when the colored wear indicator wears down to bare material, or when clipping in and out starts feeling noticeably harder, looser, or unpredictable. For many riders, cleats typically last about two to three seasons, though actual wear varies widely depending on riding surface, walking habits, and pedal system. Once you replace them, always test engagement in a stand before heading out.
TL;DR:
- Cleats should be replaced when the colored wear indicator wears down to bare material or when clipping in and out becomes difficult, loose, or unpredictable.
- Visual wear on road cleats appears as black material showing through the TPU indicator, while mountain bike cleats rely on tactile signs like rounded edges, corrosion, or play.
- Regular riders should check cleats every 1 to 2 seasons, high-mileage or walking-heavy riders may need annual replacements, and always monitor performance rather than relying solely on calendar estimates.
- Proper installation involves marking the original position, cleaning mounting surfaces, torquing bolts evenly, and testing clip-in and release before riding.
- Routine maintenance such as monthly bolt checks, cleaning, using cleat covers, and spreading wear across multiple shoes extends cleat lifespan and ensures safety.
Table of Contents
- What Are the Warning Signs Your Cleats Need Replacing?
- How Often Should You Replace Cycling Cleats?
- How Do You Replace Bike Cleats Step by Step?
- How Do You Keep Your Cleat Position Consistent?
- What Maintenance Habits Keep Cleats Working Longer?
- What Goes Wrong During Cleat Replacement, and How Do You Fix It?
- What Does Sport Factory Pro Shop’s Cleat Swap Checklist Look Like?
- When Is Replacement Worth It Over a Quick Fix?
- Where to Buy Replacement Cleats and Tools
- Sources
- FAQ
What Are the Warning Signs Your Cleats Need Replacing?
Your cleats talk to you before they fail. The trick is knowing what to listen for.
Road cleats built for SPD‑SL, Look, or Speedplay systems make this almost foolproof, because most come with a colored TPU wear pad molded into the cleat body. That colored layer sits over a black nylon base, and it’s a built-in wear gauge. When you can see black poking through the color, especially at the toe or heel contact points, you’re overdue. Wahoo’s guidance on Speedplay cleat maintenance treats this as the clearest signal available, since the indicator is designed specifically to be visible at a glance during a pre-ride check.
Functional feel matters just as much as looks, sometimes more. Pay attention to these shifts in how the pedal interaction behaves:
- Clipping in requires noticeably more force than it used to, or the cleat seems to catch before it seats.
- Clipping out happens with barely any twist, or worse, happens on its own during hard pedaling.
- Float feels looser or wanders more than your pedal’s stated range should allow.
- You hear a rattle or clunk at the interface that wasn’t there before.
That last point deserves attention because it’s often the first thing riders notice before they ever look down at the cleat itself.
Mountain bike and SPD cleats play by different rules. Metal recessed cleats don’t come with a color-coded wear layer, so you’re relying entirely on tactile and visual cues instead. Look for rounded-off engagement edges where the cleat should have crisp corners, visible corrosion or pitting on the metal, and any play or wobble when the cleat is seated in the pedal. BikeRadar’s cleat replacement advice points out that because there’s no visual indicator built in, a change in how engagement feels is usually the earliest and most reliable warning sign for off-road riders.
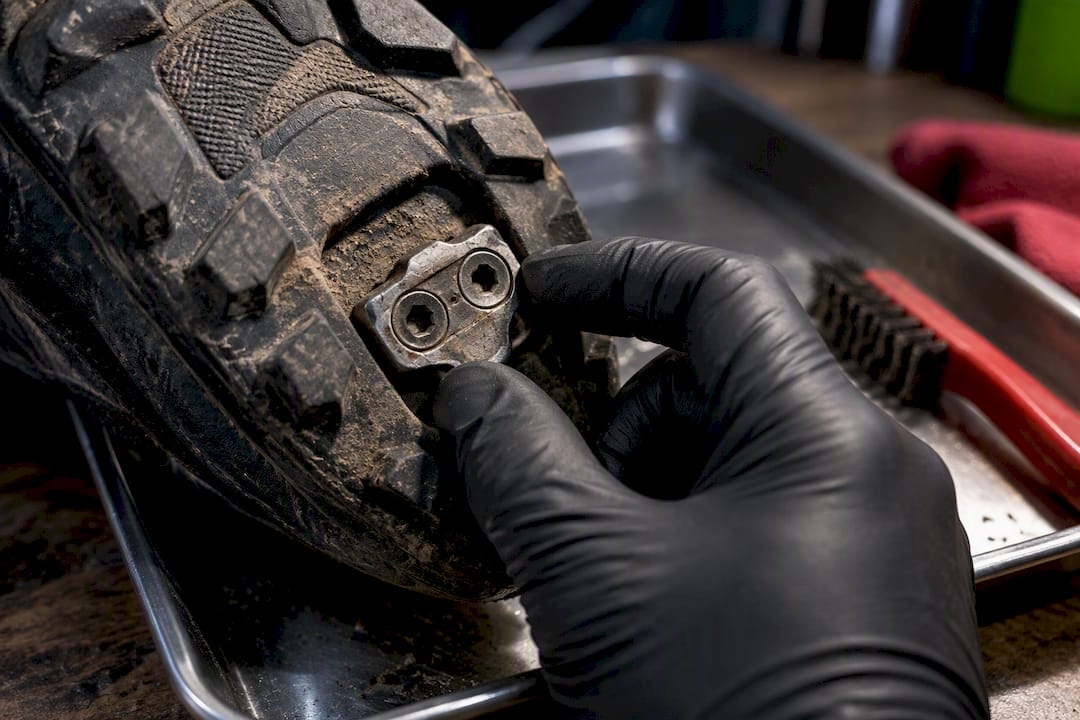
Statistic Callout: According to Wahoo’s own cleat care documentation, high-mileage riders often replace cleats every two to three seasons, though actual wear varies widely depending on riding surface, walking habits, and pedal system.
Here’s your red-flag checklist. If any of these apply, stop deferring and replace now:
- Black base material visible through the colored wear pad.
- Accidental unclipping during normal pedaling, not just hard efforts.
- Visible cracking, chipping, or a cleat edge that’s worn to a rounded slope.
- Persistent creaking or looseness at the shoe-pedal interface even after tightening bolts.
Active’s cycling maintenance advice frames this well: the goal is replacing cleats before mechanical failure or unreliable disengagement puts you in a bad spot, not after. A cleat that fails to release cleanly at a stoplight is an inconvenience. One that fails to release during a fall is a different problem entirely.
How Often Should You Replace Cycling Cleats?
There’s no single mileage number that applies to every rider, because cleat wear depends far more on use patterns than odometer readings.
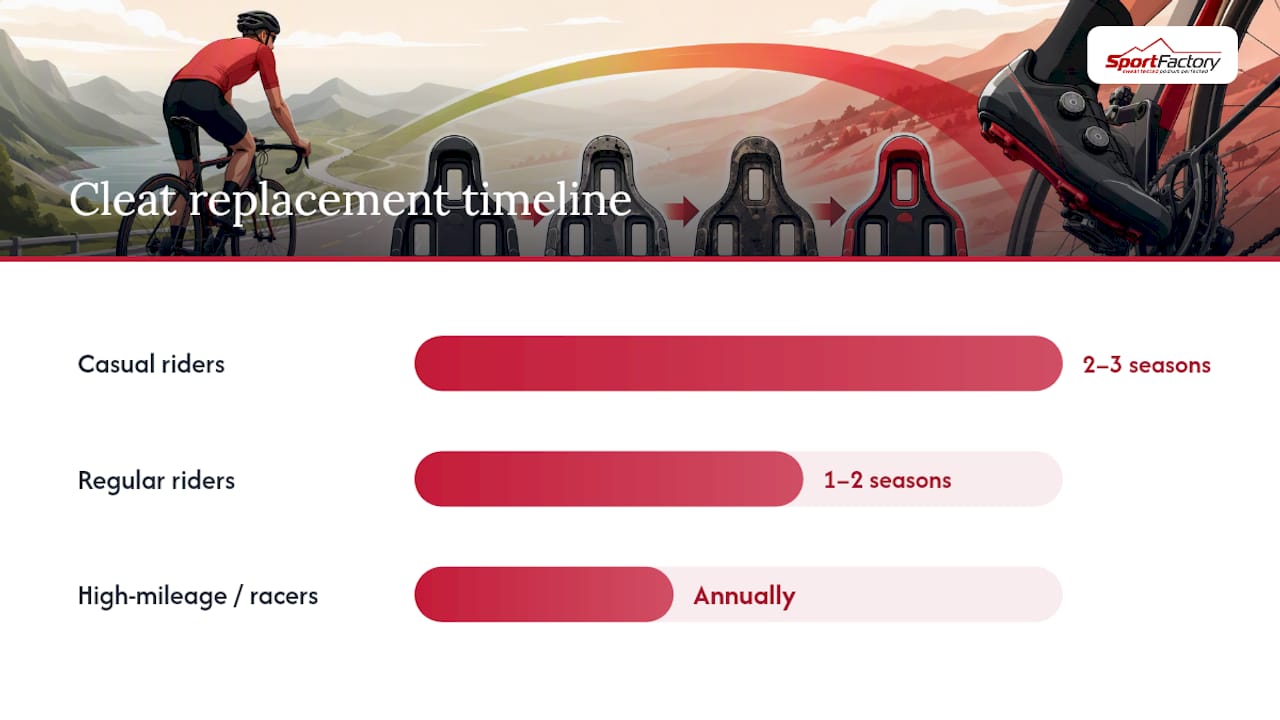
Casual riders who put in a few rides a week and rarely walk in their cycling shoes can often stretch a set of cleats across two to three full seasons before wear indicators show real change. Regular riders logging 100 to 150 miles weekly tend to see noticeable wear inside a single season, particularly on the outer edges where clipping motion concentrates stress. High-mileage riders and racers, especially those doing frequent stop-and-go efforts or criteriums, often replace cleats annually regardless of how they look, simply because the engagement feel degrades faster than the plastic visibly erodes.
Walking habits shift this timeline more than almost anything else. A triathlete jogging across transition on pavement, or a commuter walking a few blocks to a coffee shop between rides, grinds down cleat material at a rate that dwarfs normal pedaling wear. Active’s cycling maintenance guide notes that abrasive surfaces like asphalt and concrete accelerate wear significantly, which is exactly why plenty of experienced riders keep a pair of rubber cleat covers in their jersey pocket for coffee stops.
Use this rough guidance as a starting point, then adjust based on what you actually observe:
- Casual riders (1 to 3 rides weekly, minimal walking): roughly 2 to 3 seasons per set.
- Regular riders (4+ rides weekly, occasional walking): roughly 1 to 2 seasons per set.
- High-mileage or racing riders (daily riding, frequent hard efforts): annually, sometimes sooner.
- Anyone who walks often in cycling shoes on hard surfaces: check monthly, since wear can outpace mileage-based estimates fast.
The smarter approach ignores the calendar altogether and watches performance instead. If your clip-in feels different from one month to the next, that’s your real signal, not whatever season it happens to be. A cleat that’s six months old but has survived a hundred café walks on asphalt may need replacing before one that’s a year old and never touched pavement outside the pedal stroke. Treat the seasonal numbers as a ballpark, and treat the feel of the pedal interface as the actual deciding factor.
How Do You Replace Bike Cleats Step by Step?
Swapping cleats is one of the simpler jobs in home bike maintenance, but skipping steps here is exactly how riders end up with knee pain three weeks later. Here’s the process a shop mechanic would actually follow.
What you’ll need before you start:
- A 4mm Allen wrench or hex key (some road systems use a different size, so check your cleat’s bolt head first).
- A torque wrench if you have one, since over-tightening cleat bolts is a common way to strip threads.
- A marker, painter’s tape, or your phone camera.
- A small wire brush or old toothbrush for cleaning.
- Threadlocker (optional, but useful for riders who see bolts loosen frequently).
-
Mark the current cleat position. Before touching a bolt, trace the cleat outline onto the shoe sole with a fine marker, or lay down a strip of tape along its edges. Snap a photo from directly above as backup. Peloton’s cleat installation guide treats this step as essential, and it’s the single most common thing riders skip when they’re in a hurry.
-
Loosen the bolts. Work in a star pattern rather than side to side, backing off each bolt a little at a time so the cleat doesn’t shift unevenly as it comes loose.
-
Handle seized bolts carefully. If a bolt won’t budge, don’t force it with more torque than the wrench naturally gives you. A drop of penetrating oil left to sit for ten minutes usually frees corroded threads. If a bolt head starts to strip anyway, stop and take the shoe to a shop rather than risk rounding it out completely, since a stripped bolt with no clean removal point can turn a five-minute job into a drilled-out mess.
-
Remove the old cleat and clean the mounting surface. Wipe away grit, dried lubricant, and road grime from the sole’s mounting plate. Debris left in the bolt holes is a common reason new cleats sit slightly crooked even when everything looks aligned.
-
Check the new cleat’s compatibility. Confirm it matches your pedal system, whether that’s a two-bolt SPD/MTB pattern or a three-bolt road pattern like Look, SPD-SL, or Speedplay. Mixing pedal standards is a fast way to end up with a cleat that clips in but never releases the way it should.
-
Position the new cleat using your marks. Line the new cleat up against the tape outline, marker trace, or photo reference. Small changes in fore-aft position or rotational angle translate directly into knee and hip strain, so this step deserves patience, not guesswork.
-
Apply threadlocker if you’re prone to loosening bolts, then thread each bolt by hand first to avoid cross-threading before reaching for the wrench.
-
Torque the bolts evenly, working in the same star pattern. Most cleat manufacturers specify a torque range, and going by feel alone is how riders strip threads or leave a cleat slightly loose without realizing it.
-
Test before you ride. Clip in and out several times while standing next to the bike. Check that the release feel matches what you expect, and confirm there’s no unexpected float or resistance.
-
Do a short shakedown ride, then re-check the bolts. New cleats can settle slightly under load in the first few miles. A quick bolt check after your first ride catches anything that needs a final tightening pass.
Pro Tip: Take your test ride somewhere quiet with no traffic, and practice unclipping both feet at low speed before you commit to a real route. New cleats sometimes release with a different feel than the worn ones you just replaced, and you want to discover that in a parking lot, not at a stoplight.
How Do You Keep Your Cleat Position Consistent?
Getting the replacement cleat into the exact same spot as the old one is the part riders underestimate most, and it’s where most post-replacement discomfort comes from.
Your foot’s position on the pedal affects knee tracking, hip angle, and how evenly power transfers through each pedal stroke. Move a cleat just a few millimeters forward or rotate it a couple of degrees, and you can turn a comfortable position into one that produces knee pain within a few rides. That’s why Peloton’s installation documentation treats position transfer as a core part of the replacement process, not an afterthought.
Three low-effort methods work well for most riders:
- Tape outline: Lay painter’s tape flush against the cleat’s edges on all sides before removing it, then use the tape frame as a template for the new one.
- Marker trace: A fine-point marker traced right against the cleat perimeter works nearly as well and doesn’t require holding tape in place.
- Photo reference: Take an overhead photo with a ruler or credit card in frame for scale, useful as a backup if your tape or marker trace gets smudged mid-job.
If you’ve had a professional bike fit in the past, or you’re dealing with a knee or hip issue that’s ever bothered you on the bike, a cleat alignment tool or a visit to a fitter is worth the small cost. These tools measure rotational angle and fore-aft position with more precision than eyeballing a tape outline, and they matter most for riders who’ve had any history of overuse pain. If you’re moving cleats between two different shoe models, don’t assume the sole shapes match. Some manufacturers print measurement lines directly on the sole to help standardize placement, and using those lines is more reliable than trying to match distances by eye across two different shoe designs. Our guide on aerobar fit setup covers a similar principle: small position changes need to be tested incrementally, not all at once.
Pro Tip: If you’re not sure whether a position change is helping or hurting, adjust one variable at a time; fore-aft position first, rotation second; and give each change at least two or three rides before deciding. Changing everything at once makes it impossible to know what actually fixed or broke your comfort.
What Maintenance Habits Keep Cleats Working Longer?
A little routine attention stretches cleat life further than most riders expect, and it costs almost nothing in time.
Check cleat bolts monthly, even if nothing feels loose. Peloton’s maintenance recommendations call for regular tightening checks specifically because bolts work loose gradually under repeated pedaling stress, long before you’d notice it through the pedal itself. A monthly habit catches that drift before it becomes a rattle or, worse, a cleat that shifts position mid-ride.
Build these habits into your routine:
- Check bolt tightness monthly using the correct-size hex key, snugging anything that’s backed off.
- Clean dirt, grit, and dried lube out of the cleat’s engagement channels after muddy or wet rides.
- Use rubber cleat covers whenever you’re walking more than a few steps, especially on pavement or gravel.
- Rotate between two pairs of shoes or cleats if you ride frequently, spreading wear across more material.
- Re-check pedal spring tension any time you install new cleats, since fresh cleats often engage differently than the worn set they replaced.
That last point trips people up more than it should. BikeRadar’s cleat guidance notes that new cleats frequently change the release profile compared to what your pedal tension was dialed in for previously, so a spring tension that felt right for six months on worn cleats might suddenly feel too loose or too tight the day you swap in a fresh set. If you’re serious about riding consistency, it’s worth checking your bottle cage and other small-bolt torque specs at the same time, since the habit of routine torque checks tends to carry over well across the whole bike, as covered in our piece on bottle cage bolt torque.
What Goes Wrong During Cleat Replacement, and How Do You Fix It?
A handful of problems come up again and again during cleat swaps, and most have straightforward fixes.
Seized bolts are the most common headache. Penetrating oil and patience solve most cases; brute force solves none of them and usually just strips the bolt head. If a bolt won’t come free after a reasonable soak, a shop with the right extraction tools is a better bet than risking a drilled-out mounting plate.
Mixing new cleats with old, worn mounting hardware creates a subtler problem. Cycling Weekly’s advice on cleat and pedal replacement warns against pairing fresh cleats with bolts or baseplates that have their own wear pattern, since the mismatch can produce inconsistent release tension. If your hardware looks worn, replace the whole assembly rather than mixing generations of parts.
If clipping feels wrong after installation, work through this order:
- Recheck alignment against your original marks before assuming the cleat itself is defective.
- Confirm bolt torque matches spec, since an under-tightened cleat can mimic the feel of a misaligned one.
- Adjust pedal spring tension, particularly if the new cleats feel looser or tighter than the old set did.
What Does Sport Factory Pro Shop’s Cleat Swap Checklist Look Like?
A cleat replacement done right follows the same sequence every time: mark, remove, clean, fit, torque, test. That order isn’t arbitrary. Skipping the marking step is the single biggest reason riders end up with knee discomfort weeks after a swap, and skipping the final test ride is how a slightly-off release tension goes unnoticed until it matters.
For the tools side, you’re generally looking at a 4mm hex key, a torque wrench if precision matters to you, and a way to preserve your old position (tape, marker, or a photo). Sport Factory Pro Shop carries the pedals and compatible components that make matching replacement cleats to your existing system straightforward, along with the broader maintenance and tool selection that covers torque drivers and cleat covers for riders who walk often in their shoes.
A short checklist like this, similar in spirit to our disc brake safety checklist, tends to prevent the return trips that come from rushed installations. Consistency in the process matters more than any single tool in the kit.
When Is Replacement Worth It Over a Quick Fix?
Riders ask us all the time whether a worn cleat can just be touched up instead of replaced. Sanding down a rounded edge or cleaning up corrosion buys you a little time in a pinch, but it’s a stopgap, not a fix. Cleat engagement depends on precise geometry, and once that geometry is worn away, no amount of cleanup restores it.
A shop generally leans toward full replacement because consistent, predictable release tension matters more than stretching a worn part a few extra weeks. Temporary fixes make sense only when you’re mid-trip with no replacement on hand and need to get home safely. Once you’re back, replace the cleat properly rather than trusting a patched-up fix long term.
Get in the habit of glancing at your cleats every few rides. It takes less time than clipping in.
— Matt
Where to Buy Replacement Cleats and Tools
Sport Factory Pro Shop gives you a direct path to replacement parts without hunting across multiple retailers for pedal-compatible cleats, hex keys, and torque tools that actually match your setup.

Once you know which wear signs apply to your setup, whether it’s a road cleat showing bare nylon or an SPD cleat with rounded engagement edges, sourcing the right replacement is the next step. Sport Factory Pro Shop carries pedals and pedal-compatible components selected for engineering quality and rider-focused fit, so you’re not guessing at compatibility between shoe, cleat, and pedal standard. The shop’s broader tools and maintenance selection covers the torque drivers and cleaning supplies that make a home cleat swap go smoothly, and if you’re the type who checks tension and torque on every ride, the Coffeeride Club community is worth following for ride setup discussion beyond the workshop basics. Browse the pedal and component catalog now, and if you’re unsure which cleat pattern fits your pedals, reach out to the shop directly before you order.
Sources
- Wahoo Speedplay cleat care, maintenance and replacement intervals
- Peloton hardware: attaching, replacing, and removing your bike cleats
- When should you replace cycling cleats? | BikeRadar
- How to tell when you need to replace your cycling cleats | Active
FAQ
When Should Cleats Be Replaced?
Replace cleats when the colored wear indicator wears down to bare material, or when clipping feels harder, looser, or inconsistent compared to before. High-mileage riders often replace cleats every two to three seasons, though walking habits and riding surface shift that timeline considerably.
Can Cleats Be Repaired Instead of Replaced?
Minor cleanup like clearing debris or sanding a rough edge can extend a cleat’s usable life briefly, but it doesn’t restore the precise engagement geometry that wears away over time. Once a cleat shows a worn indicator or inconsistent release, full replacement is the safer choice rather than a patched-up fix.
How Do You Install New Cleats?
Mark the old cleat’s position with tape or a marker, remove the bolts with the correct hex key, clean the mounting surface, then align and torque the new cleat using your marks as a reference. Test the fit by clipping in and out repeatedly before riding, then re-check the bolts after a short shakedown ride.
Can You Replace Golf Cleats the Same Way?
Golf cleats use a different attachment system, typically a twist-lock spike rather than a bolted road or mountain bike cleat, so the process differs in tools and technique. The core principle still applies: replace them once tread or spike wear affects grip or comfort, rather than waiting for complete failure.