


90 Second Pre Ride Disc Brake Safety Checklist, Don't Skip
Posted by Matt Russ on 14th Sep 2026
90 Second Pre Ride Disc Brake Safety Checklist - Don't Skip
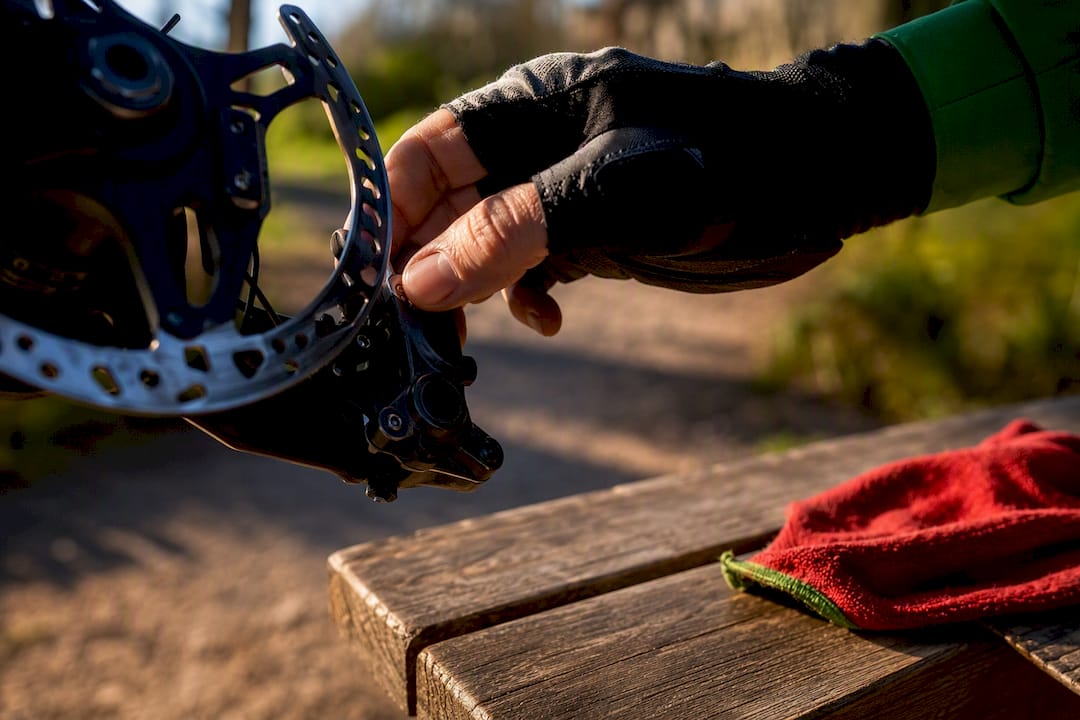
Disc brakes are safe when installed correctly, inspected regularly, and maintained on schedule. Before every ride, check for fluid leaks, confirm pad thickness, and rule out metal-on-metal contact between rotor and caliper. New pads or rotors need a proper bed-in before they perform at full strength, and any grinding noise or a leak means stop riding immediately, not “ride carefully.”
TL;DR:
- Regularly inspecting pads and rotors ensures early detection of wear, cracks, or damage before they cause brake failure during a ride.
- Contamination from lubricants or cleaning products can quickly glaze rotors and pads, with heavy contamination requiring pad replacement rather than cleaning.
- New pads and rotors need a proper bed-in process to develop an effective transfer layer, improving braking performance and reducing squeal.
- Replacing pads at about 0.5 millimeters of friction material and rotors once they reach minimum thickness prevents metal-on-metal contact and unsafe riding conditions.
- Proper maintenance of hydraulic and mechanical brakes, including bleeding or adjusting cables, is essential to avoid spongy levers or reduced stopping power.
Table of Contents
- What Disc Brake Safety Actually Requires Before You Ride
- Keep Contamination Off Your Rotors and Pads
- The Bed-In Procedure New Pads and Rotors Need
- When to Replace Pads and Rotors, With Real Numbers
- Hydraulic Versus Mechanical Disc Brakes: Different Maintenance, Same Stakes
- Braking Technique That Actually Prevents Crashes
- Fixing the Four Most Common Disc Brake Problems
- What Years Behind the Shop Counter Teach You About Brake Failures
- Get the Parts and Support to Keep Your Brakes Ride-Ready
- Manuals and Guides Worth Bookmarking
- Sources
- FAQ
What Disc Brake Safety Actually Requires Before You Ride
A 90-second pre-ride check catches most of the problems that lead to brake failure mid-ride. Start with a visual pass: look at the calipers for fluid weeping around the pistons, check hoses and cables for fraying or kinks, and spin each wheel to watch for rotor wobble.
Pad thickness matters more than most riders realize. Most pads have a wear groove stamped into the friction material, and once that groove disappears, you’re close to metal backing plate contact. Squeeze the lever, too. A firm, consistent bite point is normal; a lever that sinks toward the bar signals air in the line or a fluid leak.
Pro Tip: Do this check with the bike upside down or on a stand, in daylight. Rotor scoring and hairline cracks hide easily in a dim garage.
- Check both calipers and rotors visually for fluid, warping, or scoring
- Confirm pad thickness at the wear indicator groove
- Squeeze each lever separately and compare feel
- Stop riding immediately if you hear grinding or see fluid on the rotor
Inspection guidance from Brake Safety Week flags cracked, missing, or heavily rusted rotor material as an immediate failure, not a “monitor it” situation. The same logic applies to bicycle disc rotors.
Keep Contamination Off Your Rotors and Pads
Contamination is the single most common cause of brake noise and lost stopping power, and it’s almost always self-inflicted. Chain lube overspray, a greasy thumbprint on the rotor, or degreaser drift from cleaning your drivetrain can all glaze the pad surface and turn a quiet, confident brake into a squealing, unreliable one.
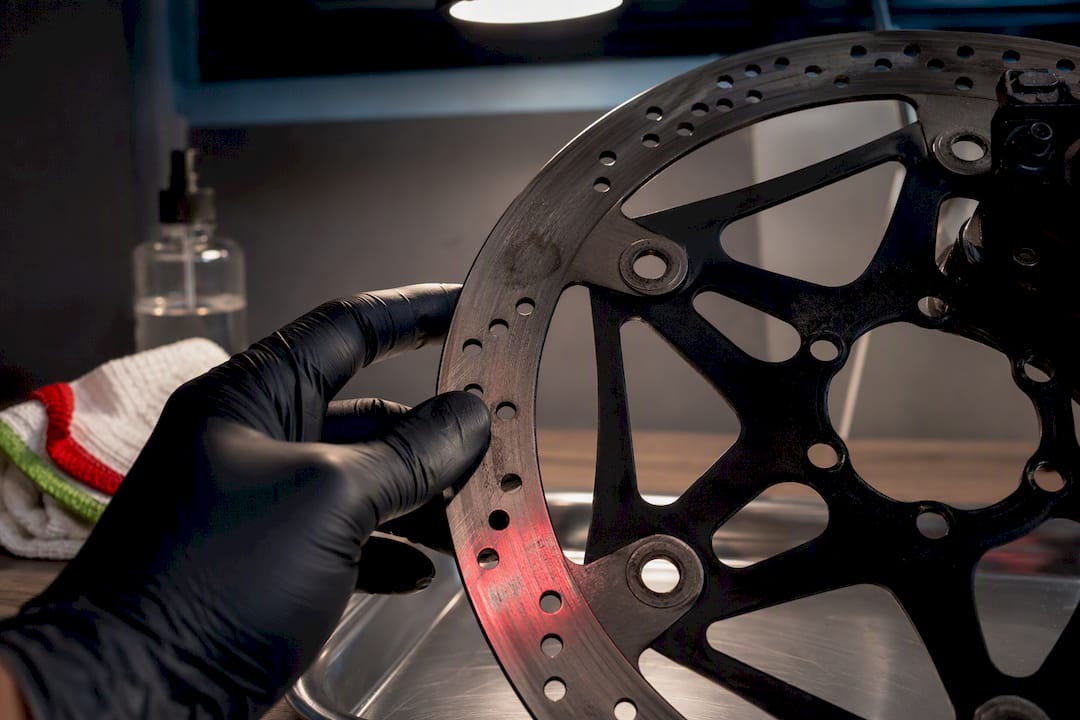
Clean contaminated rotors with isopropyl alcohol and a lint-free rag rather than household glass cleaner or soap, which can leave a residue behind. Light contamination sometimes recovers with a light sanding of the pad face followed by a fresh bed-in, but heavy contamination usually means new pads, since oil soaks into the friction material and won’t fully clean out.
Pro Tip: Pull the wheel before you lube your chain, not after. It takes ten extra seconds and saves you a $20 set of pads.
- Never touch the rotor’s braking surface with bare, oily fingers
- Lube the chain with the wheel off, or cover the rotor with a rag first
- Clean rotors with isopropyl alcohol only, never chain degreaser
- Sand lightly for minor glazing; replace pads for heavy contamination
Maintenance guidance on disc brake care confirms this same escalation path: fix light contamination, replace for heavy contamination.
The Bed-In Procedure New Pads and Rotors Need
Straight out of the box, new pads and rotors haven’t formed the thin transfer layer of pad material that actually generates strong, even braking. Skip the bed-in and you’ll get weak, inconsistent stopping power along with squeal that never quite goes away, because the pad is glazing instead of transferring material properly.
- Find a flat, traffic-free stretch and get up to a moderate speed, around 15 to 20 mph.
- Squeeze one brake at a time (never both at once during bed-in) and slow smoothly to a walking pace, without locking the wheel.
- Release and repeat roughly 20 times per wheel, letting the rotor cool slightly between the final few stops.
- Switch to the other brake and repeat the same sequence.
You’ll know it worked when lever bite gets progressively firmer and the squeal fades out over the last several stops. If the squeal persists or the bite stays weak, contamination is the likely cause, not an incomplete bed-in, and it’s worth checking the rotor before doing another 20 stops. Manufacturer bed-in guidance also warns that rotors and calipers get genuinely hot during this process, so give them a minute to cool before you touch anything.
When to Replace Pads and Rotors, With Real Numbers
Replace brake pads once the friction material wears down to the manufacturer’s recommended minimum thickness, or as soon as the backing plate becomes visible through the wear groove. Riding on backing plate contact means metal grinding directly against your rotor, which is exactly the “stop riding now” scenario.
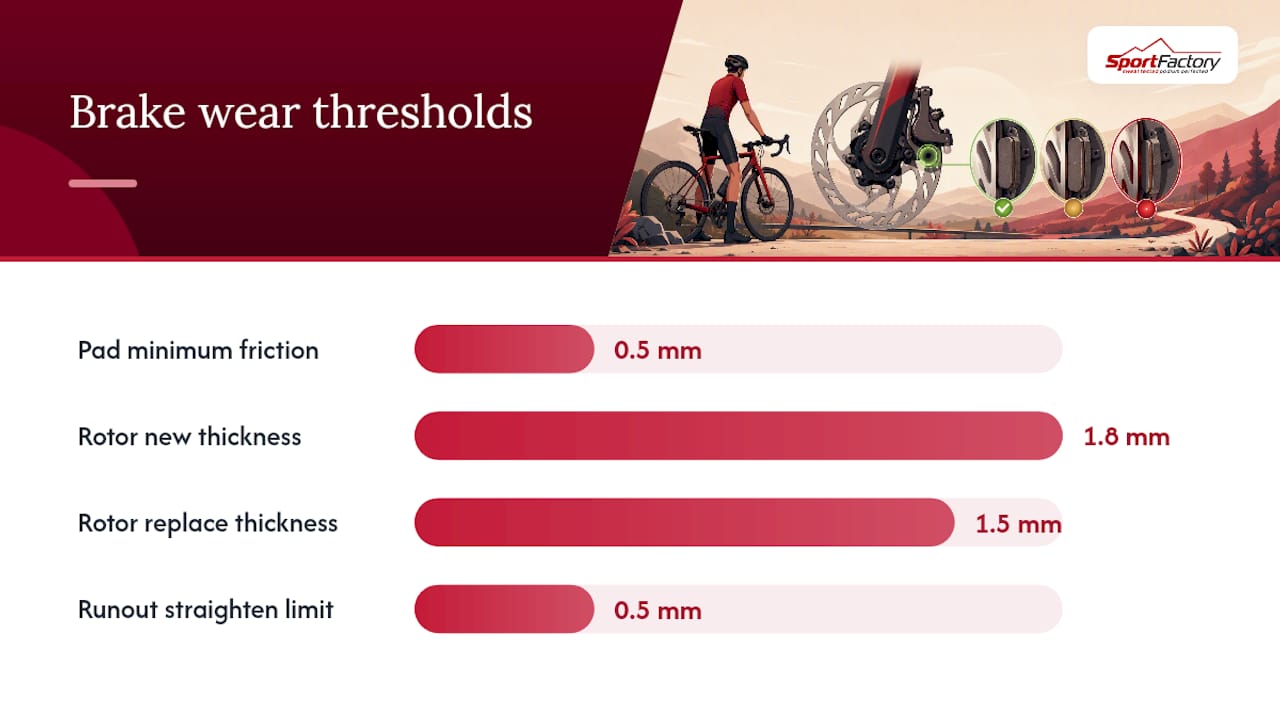
Rotors carry their own minimum thickness, usually stamped right on the rotor itself. Shimano rotors, for example, often start life around 1.8 millimeters and get replaced at 1.5 millimeters, per Shimano’s stated wear thresholds. A rotor that’s cracked, missing a chunk, or shows blue heat discoloration should be replaced regardless of thickness, since that discoloration usually means the metal has been overheated enough to weaken it.
Lateral runout, or how much a rotor wobbles side to side as it spins, should stay within manufacturer guidelines, often under a small fraction of a millimeter. A rotor slightly out of true can often be straightened with a truing tool, but if the rotor repeatedly bends back out of shape after truing, replacement is recommended.
- Pads: replace at approximately 0.5mm friction material remaining
- Rotors: replace at manufacturer minimum thickness or visible cracking/discoloration
- Runout: straighten under roughly 0.5mm; replace if it won’t hold true
Manufacturer manuals consistently recommend fitting new pads whenever you install a new rotor, since a used pad has already formed its transfer layer around the old rotor’s specific surface and won’t bed in cleanly to a new one.
Hydraulic Versus Mechanical Disc Brakes: Different Maintenance, Same Stakes
Hydraulic brakes self-adjust as pads wear, which is convenient right up until the lever starts feeling soft or spongy, which usually means air has entered the line or the fluid itself has degraded. DOT fluid is hygroscopic, meaning it absorbs moisture from the air over time, which lowers its boiling point and makes fade more likely on long descents. SRAM’s bleed manual recommends bleeding on a set schedule, roughly annually, or immediately once the lever feels off.
Mechanical disc brakes skip the fluid entirely, using a cable instead, so the tradeoff runs the other way: cables stretch gradually, which you compensate for with a barrel adjuster, and pad wear shows up as a longer lever throw you can feel directly.
- Spongy hydraulic lever: check for air in the line, then schedule a bleed
- Mechanical lever throw growing longer: adjust cable tension at the barrel adjuster
- Always use the fluid type your manufacturer specifies, DOT or mineral oil, never both interchangeably
- Follow the caliper’s torque spec exactly; overtightening bolts can warp the mount
Braking Technique That Actually Prevents Crashes
Even a perfectly maintained brake system can put you on the ground if your technique is wrong. The front brake supplies most of your stopping power, but grab it too hard and too suddenly, especially with the bar low or the load forward, and you risk pitching over the front wheel.
- Practice progressive braking on flat, open ground: squeeze gradually rather than grabbing, feathering both levers together.
- Run a few controlled emergency stops at low speed so the sensation of near lockup feels familiar before you need it in traffic.
- On long descents, brake in short intervals rather than holding steady pressure, which lets rotors shed heat instead of building it up continuously.
- Add stopping distance mentally for wet roads, extra cargo, or added rider weight, since all three extend the distance a bike needs to fully stop.
Pro Tip: If you smell a faint metallic or burning odor on a long descent, that’s an early overheating warning. Ease off, coast where you can, and let the rotors cool before continuing.
Fixing the Four Most Common Disc Brake Problems
Most disc brake complaints boil down to four issues, and each has a fairly quick diagnosis.
- Squeal: clean the rotor with isopropyl alcohol first, check for glazing, and confirm the caliper is aligned; sand or replace pads if cleaning doesn’t fix it.
- Rotor rub: check rotor trueness, then recenter the caliper using the classic method of loosening the bolts, squeezing the lever, and retightening while the pads self-align.
- Spongy lever: almost always air in the line or degraded fluid; bleed the system or get a shop bleed done, and avoid long rides until it’s resolved.
- Overheating: stop and let rotors cool, reduce continuous braking load on descents, and inspect for discoloration or cracking afterward.
The Roadman Cycling maintenance guide walks through this same clean, align, sand, replace sequence, and it’s the order that saves you the most money: always rule out the cheap fix before reaching for new parts.
What Years Behind the Shop Counter Teach You About Brake Failures
The pattern that shows up again and again on the workbench is e-bike owners running pads down to bare metal, because electric assistance masks the wear cues a rider would normally feel on a standard bike. Close behind that is contamination from lubing a chain without pulling the wheel first, and hydraulic systems that haven’t been bled in years despite an obviously soft lever.
None of this requires expert-level skill to prevent. It requires a five-minute check before you ride and the discipline to stop riding the moment something feels wrong. When a fix goes beyond pad swaps or a caliper alignment, that’s the point to hand it to a mechanic rather than guess.
— Matt
Get the Parts and Support to Keep Your Brakes Ride-Ready
The shop stocks pads, rotors, and bleed kits matched to various brake systems rather than generic universal fits. Buying mismatched pads or the wrong fluid type is exactly how riders end up with the spongy levers and glazed rotors covered above, and getting the correct part the first time avoids that entirely.

The shop carries bleed kits, mechanic gloves, and isopropyl alcohol for the cleaning routine, available together for convenience. If you’re not sure which pad compound or rotor size fits your setup, reach out for guidance before you buy rather than guessing at checkout. Browse the current brake parts selection at Sportfactoryproshop and get your setup sorted before your next ride.
Manuals and Guides Worth Bookmarking
- SRAM’s mineral oil disc brake manual for bleed procedure and torque specs
- CyclingSavvy’s disc brake care article for wear thresholds and cleaning
- Roadman Cycling’s maintenance guide for troubleshooting sequences
- CVSA’s Brake Safety Week flyer for rotor inspection criteria
Always default to your specific brake manufacturer’s stated service intervals and fluid type over general advice, since torque specs and compatible fluids vary by model.
Sources
- SRAM mineral oil disc brake installation and bleed manual
- Disc brake maintenance and care (CyclingSavvy)
- Hydraulic disc brake user manual — bed-in and safety notes (manufacturer manual excerpt)
- CVSA 2026 Brake Safety Week flyer — drum and rotor inspection tips
FAQ
Is Disc Brake Safety a Real Concern for Everyday Riders?
Disc brakes are safe for everyday riding when pads, rotors, and fluid are inspected and maintained on schedule; most reported failures trace back to skipped maintenance or contamination rather than the brake design itself.
What Is the 30/30/30 Rule for Brakes?
Definitions of this rule vary by context and it isn’t a standard bicycle disc brake guideline, so rely on manufacturer-stated bed-in counts and pad wear thresholds instead of this rule of thumb.
What Are the Downsides of Disc Brakes?
Disc brakes cost more than rim brakes, need periodic hydraulic bleeding or cable adjustment, and are more sensitive to contamination from chain lube or degreaser than a rim brake pad touching a clean wheel rim.
Which Is Safer, Drum or Disc Brakes?
For bicycles, disc brakes generally offer stronger, more consistent stopping power in wet conditions than rim or drum style brakes, though that advantage only holds if the pads, rotors, and fluid are properly maintained.