

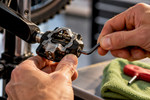
How To Fine Tune SPD Pedal Spring Tension
Posted by Matt Russ on 27th Sep 2026
Tune SPD Spring Tension One or Two Clicks at a Time

Turn the pedal’s tension screw clockwise to tighten and counterclockwise to loosen, changing the setting by only one or two clicks at a time. Before you touch that screw, check three things: that you have the right tools and torque specs on hand, that you’re counting clicks as you go, and that you test each change somewhere safe. Get those three steps right and the rest of the process is quick.
TL;DR:
- Using a torque wrench ensures precise tightening of cleats and pedals, preventing misadjustments and reducing the risk of damage or instability.
- Adjusting tension by only one or two clicks at a time and testing thoroughly helps prevent over- or under-tightening that could cause issues during rides.
- Matching the click count on both pedals to create symmetric tension simplifies riding and avoids confusion or uneven release forces.
- Regularly cleaning pedals and replacing worn cleats are more effective fixes for engagement problems than simply tightening the tension screw.
- Documenting your specific click counts and torque settings in a note can save time and ensure consistent adjustments over multiple rides or bike swaps.
Table of Contents
- What you need and safety checklist before adjusting
- Step-by-step: adjust SPD spring tension
- How to test and fine-tune tension safely
- Matching left/right and special cases
- Common problems and quick fixes
- Shop-tested pro tips
- Author perspective: practical encouragement and final safety reminder
- How Sport Factory Pro Shop can help
- Sources
- FAQ
What you need and safety checklist before adjusting
Before adjusting anything, gather the right tools. Most SPD tension screws take a 2.5 to 3 mm hex wrench, cleat bolts typically need a 4 mm hex, and pedal-to-crank mounting hardware calls for an 8 mm hex or a 15 mm spanner depending on the model.
Torque matters as much as tools. Shimano’s service documentation specifies cleat mounting bolts at 5 to 6 N·m, with a provisional torque around 2.5 N·m useful while you’re still testing foot position. Pedal-to-crank installation runs close to 35 N·m according to Shimano’s pedal installation instructions, and the right pedal threads normally while the left pedal uses a reverse thread, so turn each the correct direction to avoid cross-threading.
- Use a torque wrench where possible rather than guessing by feel.
- Practice clipping in and out while holding a wall, doorway, or a friend’s shoulder for support.
- Try a few practice sessions on a trainer before riding in traffic.
5 to 6 N·m is the torque Shimano specifies for cleat bolts, and getting that number right keeps your cleat from shifting mid-ride, according to Shimano’s documentation.
Step-by-step: adjust SPD spring tension
Once your tools and torque numbers are sorted, the adjustment itself is mechanical and repeatable.
- Flip the pedal so you can see the tension indicator near the rear of the binding, usually a small notch or arrow on the body.
- Turn the tension screw counterclockwise until it stops at the weakest setting, then count how many clicks it takes to turn it back clockwise to where it started. Write that number down.
- From your current position, make a small change of one or two clicks. Shimano notes that most screws click four times per full turn, with a total range of about three turns, or roughly 12 clicks, from weakest to strongest.
- Clip in and out a few times to test how the new setting feels before making another change.
- If your pedals are double-sided, match the click count on both sides of each pedal. If they’re single-sided, just track that one mechanism’s setting.
- Once you’re happy with the feel, torque the cleat bolts to spec and record the final click count for each pedal.
Pro Tip: Keep a small note in your phone or saddle bag with your click counts. It saves guesswork the next time you service your pedals or swap bikes.
Working from the weakest position every time gives you a fixed reference point, which matters more than the exact number of clicks you land on. Two riders on the same pedal model might settle on different counts entirely and both be riding safely.

How to test and fine-tune tension safely
Testing is what turns a guess into a setting you can trust.
- Start with a static test: clip in and out while holding a support or straddling a trainer, checking that a normal heel-out motion releases the cleat cleanly.
- Move to a dynamic test once the static check feels solid: ride slowly on flat, open ground, pedal with moderate effort, then deliberately release to confirm the pedal lets go under load, not just at a standstill.
- If your foot pops out unexpectedly, add a click or two to firm things up.
- If you have to wrench your heel hard to disengage, back off a click or two, or check for a worn cleat before assuming tension is the problem.
- Once a setting releases predictably in both tests, write down the click count for each pedal as your working baseline.
That baseline becomes useful later, whether you’re troubleshooting a problem or restoring your setup after a pedal swap.
Matching left/right and special cases
For most riders, both pedals should carry the same click count. Consistent tension on both sides means your body doesn’t have to relearn a different release feel with each foot, and it’s the simplest way to avoid confusion mid-ride.
- Match both pedals by recorded click count as your default approach.
- Reserve asymmetric settings for documented physical needs, such as a knee that struggles with a firm release on one side, and change that side by the smallest possible increment before retesting.
- Keep a written note of any asymmetric setting so a mechanic, or future you, can reproduce it exactly.
Shimano’s guidance acknowledges that asymmetric tension can help riders with specific needs, but it should be set up carefully and tracked, not adjusted casually.
Common problems and quick fixes
Most engagement complaints trace back to something other than the tension screw.
- Clean the pedal binding and cleat first. Dirt and grit are common causes of engagement problems that get mistaken for tension issues.
- Inspect your cleats for wear. A worn cleat can cause unpredictable release no matter how the tension is set, so replace it before adjusting further.
- If release still feels inconsistent, double check the click count and indicator position on each pedal to confirm they match.
- If problems persist after cleaning, replacing cleats, and rechecking clicks, stop riding on that pedal and have it looked at by someone experienced with SPD systems.
Shimano’s service documentation points out that engagement problems are often tied to dirty bindings or worn cleats rather than the tension setting itself, which is worth ruling out before you keep turning that screw.
Shop-tested pro tips
A few habits keep your settings reliable over time. Record each pedal’s click count and store it with your bike’s service notes or even inside your shoe box. Before a ride, run a quick check: confirm cleat torque, glance at cleat wear, and test one clip-in while your foot is supported. If engagement stays inconsistent, you suspect pedal damage, or you’d simply like a second opinion, a shop visit for a professional fit check is worth the time.

Author perspective: practical encouragement and final safety reminder
Learning to trust SPD pedals takes repetition, not talent. Start light, practice clipping in and out until it’s second nature, and write your settings down so you’re not starting from zero every time you make a change. If something still feels off after following these steps, a shop that works with SPD systems regularly can check your setup in minutes.
— Matt
How Sport Factory Pro Shop can help
Getting your tension right is only half the job. It also helps to start with pedals and cleats built to hold their adjustment and tools that make the job painless instead of fiddly. Sport Factory Pro Shop carries pedals and related components from trusted brands, along with the torque wrenches and hex keys you need to hit Shimano’s spec numbers instead of guessing.

- Browse compatible SPD pedals and cleats built for reliable, repeatable adjustment.
- Pick up the torque tools that keep cleat bolts and pedal mounts at spec.
- Book a shop check if your tension keeps drifting or you need an asymmetric setup documented properly.
If your setup still feels inconsistent after working through cleaning, cleat replacement, and click checks, visit Sport Factory Pro Shop to find gear built for the job or to get a professional look at your pedals.
Sources
- How to Adjust Shimano SPD Spring Tension | Ride Shimano
- DM-RCPD002 Shimano service document (cleat mounting torque guidance)
FAQ
How tight should I tighten SPD cleats?
Cleat bolts should be torqued to 5 to 6 N·m, which is the range Shimano specifies for secure mounting. A provisional torque of about 2.5 N·m is often used while you’re still testing foot position before final tightening.
What is the recommended torque setting for Shimano SPD cleats?
Shimano’s documentation calls for 5 to 6 N·m on cleat mounting bolts, using a 4 mm hex wrench. Pedal-to-crank installation is a separate spec, around 35 N·m, according to Shimano’s pedal instructions.
How tight should you tighten bike pedals?
Pedals should be installed to the crank arm at roughly 35 N·m, with the right pedal threading normally and the left pedal using a reverse thread. This is separate from spring tension, which controls how easily the cleat engages and releases rather than how the pedal attaches to the bike.
How do I make SPD pedals loose?
Turn the tension adjustment screw at the rear of the binding counterclockwise to reduce spring tension and make the pedal easier to release. Change it one or two clicks at a time and test the release before making another adjustment, since most screws allow up to about three full turns, or roughly 12 clicks, between weakest and strongest.