


How To Select A Saddle That Fits Your Anatomy
Posted by Matt Russ on 21st Sep 2026
How To Select A Saddle That Fits Your Anatomy
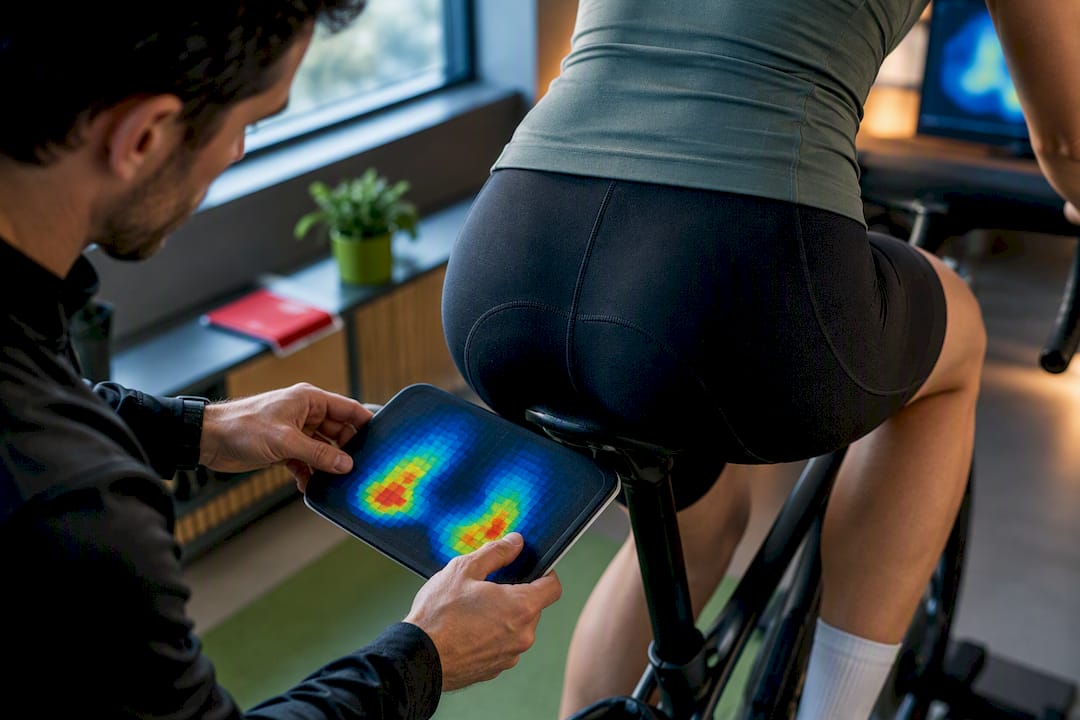
Pick a saddle shape and width that supports your sit bones and matches your hip angle, not one chosen by gender labels or padding thickness. Measure your sit-bone width first, then match that number to a flat, curved, or stepped profile based on how upright or aggressive your riding position is. If numbness, chafing, or soreness persists after a proper fit, book a pressure-mapping session before buying another saddle blind.
TL;DR:
- Proper saddle width should be roughly 20 to 25 millimeters wider than sit-bone indentations for optimal support, determined through DIY or professional pressure mapping.
- The ideal saddle shape depends on riding style and hip angle; flat profiles suit racers with frequent position changes, while curved or stepped profiles benefit long-distance, aggressive, or upright riders.
- Measuring sit-bone width at home is quick and inexpensive, but pressure mapping provides precise shape and support recommendations tailored to individual anatomy.
- Saddle selection should prioritize anatomical fit over gender labels or padding thickness, with shape adjusted based on riding posture and pelvic rotation.
- Testing a saddle on the bike during actual rides and logging comfort patterns helps identify issues related to width, tilt, or shape before considering replacement.
Table of Contents
- Saddle Shapes Explained: Flat, Round, and Stepped Profiles
- How Do You Measure Sit-Bone Width at Home?
- How Does Hip Angle Change the Ideal Saddle Shape?
- Which Saddle Features Actually Affect Fit?
- How Do You Test a Saddle on Your Bike?
- What We See in Real Saddle Fittings
- Why Anatomy-First Fitting Beats Gender and Padding Myths
- Get Fitted and Shop Curated Saddles at Sport Factory Pro Shop
- Sources
- FAQ
Saddle Shapes Explained: Flat, Round, and Stepped Profiles
Every saddle shape solves the same problem differently: how to support your ischial tuberosities, the two bones you can feel when you rock side to side on a hard chair, while keeping soft tissue clear of pressure. Flat saddles keep a consistent surface from front to back, which lets your pelvis rotate freely as you move between positions. Curved or round-profile saddles create a defined pocket near the rear that cradles the sit bones in one spot, which suits riders who hold a single position for hours.
Stepped or wave-shaped designs, like the SQlab ERGOWAVE approach, combine a raised rear section with a central dip and a lower nose. That combination reduces pressure on the perineal area while still giving aggressive riders something firm to push against during hard efforts.
Here’s how the shapes tend to sort by riding style:
- Flat profile: favors racers with consistent pelvic rotation and frequent position changes.
- Curved/round profile: stabilizes the pelvis and suits riders who hold one position for long stretches, like endurance and gravel riders.
- Stepped/wave profile: works well for aggressive road and time trial positions where the pelvis rotates forward.
- Semi-flat hybrid: a middle ground for commuters and mixed-position riders who don’t fit neatly into either camp.
Pro Tip: If you switch between an upright commuter bike and a aggressive road bike, don’t assume one saddle shape works for both. Your hip angle changes enough between the two that the “right” shape for one setup can feel wrong on the other.
How Do You Measure Sit-Bone Width at Home?
Sit-bone width is the single most useful number you can bring into a saddle decision, and you can get a rough version of it without a shop visit.
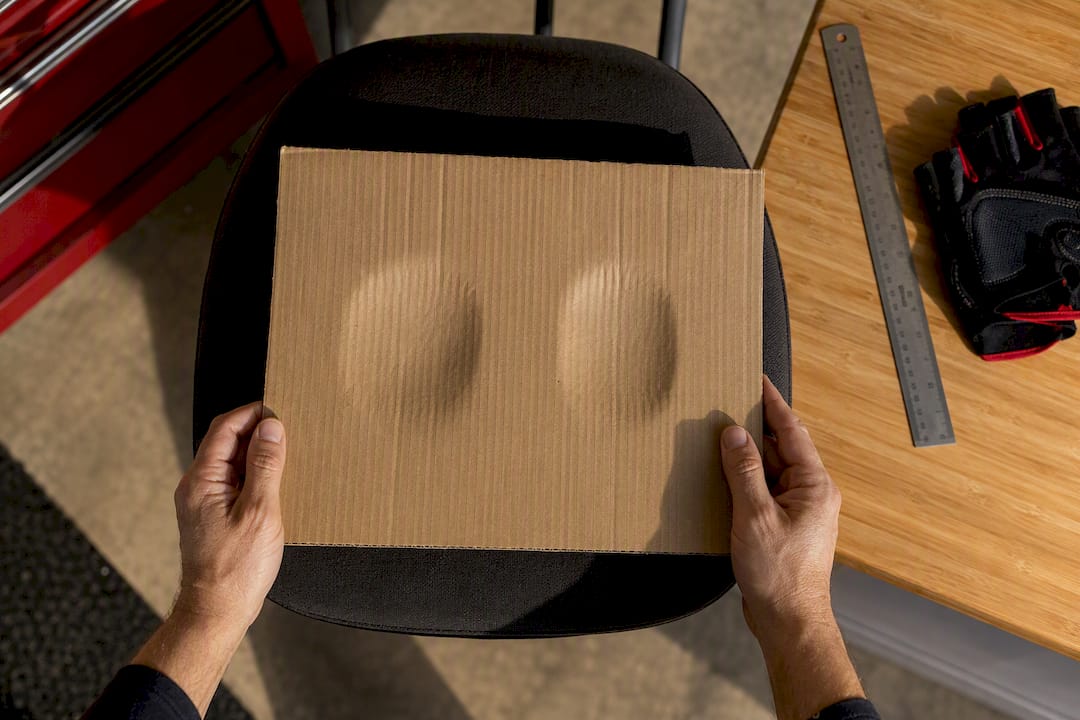
- Place a piece of corrugated cardboard or a foam pad on a hard chair.
- Sit upright with your weight centered, as if pedaling, and hold for 10 to 15 seconds.
- Stand up and look for two indentations left by your ischial tuberosities.
- Measure the distance between the center of each indentation in millimeters.
- Add roughly 20 to 25 millimeters to that number to estimate your ideal saddle width, since most saddles need to extend slightly beyond the sit bones for support.
A dealer pressure-mapping session takes the guesswork out of that last step. You bring your bike and current saddle, sit on a pressure-sensitive mat, and a fitter reads where your weight actually lands while pedaling, not just sitting still. The whole process runs around 45 minutes, and it often reveals whether a cutout would help before you spend money finding out the hard way.
Pro Tip: If your current saddle leaves you rocking side to side to find a comfortable spot, it’s usually too narrow. If you feel pressure on the outer edges of your thighs while pedaling, it’s likely too wide.
The DIY cardboard test costs nothing and takes ten minutes, but it only tells you width. A pro fitting costs more and takes closer to an hour, but it tells you width, shape, and where a cutout would actually help.
How Does Hip Angle Change the Ideal Saddle Shape?
Your hip angle, the bend between your torso and thighs while riding, determines how much of your pelvis rotates forward and how your weight redistributes across the saddle. A more aggressive, forward-leaning position tips your pelvis forward, shifting load toward the front of your sit bones and increasing pressure on soft tissue behind the pubic bone. That’s exactly the scenario the finite-element modeling research addresses: nose-down tilt reduces anterior perineal stress in that forward-rotated position, and a narrower, stepped saddle typically fits better because less of the shape needs to support lateral movement.
Upright positions do the opposite. Your pelvis sits closer to vertical, weight lands more squarely on both sit bones at once, and lateral loading increases as you rock gently while pedaling. That calls for a wider, flatter surface.
A few concrete examples make this easier to apply:
- Road racers and time trial riders: aggressive hip angle, favor narrower stepped or wave shapes with nose-down tilt.
- Triathletes on aerobars: extreme forward rotation, often need the most relief-focused nose profile of any discipline.
- Commuters and upright hybrid riders: neutral hip angle, benefit from wider flat or gently curved shapes.
- Gravel and mountain bikers: frequently shift between seated and standing, so a shorter nose and moderate width often outperforms an aggressive road shape.
Riders with limited hip rotation, prior injuries, or pelvic asymmetry sometimes need to override these general patterns. If one hip sits noticeably higher or rotates less than the other, a symmetric saddle recommendation based on hip angle alone can miss the mark, which is another reason pressure mapping matters more than guessing from a chart.
Which Saddle Features Actually Affect Fit?
Width placement matters more than padding thickness for comfort on rides longer than an hour. A saddle that’s the right width but has thin padding will usually outperform a wide, plush saddle that’s too narrow for your sit bones, because thick foam compresses under sustained pressure and stops helping after the first 20 minutes.
- Cutouts and central channels: help when pressure mapping shows concentrated load on soft tissue, but they can reduce lateral support on wider saddles if the channel is too aggressive for your anatomy.
- Shell flex: a stiffer shell transmits more road feedback but supports power transfer better; a saddle with more flex absorbs small movements, useful for endurance and gravel riding.
- Nose profile: a narrower, lower nose reduces soft-tissue contact during aggressive positions but can feel less stable when you shift your weight forward to climb or sprint.
- Padding density: firmer foam holds its shape over a four-hour ride; softer foam feels better in the first ten minutes and then compresses unevenly.
Manufacturers like Ergon build their ergonomic development process around exactly this hierarchy: sit-bone data and riding position first, then shape, then the finer details of padding and shell tuning.
How Do You Test a Saddle on Your Bike?
A saddle that feels right in a shop can feel wrong after 25 minutes of real riding, so testing on the road matters more than a five-minute parking lot sit test.
- Install the saddle at a neutral tilt (level, or one to two degrees nose down) and your existing fore/aft and height settings.
- Ride 20 to 30 minutes at your normal effort, noting any numbness, hot spots, or sit-bone soreness at the 10 and 20 minute marks.
- Adjust nose tilt first in small increments, no more than one degree at a time, since even small changes shift pressure meaningfully.
- Once tilt feels stable, adjust fore/aft position in 5mm increments, then height last.
- Repeat a second short ride after each change and log what improved and what didn’t.
Numbness that appears within the first ten minutes usually points to width or tilt, not shape. Chafing along the inner thigh often signals the saddle is too wide or the nose too broad. Sit-bone soreness that fades within a few rides is normal adaptation, but soreness that gets worse after three or four rides means the shape itself is wrong, not just the adjustment.
Pro Tip: Keep a simple log on your phone: date, tilt setting, fore/aft position, and how you felt at 10 and 20 minutes. Patterns show up fast once you have three or four rides logged.
If you’ve made every reasonable adjustment across two full test rides and something still hurts, stop tuning and try a different shape. A custom fit also has limits worth knowing: a saddle dialed in on one bike may not transfer perfectly to a second bike with a different stack or reach, so retest after any major position change.
What We See in Real Saddle Fittings
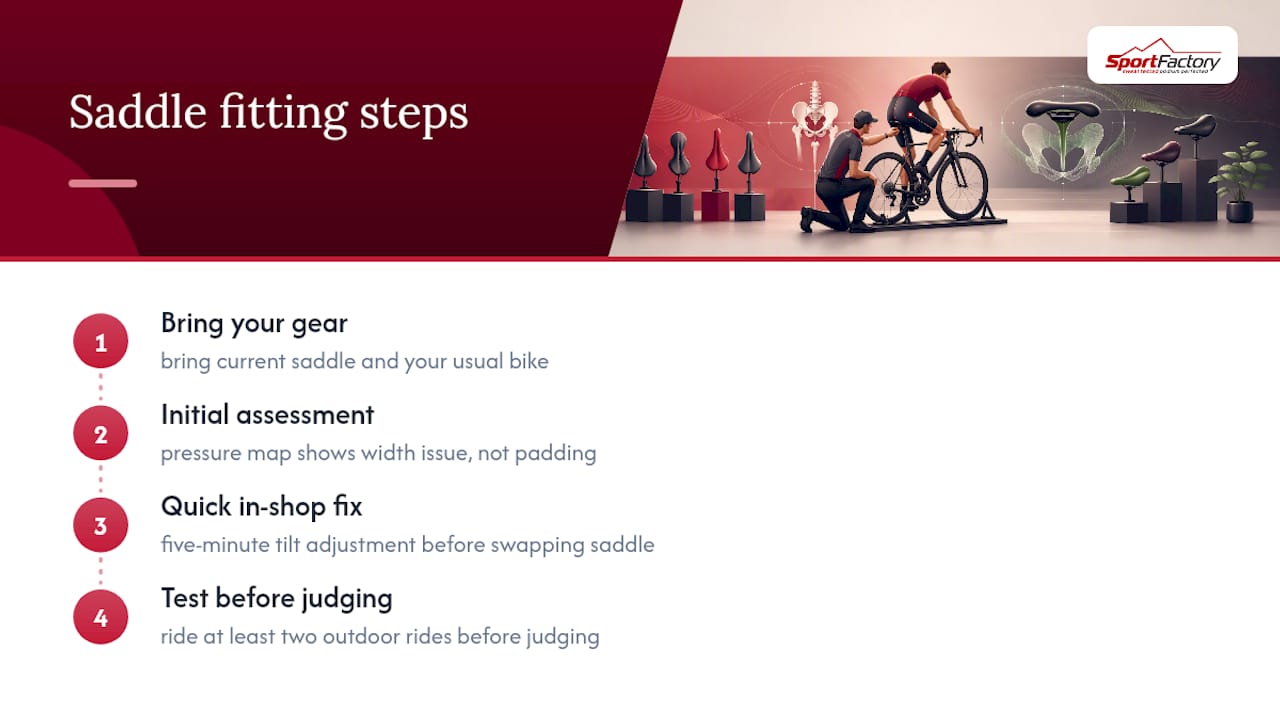
Most fitting sessions start the same way: a customer walks in convinced their saddle needs more padding, and the pressure map shows the real problem is width. Bring your current saddle and the bike you actually ride most, since a fitter needs to see your real contact points, not a generic setup on a stationary trainer.
The most common mistake is buying a saddle two sizes too narrow because it looked sleek in a catalog photo. The quickest in-shop fix is usually a five-minute tilt adjustment before anyone reaches for a different saddle at all. Once you’ve settled on a shape, it’s recommended to ride it for at least two outdoor rides before final judgment, since indoor trainer sessions don’t replicate the small pelvic movements that reveal whether a shape actually works.
Why Anatomy-First Fitting Beats Gender and Padding Myths
Gendered saddle marketing and padding-thickness claims both miss the same point: two riders of the same sex, height, and weight can have wildly different sit-bone widths and hip flexibility. Measuring your own anatomy, or getting a pressure map, gives you a number to act on instead of a guess based on a label. Padding is the last thing to adjust, not the first, since correct sit-bone support does more for long-term comfort than any amount of foam.
Treat your first saddle choice as a hypothesis, not a final answer. Measure, test on two real rides, adjust tilt and fore/aft before blaming the shape, and only switch saddles once you’ve ruled out setup. If you’re still guessing after that, a pressure-mapping session removes the ambiguity in about 45 minutes.
— Matt
Get Fitted and Shop Curated Saddles at Sport Factory Pro Shop
Guessing your saddle size from a size chart is how most riders end up on their third or fourth saddle before finding one that works. The store takes a different approach: curated gear selected for engineering quality and rider-focused features, backed by real performance insight instead of marketing claims.

Bring your bike, your current saddle, and a sense of what position you ride most, whether that’s an upright commute or an aggressive time trial tuck, and you’ll get further faster than trial-and-error ever will. While you’re dialing in contact points, it’s worth checking your aerobar setup too, since hip angle and cockpit position move together more than most riders expect. Browse the components selection for saddle-adjacent gear, or head to the apparel category if chafing during test rides has been part of the problem. Start by visiting the site to see current stock and pricing on the saddles and components that fit your measurements.
Sources
- The effect of saddle design on stresses in the perineum during cycling - PubMed
- Fizik’s custom-printed Vento Antares Adaptive One-to-One saddle, reviewed | Cycling Weekly
FAQ
What Does Saddle Shape Mean?
Saddle shape describes the longitudinal profile of a bike seat, whether it’s flat, curved, or stepped, and how that profile positions your sit bones and soft tissue. Shape works together with width to determine fit, and neither factor alone tells the full story.
What Bike Seats Work Best for Women’s Anatomy?
There’s no single seat that fits all women, since sit-bone width and hip angle vary within any group. The reliable approach is measuring your own sit-bone width and testing shapes that match your riding position, rather than choosing based on a “women’s specific” label alone.
What Is an Ergon Saddle Designed For?
Ergon builds its saddles around anatomical data collected during pressure testing, focusing on placing rider weight on the sit bones while reducing pressure on the perineum. Their lineup includes multiple widths and profiles to match different sit-bone measurements and riding positions.
What Are the Different Types of Saddles?
The main categories are flat, curved or round, and stepped or wave-shaped profiles, each suited to different riding postures. Flat saddles favor riders who shift position often, curved saddles stabilize a single seated position, and stepped saddles combine rear support with nose-area pressure relief for aggressive positions.
How Much Does a Fitting at Sport Factory Pro Shop Cost?
Pricing for fitting sessions and saddle products is available directly on the Sportfactoryproshop site rather than through a fixed published rate. Check the components page for current saddle-related product listings.