

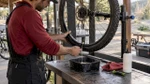
A 15 Minute Tubeless Tire Sealant Swap: Top Up, Then Clean
Posted by Matt Russ on 4th Oct 2026
15 Minutes to Swap Tire Sealant Safely: Top Up, Then Clean

Mixing tire-sealant brands is generally discouraged, though a small trail top-up rarely causes immediate trouble. When you switch brands for good, we recommend fully cleaning out the old sealant first. Sealant does not make plugs or boots useless, but it can reduce plug adhesion, so prepare the puncture carefully. When in doubt, clean and replace the sealant, and carry a small top-up bottle plus a spare tube for bigger cuts.
TL;DR:
- Mixing sealant brands can cause clumping and weaken sealing performance, especially with repeated top-ups over several weeks or months.
- Fully cleaning out old sealant before switching brands or reassembling the tire prevents residue reactions that lead to rubbery lumps.
- Small trail top-ups with different brands are generally tolerated once; however, a full clean-out is necessary for permanent brand changes.
- Proper repair involves removing excess sealant, cleaning the puncture area, and carefully reseating plugs or boots, with additional caution on larger damages.
- Regularly checking and maintaining the right amount of sealant based on tire type and riding conditions extends sealant effectiveness and prevents leaks.
Table of Contents
- How sealant affects plugs and tire boots on the trail
- Why mixing sealant brands is risky
- Removing old sealant before switching brands
- How much sealant to use by tire type
- Keeping sealant working between refills
- Coach Matt’s shop-tested rules for sealant care
- Finding the right balance between convenience and caution
- Stock your kit for sealant season at Sport Factory Pro Shop
- FAQ
- Sources
How sealant affects plugs and tire boots on the trail
Liquid sealant coats the puncture channel, and that coating can work against you when you are trying to seat a plug. That does not mean plugs and sealant cannot coexist. It means you need to manage the moisture before you insert one.
Boots and plugs solve different problems. A plug handles a puncture that a plug tool can reach and seal. A boot covers a larger sidewall slash that sealant and a plug cannot hold on their own, and sometimes a full tube is the safer call when the damage is bigger than either fix allows, a distinction worth keeping in mind on technical descents.
On the trail, the workflow is simple:
- Pull the object out and wipe away excess sealant pooling around the hole.
- Insert the plug firmly and hold pressure for a few seconds.
- Top up a small amount of sealant and spin the wheel to help it seat.
- Ride cautiously for the next few minutes so the plug has time to set before you load it hard.
Back in the workshop, the fix looks different: remove the tire, clean the area around the puncture, reseat the bead if it shifted, and apply a patch or boot before refilling with sealant once everything is dry. We cover more on when a boot beats a plug in our notes on sidewall protection.
Pro Tip: Keep a dry rag in your repair kit. Wiping the puncture area before inserting a plug makes a bigger difference than any sealant formula.

Why mixing sealant brands is risky
Different sealants rely on different carriers, including latex, glycol, and water-based formulas, each carrying its own particulates to plug a hole. When two different chemistries meet inside a tire, they can coagulate into rubbery lumps instead of blending smoothly, a reaction most manufacturers warn against according to Mountain Bike Action. That is the core reason most brands advise against mixing formulas rather than just suggesting a preference.
In practice, shops see a gray area. A single small top-up from a different bottle usually gets tolerated without drama, but repeated mixing over weeks or months raises the odds of clumping and weaker sealing performance, per the same manufacturer guidance.
Signs your tire has a mixed-sealant problem:
- A sloshing sound that turns into a dull thud as lumps move around.
- Visible rubbery clumps when you peek past the valve or pull the tire.
- A slow leak that sealant no longer seals, even after spinning the wheel.
Repeated mixing over time can create rubbery clumps that reduce puncture-sealing performance, which is the mechanism behind most mixed-sealant complaints according to Mountain Bike Action. The practical rule: for a permanent brand swap, clean the tire out completely. For a one-off trail top-up, use the smallest amount that gets you home, then plan a full clean within the next week.
Removing old sealant before switching brands
Changing sealant brands properly takes about fifteen minutes with the right supplies on hand. Gather a valve-core tool, clean rags, isopropyl alcohol, a small bucket, a plastic scraper, and a pair of gloves before you start.
- Deflate the tire fully and break the bead on one side.
- Pull the tire off the rim and dump out the remaining liquid.
- Scrape out any dried boogers clinging to the tire casing or rim bed.
- Wipe the inside of the tire and the rim with a rag dampened in isopropyl alcohol.
- Inspect the rim tape, bead, and valve stem for damage or wear.
- Let everything dry fully before reinstalling the tire.
- Seat the bead, add fresh sealant through the valve, and inflate to pressure.
This full-clean approach matches the procedure shops use to avoid leaving old sealant behind, which is exactly what causes clumping when a new formula meets old residue, per Mountain Bike Action. While you have the tire off, check whether the rim tape has lifted at the edges. Our guide to tubeless tape residue walks through what to do if old adhesive is giving you trouble.
Pro Tip: Let alcohol-wiped surfaces air dry for a few minutes before adding fresh sealant. Trapped moisture dilutes the new formula right out of the gate.
How much sealant to use by tire type
Volume matters more than most riders assume. Road and gravel tires typically need a moderate amount of sealant, cross-country tires fall in a similar moderate range, trail and plus-size tires usually require a somewhat larger amount, and fat tires often need the most sealant, adjusted for rider weight and terrain, as outlined in our tubeless sealant amount guide.
Bead profile, rim depth, and how aggressively you ride all shift these numbers. Lower pressures and rougher terrain call for more sealant since there is more opportunity for small cuts to open and close while you ride.
- Overfilling adds unnecessary weight and can cause sloshing you can feel through the bars.
- Underfilling leaves punctures unsealed and dries out faster, leaving you without protection sooner.
Sealant stays liquid long enough to heal small punctures, but it gradually dries out over months and needs periodic renewal to keep working, according to BikeRadar. Getting the volume right the first time means fewer surprises later.
Keeping sealant working between refills
Sealant does not last forever once it is in the tire. Depending on climate and how often you ride, expect to refresh it somewhere between two and six months, with hotter and drier conditions drying it out faster.
- Shake the wheel and listen. A healthy tire sounds like liquid moving, not a dry rattle.
- Spin the valve to the bottom before unscrewing the core, so you do not lose sealant when checking levels.
- Pull the tire for a full inspection if you hear rattling or notice pressure dropping overnight beyond the normal range.
- Clean out valve cores regularly since dried sealant is a common cause of slow air loss, a point we expand on in our overnight air loss guide.
- Remove any lumps you find during a check rather than topping up over them.
For trail fixes, a small top-up bottle and a valve-core tool handle most problems on the spot. Save the full tube swap for damage sealant and a plug cannot handle, since tubeless setups are designed to work with sealant shaken or ridden into place after being poured in, per BikeRadar.
Coach Matt’s shop-tested rules for sealant care
These are the habits that come up again and again when we talk through tubeless setups with riders at the shop:
- Top up small amounts on the trail rather than dumping in a full bottle of a different brand.
- If you are switching brands for good, clean the tire first instead of layering sealant on top of sealant.
- Replace valve cores at least once a year since dried residue builds up there first.
- Carry a small top-up bottle and a spare tube on every ride, no exceptions for short loops.
- Check tires for boogers at seasonal service, not just when something goes wrong.
For cleaning, isopropyl alcohol and a plastic scraper handle dried sealant without damaging tire casings or rim tape.
Pro Tip: A seasonal tire check takes less time than one trailside plug-and-patch session gone wrong.
Finding the right balance between convenience and caution
A single trail top-up from whatever bottle is handy will not ruin your tire. What gets riders into trouble is treating every ride as an excuse to top off with a different brand, letting residue build for months, and then wondering why the tire rattles and will not seal. If you do not know what is already in the tire, or you can feel lumps when you shake the wheel, skip the shortcut and clean it out.
— Coach Matt
Stock your kit for sealant season at Sport Factory Pro Shop
Tubeless maintenance gets easier when you have the right supplies sitting in a drawer instead of scrambling mid-ride. We curate our tire selection and maintenance gear from brands chosen for engineering quality, so you are not guessing which valve-core tool or cleaning supply actually holds up.

A simple trail kit covers most situations:
- A small sealant top-up bottle for quick trailside refills.
- A valve-core tool for cleaning or swapping cores on the spot.
- A spare tube for cuts too big for a plug or boot.
| Item | Why you need it |
|---|---|
| Sealant top-up bottle | Covers small trail refills without opening a full bottle |
| Valve-core tool | Clears clogs and swaps cores during routine checks |
| Spare tube | Handles damage sealant and plugs cannot fix |
Browse our maintenance and tools category to round out your kit before your next ride.
FAQ
Is it okay to mix Stan’s and Orange Seal?
Mixing different sealant brands is generally discouraged because their formulas can react and coagulate into lumps. A small, occasional top-up usually causes no immediate issue, but a permanent switch should start with a full clean-out, per Mountain Bike Action.
Can you use too much tire sealant?
Yes, overfilling adds unnecessary weight and can cause a sloshing feel while riding. Stick to the recommended range for your tire type rather than adding extra for peace of mind, as detailed in our sealant amount guide.
How much tubeless sealant should I add to each tire?
Amounts vary by tire type: road and gravel tires typically need a moderate amount of sealant, trail and plus tires usually require a somewhat larger amount, and fat tires often need the most, adjusted for rider weight and terrain, based on our tubeless sealant amount breakdown.
Do you need to remove old sealant before applying new tubeless sealant?
Removing old sealant is recommended whenever you are switching brands, since leftover residue can react with a new formula and form clumps. A quick top-up of the same brand does not require a full clean-out, but a brand change does, according to Mountain Bike Action.
Sources
- EVERYTHING YOU NEED TO KNOW ABOUT MOUNTAIN BIKE TIRE SEALANT - Mountain Bike Action Magazine
- What is a tubeless tyre? Everything you need to know - BikeRadar