

For Hookless Bicycle Rim Safety Stay Under 73 psi with Extra Heat and Load Margin
Posted by Matt Russ on 6th Oct 2026
Stay Under 73 psi: Shop Tested Hookless Rim Checks for Road Riders

For hookless road rims, the industry ceiling is about 5 bar (roughly 72.5 to 73 psi), and the rule that matters most is simple: always run the lower of the rim or tire manufacturer’s published maximum, then leave margin for heat and load. Rider weight and tire width often push your real working pressure well below that ceiling, not up to it.
TL;DR:
- Riding on hookless rims requires keeping tire pressure at or below the lower of the rim or tire maximum, which is typically around 72.5 to 73 psi according to standards.
- Temperature increases of about 2.5 psi per 10°C can significantly raise pressure during a ride, especially in hot conditions, risking bead unseating.
- Heavier riders on narrow tires often need to exceed 73 psi to prevent rim strikes, making hookless rims unsuitable for such setups without wider tires or hooked rims.
- Proper bead seating and sealant levels are crucial for long-term reliability, especially when inflating in cold conditions and riding through impacts.
- For safer operation, start with inflation 3 to 5 psi below the published maximum and recheck pressure after the tire warms up on a ride.
Table of Contents
- Industry standards and quick reference numbers for hookless rims
- Step-by-step checklist to verify your safe maximum
- How temperature, altitude, weight, and impacts change pressure
- Practical starting pressure bands by weight and tire width
- Our shop-tested mounting and inflation tips
- Who should run hookless rims, and when to choose something else
- Find tires, pumps, and fitting help at Sport Factory Pro Shop
- FAQ
- Sources
Industry standards and quick reference numbers for hookless rims
The 72.5 to 73 psi (5 bar) ceiling for hookless road systems comes from ETRTO and ISO, the two standards bodies that harmonize rim and tire dimensions across brands. The number exists because a hookless bead has no mechanical hook to lock the tire onto the rim at high pressure, so the bead relies entirely on correct seating and tape integrity to stay put. Some manufacturers test individual rims to higher figures, but the published standard stays the operative limit for any rider mixing parts from different brands.
Both your rim and your tire carry a stamped or printed maximum. Rims usually list it on the sidewall near the spoke bed or in the manufacturer’s online chart; tires print it near the bead. Whichever number is lower governs your setup, not the average of the two.

These ranges are starting references only. Manufacturer guidance for your exact tire and rim always overrides a generic chart.
Step-by-step checklist to verify your safe maximum
Before you inflate a hookless setup for the first time, work through this checklist rather than guessing from memory or a forum post.
- Pull up your rim manufacturer’s current pressure chart and note any hookless-specific limit, since it can differ from a hooked version of the same rim.
- Read the tire sidewall for its stamped maximum and confirm it is listed as tubeless or hookless compatible.
- Inspect rim tape for bubbles, lifting edges, or gaps at the valve hole, since a compromised seal lowers your effective safe ceiling.
- Use a tubeless-specific valve with a secure base, and confirm the bead has seated evenly around the full circumference before adding sealant.
- Record the lower of the two published maximums for that specific wheel and tire combination so you are not relying on memory next time you inflate.
A pressure calculator built around tubeless setups can help translate that ceiling into a practical starting number once you know your limit.
How temperature, altitude, weight, and impacts change pressure
Pressure is not static once you leave the workshop. Inflation pressure rises by roughly 2.5 psi for every 10°C (18°F) increase in tire temperature, meaning a tire set at 70 psi on a cool 10°C morning can read well above that figure by a hot midday ride, particularly on dark asphalt or during a long climb.
Impacts add another layer of risk. A hard hit on a pothole or curb creates a transient pressure spike, and if your tire was already sitting near its published maximum, that spike can unseat a bead that would otherwise hold fine.
- Narrower tires paired with heavier riders concentrate load over a smaller contact patch, raising the pressure needed to avoid rim strikes and pushing closer to the ceiling.
- Wider tires let heavier riders run meaningfully lower pressure while maintaining support, which keeps more margin below the published max.
- Starting your inflation 3 to 5 psi below the lower published maximum gives room for both heat and impact spikes without crossing the line.
- Re-checking pressure after the tire warms up on a ride confirms you have not drifted past a safe working range.
Some manufacturers explicitly recommend hooked rims for riders who regularly face extreme heat swings, since the hook provides a mechanical backup the hookless bead does not have.
Practical starting pressure bands by weight and tire width
Matching pressure to both rider weight and tire width keeps you comfortably under the hookless ceiling rather than flirting with it. The bands below are starting points, and the published maximum for your specific rim or tire always takes priority if it falls lower.
A rider over 220 lb running 23 to 25 mm tires often needs a pressure above the 73 psi hookless limit just to avoid pinch flats and rim strikes, which puts that combination outside safe hookless operation entirely.
- A heavier rider on narrow tires should move to a wider tire or a hooked rim rather than push toward the published ceiling.
- A lighter rider on wide gravel tires has substantial margin and can prioritize comfort and traction over chasing a higher number.
- Whatever band you land in, hold back 3 to 5 psi from the top of it if you expect temperature swings or rough terrain during the ride.
Our shop-tested mounting and inflation tips
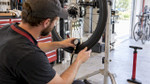
Seating a hookless bead cleanly makes the biggest difference in long-term reliability, and the tool you reach for matters. A compact 108-gram pocket e-flator works for trailside top-offs, but initial bead seating on a tight hookless rim usually goes smoother with a dedicated workshop-style unit or a high-volume floor pump that can deliver a fast burst of air.

Pro Tip: Inflate in short bursts while rotating the wheel, listening for both beads popping evenly rather than one side seating first.
A recommended routine for a new setup:
- Measure cold pressure before riding, ideally first thing in the morning or straight out of an air-conditioned shop.
- Ride or warm up for 10 to 15 minutes, then re-measure to see how much the number has climbed.
- Keep sealant at the volume recommended for your tire size, since low sealant levels let small leaks turn into pressure loss that amplifies risk under high pressure and hard impacts.
- Stop and have a professional inspect the wheel if you notice repeated burping at speed, visible shifting of the rim tape, or any sign of bead damage after a hard hit.
Overnight pressure drop of 2 to 5 psi is normal for tubeless setups and is not itself a warning sign, but a faster drop is worth checking before your next ride.
Who should run hookless rims, and when to choose something else
Hookless rims suit lighter and mid-weight riders running tires 28 mm and wider, where the published ceiling sits comfortably above any realistic working pressure. Where I get cautious is narrow road tires paired with a heavier rider or frequent extreme heat, since that combination eats through the available margin fast. If you routinely ride in high heat, carry extra load, or need pressures that bump against the hookless limit, a wider tire or a traditional hooked rim gives you a safer cushion without sacrificing much performance.
— Coach Matt
Find tires, pumps, and fitting help at Sport Factory Pro Shop
Once you know your safe ceiling, the right gear makes staying under it easy. We carry a curated range of tires built for tubeless and hookless compatibility, so you can size up for a heavier build or extreme heat without guessing at compatibility.

For seating beads cleanly and checking pressure on the road, our pumps and inflation tools cover everything from workshop units to pocket-sized backups. Browse our tire selection or reach out through our product pages for help matching a tire and rim combination to your weight and riding conditions.
FAQ
What is the 4 psi rule on tires?
The 4 psi rule is a rough guideline suggesting you adjust tire pressure by about 1 psi for every 4 to 5°F change in ambient temperature, though the more commonly cited figure for cycling is a 2.5 psi rise per 10°C (18°F). Either way, the point is the same: pressure set cold in the morning will read higher once the tire warms up.
Is 40 psi too high for a bike?
It depends entirely on tire width and rider weight. For a wide gravel or mountain tire, 40 psi can sit at or above the upper end of a safe range, while for a narrow road tire it would be far too low to prevent pinch flats or rim strikes.
What is the 105% rule in cycling?
If you have seen this figure referenced, treat it as informal advice rather than a published standard, and default to the lower of your rim or tire manufacturer’s stated maximum instead.
What are the disadvantages of hookless rims?
Hookless rims carry a lower maximum pressure ceiling than hooked designs, typically around 72.5 to 73 psi, which can rule them out for heavier riders running narrow tires. They also depend more heavily on correct tire compatibility, tape condition, and bead seating, since there is no mechanical hook to help retain the tire at higher pressures.
How do I know if my tire and rim are safe together on a hookless setup?
Check both the rim manufacturer’s chart and the tire sidewall for their published maximum pressures, then operate at or below whichever number is lower. Confirm the tire is listed as hookless or tubeless compatible by the manufacturer before mounting it.
Sources
- This is how hot weather affects your tyre pressure (and why hookless rims need extra care) | BikeRadar
- Are hookless rims safe for road riding? – Rouleur
- Why is bicycle tire pressure higher in summer? | Upway