

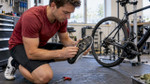
5–10mm Rearward Bias: Testable Cleat Positioning for Cyclists
Posted by Matt Russ on 5th Oct 2026
5–10mm Rearward Bias: Testable Cleat Positioning for Cyclists

Start with the cleat center on the line between your first and fifth metatarsal heads, then shift it 5 to 10 millimeters rearward for endurance comfort, keep rotation neutral with float engaged, and align lateral position so your hip, knee, and foot track in a straight line. Mark your current setup, loosen the bolts, move the cleat 2 to 3 millimeters or 2 to 3 degrees at a time, tighten finger-tight, and test-ride before locking anything in.
TL;DR:
- Moving the cleat 5 to 10 millimeters rearward reduces calf load without affecting pedaling efficiency, especially beneficial for endurance riders.
- Setting the cleat on the metatarsal line and then shifting it based on riding style ensures better foot alignment and knee tracking.
- Small, incremental adjustments of 2 to 3 millimeters or degrees improve fit more reliably than large, sudden changes.
- Comfort and injury prevention depend on considering saddle height, foot position, and cadence alongside cleat placement.
- Persistent knee pain or numbness after a few fine-tuned adjustments should prompt consultation with a professional fitter.
Table of Contents
- The three cleat variables that shape every ride
- Three practical ways to set your cleat position
- Which setup method fits your situation?
- Matching symptoms to the right cleat adjustment
- How to test a cleat change without guessing
- When a fitter or medical professional should take over
- Coach Matt’s shop-tested cleat tips
- Why small adjustments beat big jumps
- Gear that makes cleat setup easier
- FAQ
- Sources
The three cleat variables that shape every ride
Every cleat adjustment comes down to three dials: fore-aft position, lateral-medial stance, and rotation with float. Each one changes how force travels through your foot, ankle, and knee, so understanding what each does makes the rest of this guide easier to apply.
Fore-aft position moves the cleat forward or back under your foot. A controlled lab study found that moving the cleat rearward cut plantarflexor (calf) activation by roughly 27% in a mid-position and 54% in a rear position compared to forward placement, with no measurable change in overall pedaling economy. A forward cleat increases ankle and calf leverage, which some sprinters prefer for short, explosive efforts.

Lateral-medial stance sets how wide or narrow your feet sit relative to the pedal spindle, which affects your Q-factor and how your knee tracks through the pedal stroke. Move it too far one way and you can create knee-in or knee-out loading that shows up as discomfort over time.
Rotation and float determine how much your heel can swing in or out before the cleat resists. Research on pedal mechanics shows that float reduces torsional load on the knee, which is why locking the foot into a fixed rotation without a clear reason raises injury risk rather than lowering it.
- Fore-aft: forward favors sprint leverage, rearward favors endurance comfort and lower calf load.
- Lateral-medial: controls stance width and how your knee tracks over the pedal.
- Rotation and float: permits natural heel movement and reduces twisting force at the knee.
Three practical ways to set your cleat position
Most riders choose from common starting points, each with a suitable setup method.
- Replicate your current position. If your existing setup feels fine and you are only swapping shoes or cleats, place the old shoe sole-to-sole with the new one, line up the cleat outlines, and transfer the fore-aft, lateral, and rotational position before tightening.
- Use a copying tool. A cleat alignment tool, such as the Ergon Cleat Tool, lets you record the exact position on your current shoe, loosen the bolts on the new shoe, set the tool to match, and tighten once the cleat sits in the same spot.
- Build from scratch using foot landmarks. Find your first and fifth metatarsal heads (the bony bumps at the base of your big toe and little toe), draw a line connecting them on the sole, and center the cleat on that line. From there, shift the cleat 0 to 10 millimeters rearward depending on your riding style: closer to zero for sprint-focused riding, and closer to 10 millimeters for long endurance rides. Fitters commonly use this metatarsal line rather than the big toe alone, since the toe-only method tends to push the cleat too far forward.
Once you have a position, loosen the bolts enough to move the cleat freely, make your adjustment, and tighten just enough to hold it in place for a test ride. Only torque the bolts to the manufacturer’s spec once you have confirmed the position works, and trace the final cleat outline with a marker so you can restore it exactly if you ever remove the cleat.
Pro Tip: Change only one variable at a time. Adjusting fore-aft, lateral position, and rotation all at once makes it impossible to know which change fixed or caused a symptom.
Which setup method fits your situation?
The right starting method depends on what is already working and what is changing.
- If your current position feels good and you are just replacing worn cleats or shoes, copy it exactly rather than guessing.
- If you are switching shoes but keeping your pedal system, a copying tool gets you back to neutral fastest.
- If you are starting fresh, switching pedal brands, or have never had your cleats properly set, build from the metatarsal landmarks.
Before touching your cleats at all, run a quick pre-change checklist: confirm saddle height and fore-aft position, check crank length, verify shoe fit, and note any known leg length difference. A systematic review of bike fit variables found that saddle height, saddle fore-aft, foot position, and cadence all influence knee joint loading, so a saddle that sits a few millimeters off can produce symptoms that look like a cleat problem but are not. Changing your cleats without checking these other variables first can mask the real source of discomfort.
Matching symptoms to the right cleat adjustment
Different symptoms point to different fixes, and small changes usually solve them faster than big ones.
- Hotspots or numbness in the forefoot: shift the cleat 5 to 10 millimeters rearward, check that your insole and cleat plate are not compressing a narrow band of pressure, then retest.
- Medial knee pain (inside of the knee): try a slight toe-in adjustment or a small outward lateral shift, and double-check your Q-factor against your natural stance width.
- Lateral knee pain (outside of the knee or IT band): move the cleat slightly outward or adjust rotation to reduce the knee’s inward-outward swing during the pedal stroke.
- Calf or Achilles overload: move the cleat rearward. The same biomechanics research that found reduced plantarflexor activation in rearward positions suggests this shift lowers calf demand without hurting pedaling efficiency.
Pro Tip: If a symptom moves to a new location after an adjustment rather than easing, that is a sign to stop and reassess rather than keep pushing further in the same direction.
If pain worsens or spreads rather than settling after one or two small adjustments, stop making changes yourself and bring in a professional. Foot mechanics and knee tracking are closely linked, and research on walking and foot mechanics outside of cycling reinforces how much alignment at the foot affects load higher up the chain.
How to test a cleat change without guessing
A cleat change only tells you something useful if you track it properly.
- Change one variable at a time, in steps of 2 to 3 millimeters or 2 to 3 degrees.
- Log your baseline before you start: shoe model, cleat model, fore-aft distance from the metatarsal line, lateral distance from centerline, rotation angle, saddle height and fore-aft, crank length, and typical cadence or route.
- Test-ride with a structure: warm up, ride 20 to 30 minutes at a steady effort, add a short sprint or hard effort, then rate how it felt and note any objective data like power or cadence.
- Repeat for two or three rides before deciding.
One documented ride is not enough to judge a cleat change. Small adjustments like a 5 millimeter rearward shift can meaningfully reduce plantarflexor load, but the effect only shows up clearly across repeated, logged rides rather than a single outing.
Adopt the change if two out of three test rides show improvement with no new symptoms. Revert to your previous position if things get worse or a new symptom appears.
When a fitter or medical professional should take over
Most cleat issues respond to small, careful adjustments, but some signs mean it is time to stop experimenting on your own.
- Joint pain that persists or worsens despite two or three documented adjustment attempts.
- Any loss of pedaling function, stability, or control on the bike.
- Numbness that continues well after you get off the bike rather than fading within minutes.
A professional fitter can run dynamic video analysis, check joint alignment through the pedal stroke, and in some cases use in-shoe pressure mapping to see exactly where load concentrates. Bring your symptom log, your shoes and cleats, your pedals, and any measurements or ride data you have recorded so the fitter can pick up where your testing left off instead of starting over.
Coach Matt’s shop-tested cleat tips
The most common mistake we see in the shop is riders centering cleats on the big toe alone instead of the full metatarsal line, which almost always pushes the cleat too far forward. The second is over-tightening cleat bolts before confirming the position works on the road, which makes fine adjustments harder and can strip the threads. We also see riders chase cleat changes for weeks before ever rechecking saddle height, even though a saddle that is a few millimeters off can cause the exact knee pain they are blaming on the cleats.
Our starting heuristic for most endurance riders is a 5 to 10 millimeter rearward bias from the metatarsal line, adjusted from there based on how the ride feels, never treated as a fixed rule.

Why small adjustments beat big jumps
We have watched riders chase knee pain for months by swapping shoes, pedals, and cleats all at once, when the fix turned out to be a single 5 millimeter rearward shift combined with a small saddle correction. The riders who get it right fastest are the ones who change one thing, ride it twice, and write down what happened before touching anything else. Treat your cleat setup like a short experiment rather than a guess, and the data you collect will tell you more than instinct ever will.
— Coach Matt
Gear that makes cleat setup easier
Once you know where your cleats need to sit, the right tools make the adjustment faster and more precise. We carry pedals and compatible components for riders switching pedal systems or replacing worn cleats, along with the maintenance tools, torque wrenches, and small parts you will want on hand in our bike maintenance and tools category for a proper setup session. Comfortable socks and padded liners from our apparel selection can also help with hotspots while you fine-tune position.

Browse our pedal and component selection to find the right match for your next adjustment.
FAQ
What is the best starting cleat position for most riders?
Center the cleat on the line between your first and fifth metatarsal heads, then shift it 5 to 10 millimeters rearward if you ride mostly endurance distances. Fitters commonly use this metatarsal line as the baseline rather than the big toe alone.
How much float should my cleats allow?
Most riders do best starting with neutral rotation and the pedal system’s standard float engaged rather than locked. Research on pedal mechanics associates this float with lower torsional load on the knee compared to a fully fixed rotation.
Can cleat position alone fix knee pain?
Sometimes, but not always. A systematic review of bike fit factors found that saddle height, saddle fore-aft, foot position, and cadence all influence knee loading, so cleat position is one variable among several worth checking together.
How far should I move my cleats when testing a change?
Move the cleat in small steps, 2 to 3 millimeters or 2 to 3 degrees at a time, and test each change across two or three rides before deciding to keep or revert it. Larger jumps make it hard to tell which part of the change caused the result.
When should I see a fitter instead of adjusting cleats myself?
See a fitter or medical professional if pain persists or worsens after a couple of careful adjustments, or if you notice numbness that lingers after you get off the bike. A fitter can use dynamic video analysis and alignment checks to find issues that trial-and-error cleat tweaks will not catch.
Sources
- Cycling cleat position explained: How to set them up correctly | Cycling Weekly
- Effects of foot position on pedaling biomechanics (Van Sickle et al.)
- Influence of lateral pedal translation on muscle recruitment and kinematics in cyclists - PMC