


Cyclists: Save Up to 8 Watts With Aero Bottle Placement
Posted by Matt Russ on 7th Sep 2026
Cyclists: Save Up to 8 Watts With Aero Bottle Placement
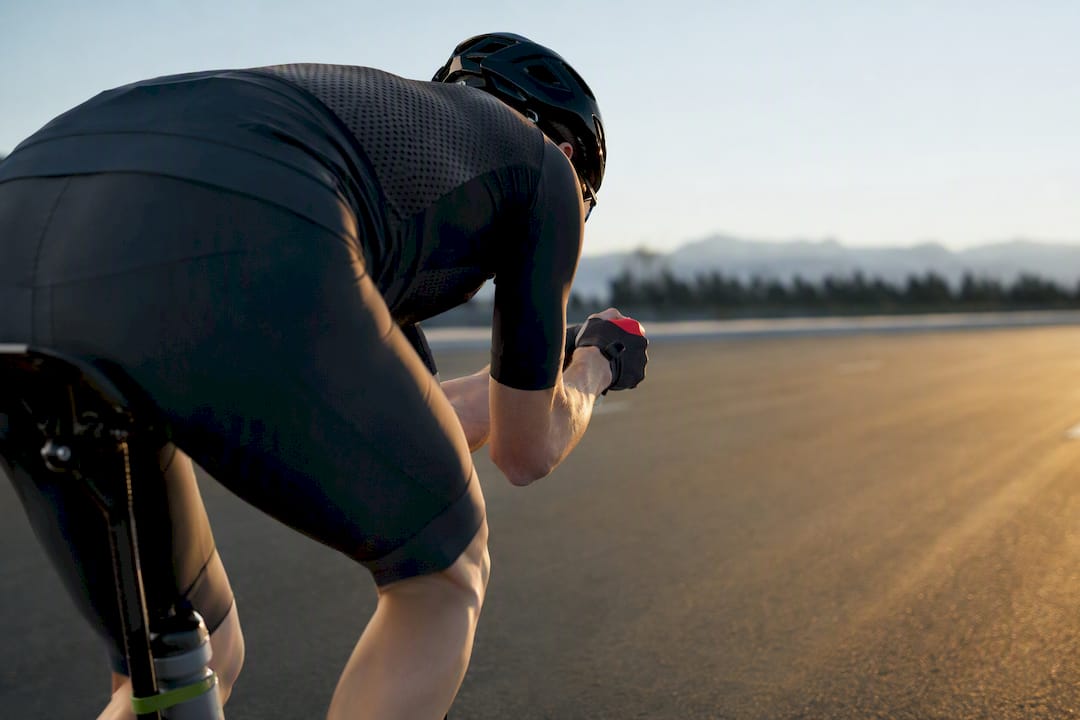
Hide your hydration when you can. Tucking a bottle between your arms or angling one tight behind the saddle beats a round bottle on the downtube in nearly every wind-tunnel and field test, often by 3 to 8 watts at race speed. Over an Ironman bike leg, that gap adds up to minutes, not seconds. Your ideal setup still depends on your torso angle, hydration needs, and the course profile, so treat this as a strong default, not a universal rule.
TL;DR:
- Mounting bottles behind the saddle or between the arms can often be neutral or even improve aerodynamics, unlike downtube placements that cause significant drag.
- A 900 ml downtube bottle can add around 8.3 watts of resistance at 25 mph, potentially costing several minutes on an Ironman bike leg.
- Crosswinds and rider posture significantly influence the aerodynamic penalty of different bottle placements, making sheltered options more stable in gusty conditions.
- Personal bike geometry and race course profile should guide placement choices, with longer events and hilly courses prioritizing access and weight over marginal aero gains.
- Properly testing and securing your hydration system before race day prevents equipment failures that can negate any aero benefits.
Table of Contents
- What Aero Bottle Placement Tests Actually Measured
- Downtube, Seat Tube, Saddle, or Between the Arms?
- How Do You Choose the Right Placement for Your Setup?
- Setting Up Your Bottle Mounts for Race Day
- When Aero Gains Don’t Pay Off
- Does Your Aerobar or Frame Bag Change the Best Bottle Spot?
- How Crosswinds Change the Bottle Placement Penalty
- What Do Pro Riders Actually Choose?
- Bottles or a Hydration Bladder: Which Costs Less Aero Drag?
- Handling Bottle Refills Without Breaking Your Position
- What I’d Tell a Rider Chasing Watts Over Bottles
- Get Your Aero Bottle Setup Right With Sport Factory Pro Shop
- Primary Sources and Further Reading
- Sources
What Aero Bottle Placement Tests Actually Measured
Every serious placement test comes down to the same question: how many watts does a given bottle and mount cost you at race speed, and what does that translate to over race distance? The answers vary by rider and rig, but the pattern across independent tests is remarkably consistent.
AeroCoach’s testing found that a 900 ml round bottle mounted on the downtube produced roughly an 8.3-watt penalty at 25 mph, one of the worst results in the entire test set. A smaller 500 ml bottle in the same spot still cost several watts. Seat tube mounting often performs a little better than the downtube because it sits slightly more sheltered behind the front wheel and legs, though the improvement is inconsistent across frame designs. Between-the-arms and tucked behind-saddle placements, by contrast, frequently came back close to neutral or even beneficial compared to riding with no bottle at all.
Translating watts into race time depends on speed and duration, but the shape of the math is straightforward: a sustained 5 to 8 watt penalty at 25 mph over a 112-mile Ironman bike leg has been shown to cost several minutes depending on the exact setup and rider CdA. For a shorter 40 km time trial, the same watt gap shrinks to a smaller but still meaningful chunk of time, often a small but measurable amount of time, often under a minute at typical TT speeds.
A few caveats matter before you treat any of these numbers as gospel:
- Most published figures come from single-rider or small-sample testing, so your personal CdA and frame interaction will shift the exact watt cost up or down.
- Results are frame-dependent. A bottle that disappears into a deep-tubed aero frame’s wake behaves differently than the same bottle on a round-tubed climbing bike.
- Wind angle changes the picture substantially. A placement that tests well in a headwind tunnel run can behave differently in a 10 to 15 degree crosswind, which is common on real race courses.
Statistic to remember: the difference between the best and worst bottle placement in controlled testing has run as high as 8 watts at 25 mph, which is a bigger swing than many riders get from an expensive helmet upgrade.
Downtube, Seat Tube, Saddle, or Between the Arms?
Each placement interacts with airflow differently, and understanding why helps you predict how your own frame and position will respond even without a wind tunnel.
Downtube mounting sits directly in disturbed air coming off the front wheel and fork, which is why it tends to produce the largest penalties in testing. Modern aero frames with deep, integrated downtubes can actually make this worse, since a round bottle breaks up airflow that the frame was shaped to manage cleanly.
Seat tube mounting often performs somewhat better because the tube itself is narrower and the bottle sits closer to the rider’s legs, which already disturb that air. Fit and frame clearance vary a lot here, though. Smaller frames sometimes can’t fit a full-size bottle on the seat tube without rubbing the rear tire.
Saddle-mounted rear bottles can be some of the fastest options tested, but only when mounted correctly. Distance and angle matter enormously. A bottle held tight against the seatpost in the sheltered air behind the rider’s legs can nearly disappear aerodynamically; one hanging a few centimeters back with an exposed gap creates its own turbulence and can be worse than a downtube cage.
Between-the-arms or front-mounted systems tend to be the most posture-dependent option. In an aggressive, tucked time-trial position, a bottle nestled between the forearms can be aero-neutral or even beneficial compared to no bottle. In a more upright long-course triathlon position, the same setup can catch more air and cost watts instead of saving them.
Jersey pockets and hydration reservoirs solve access problems but introduce heat retention and reach issues, and they add drag of their own once you sit up to grab a pocket bottle mid-race.
- Downtube: largest measured penalty, worse on deep-tube aero frames.
- Seat tube: usually milder, limited by frame clearance.
- Saddle mount: fastest when tight and angled correctly, worst when loose.
- Between the arms: best in an aggressive tuck, situational in an upright position.
- Jersey pocket: practical backup, adds drag once accessed.
Pro Tip: Test your saddle-mounted bottle’s clearance with a full bottle installed, not an empty one. A full 750 ml bottle sits differently in the cage and can shift the angle enough to open a drag-inducing gap you wouldn’t notice with an empty test bottle at home.
How Do You Choose the Right Placement for Your Setup?
Picking a placement isn’t a single decision. It’s a short list of trade-offs ranked by what actually affects your finish time.
- Match placement to your target speed and course profile first. A flat, fast 40 km TT rewards aggressive, hidden placements more than a hilly long-course triathlon where climbing effort and access matter more than a few watts on the flats.
- Size your hydration volume before choosing a mount. If you need two or three bottles for a hot Ironman bike leg, between-the-arms alone won’t cut it. Combine a tucked saddle system with a front bottle rather than forcing all your volume into one aero-optimal spot.
- Weigh access frequency against aero purity. If you drink every 10 minutes, a placement that forces you to sit up and break your tuck every time will cost more than the watts it saves in clean air.
Rider posture and reach shape all three of these decisions. A rider with a shorter torso and steep aerobar setup interacts with a between-the-arms bottle very differently than someone in a long, low stretch, so don’t copy a pro’s setup blindly without checking your own position against it.
Before race day, run this checklist in training:
- Can you reach and drink from this setup without lifting your head or shoulders out of your aero position?
- Does the bottle stay secure over rough pavement at race pace, including out-of-saddle efforts?
- Have you tested it in a crosswind, not just a calm morning ride?
Pro Tip: If you’re between two placements and can’t test both in a wind tunnel, prioritize the one that lets you drink more often without breaking form. Sustained position almost always beats a marginal aero edge you can’t hold for four hours.
Setting Up Your Bottle Mounts for Race Day
Good placement data means nothing if the mount itself fails at mile 60. Saddle-mounted systems should sit tight against the seatpost with a slight downward or rearward tilt, close enough that there’s no visible air gap between the bottle and your legs when pedaling. If you can slide two fingers into the gap behind the bottle, it’s probably too far back to capture the sheltered air it’s supposed to use.
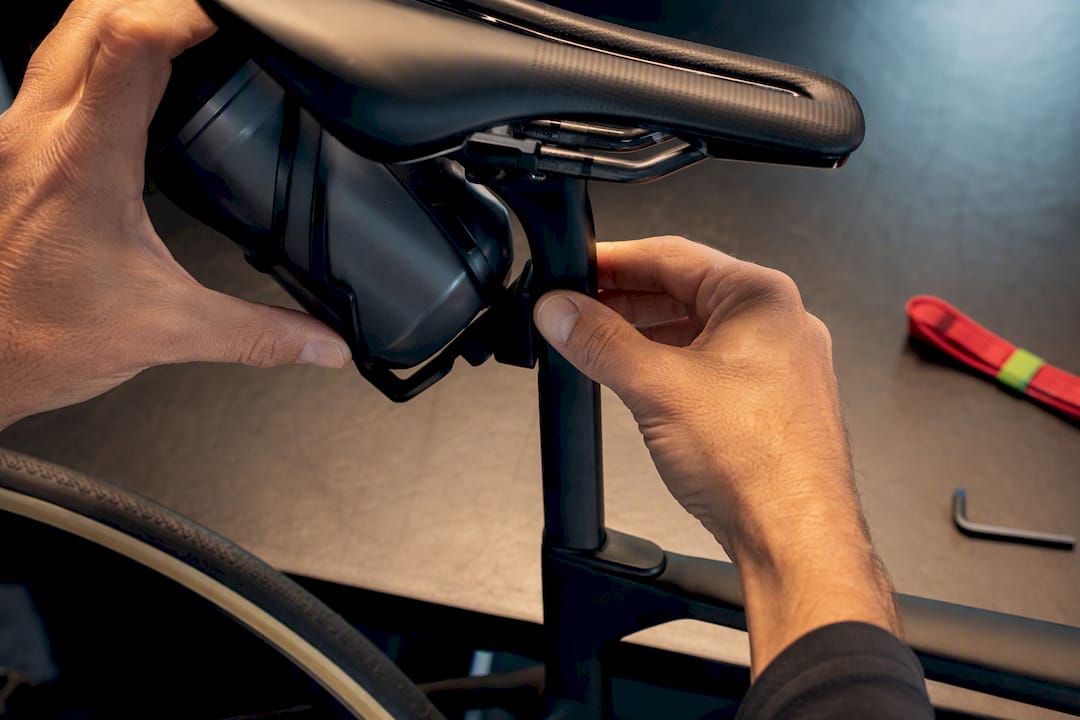
Cage choice matters as much as position. Secure-fit cages with side-load or strap retention hold up better over rough roads than basic wire cages, and aero-specific bottles with molded fairing shapes tend to seal and seat more consistently in dedicated mounts than repurposed round bottles. Saddle rail attachments and under-downtube mounts both need a trial ride with the bike loaded exactly as it will be on race day, since bag straps, CO2 mounts, and computer positioning can all shift how the bottle sits.
Before you race, run through a short preflight:
- Seal-test every bottle by shaking it upside down over grass, not your garage floor.
- Fill bottles the night before and re-check mount tension, since cold fluid and vibration loosen straps over time.
- Confirm your placement doesn’t violate race-specific equipment rules, particularly for draft-legal or age-group categories with mount restrictions.
| Setup element | What to check | Why it matters |
|---|---|---|
| Saddle mount angle | Bottle tilts down/back, tight to seatpost | Closes the drag-inducing air gap |
| Cage retention | Secure-fit or strap system, tested over rough road | Prevents bottle ejection at race speed |
| Bottle fill timing | Filled and seal-tested the night before | Confirms no leaks under vibration |
| Reach test | Full aero-position drink test in training | Confirms access doesn’t break your tuck |
When Aero Gains Don’t Pay Off
Aero savings mean little if you’re climbing. Extra bottle weight erodes flat-road aero gains as gradients increase, since the watts you spend hauling mass uphill can exceed what you saved in clean air on the flats. A setup that wins on a pancake-flat TT course can be a net loss on a rolling century-style Ironman bike leg.
Fatigue changes the calculus too. A bottle placement that’s technically faster in a wind tunnel but forces you to sit up, twist, or lose focus every time you drink can cost more over four hours than a slightly less aero setup you can access without breaking form.
Match your placement to the actual race in front of you:
- Short, flat 20 to 40 km TT: favor between-the-arms or a tight saddle mount, since hydration needs are low and aero purity matters most.
- Flat Ironman legs: a stable saddle system paired with an easy-reach front bottle balances volume and drag.
- Hilly long-course events: prioritize weight and access over marginal aero gains, since climbing effort dominates the watt budget.
- Mixed courses: split the difference, accepting a small aero cost in exchange for hydration you can actually use without disrupting your position.
Does Your Aerobar or Frame Bag Change the Best Bottle Spot?
Bottle placement doesn’t exist in isolation. Your aerobar width and extension length directly affect whether a between-the-arms bottle sits in clean air or gets buffeted by turbulence spilling off your forearms. Narrow, ski-bend aerobars tend to create a tighter, more sheltered pocket for a front-mounted bottle than wide, straight extensions, which is one reason two riders on similar bikes can get opposite results testing the same bottle.
Frame bags and top-tube bento boxes complicate the seat tube and downtube options further. A bento box mounted just behind the stem can partially shield a downtube bottle from oncoming air, softening the penalty slightly, but it also adds its own drag and weight. Stack a frame bag along the top tube and a downtube bottle underneath it, and you get compounding effects that no single test isolates cleanly.
The practical takeaway is to test your specific combination rather than assume a placement that worked for someone else’s setup will transfer to yours. If you run a full-size frame bag for nutrition storage, your downtube or seat tube slot may already be compromised, pushing you toward a saddle mount or between-the-arms bottle by default rather than by aero preference. Riders using minimal storage, just a small bento box or none at all, have more freedom to chase the theoretically fastest bottle position without fighting for space against other equipment.
How Crosswinds Change the Bottle Placement Penalty
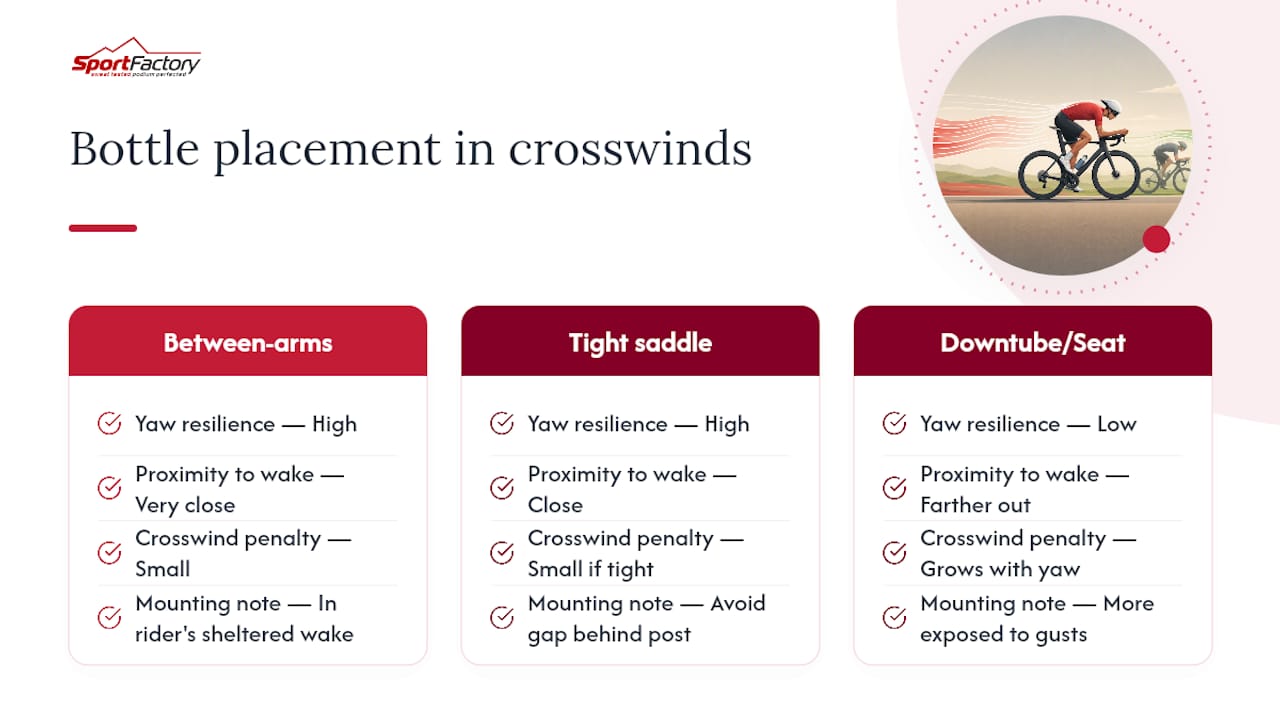
Most published watt figures come from controlled, largely headwind-facing test conditions. Real races rarely offer that luxury. A 10 to 15 degree yaw angle from a crosswind changes how air moves around your frame, your legs, and any bottle mounted on it, and the placements that test cleanest at zero yaw don’t always hold that advantage once wind comes from the side.
Downtube and seat tube bottles tend to be more exposed to crosswind effects because they sit farther from the sheltered zone directly behind the rider’s torso. A bottle that costs a moderate penalty in still air can see that penalty grow as yaw angle increases, since the airflow separating around the tube interacts differently with a protruding round shape at an angle than it does head on.
Between-the-arms and tight saddle-mounted bottles generally hold up better in crosswinds precisely because they sit closer to the rider’s own sheltered wake, which shifts with the rider’s body rather than staying fixed relative to the wind. That doesn’t mean they’re immune. A loosely mounted saddle bottle with any gap behind the seatpost can catch a crosswind and create a small pocket of turbulence that a tightly mounted one avoids entirely.
If your race course includes exposed sections, bridges, or coastal roads prone to crosswinds, weight the more sheltered placements more heavily in your decision. A setup that’s only marginally faster in still air but noticeably more stable in wind is often the better real-world choice, since a bottle that shifts or rattles in gusty conditions costs you more than a few watts of aero theory.
What Do Pro Riders Actually Choose?
Professional time-trialists and long-course triathletes rarely rely on a single bottle for an entire race, and their choices reflect the same trade-offs amateur racers face, just with more resources behind the decision. Athletes who run tight, low aerobar positions frequently favor a between-the-arms aero bottle for exactly the reason testing suggests: in that posture, the bottle sits in a sheltered pocket that adds minimal drag while keeping hydration within reach without breaking form.
For longer events, it’s common to see a combination approach: a front-mounted bottle for frequent small sips paired with a tucked saddle-mounted bottle carrying reserve volume for later in the race. This mirrors the posture-dependent findings from simulation-based testing, where the optimal hiding spot for a bottle shifted based on how upright or aggressive the rider’s position was. A rider with a flatter back and lower head position gets more benefit from between-the-arms storage than someone racing in a more upright long-course setup, who may lean more heavily on a well-executed saddle mount instead.
What’s notable is how rarely elite riders choose a round bottle on an exposed downtube position for a pure time trial, given how consistently that placement tests poorly. On longer triathlon bike legs where hydration and nutrition volume outweigh marginal aero considerations, though, you’ll still see downtube bottles in the mix, chosen for practicality rather than pure speed. The lesson isn’t to copy a specific pro’s rig. It’s to notice that even athletes with access to wind tunnel time still make placement choices based on their own posture and race distance rather than chasing a single universally fastest setup.
Bottles or a Hydration Bladder: Which Costs Less Aero Drag?
Standard bottles, whether round or aero-shaped, remain the default for most racers because they’re easy to test, refill, and mount in known positions. A hydration bladder or reservoir system, often worn on the back or integrated into a frame bag, removes the bottle-shaped object from the airflow around your frame entirely, which sounds like a clean aero win on paper.
In practice, the trade-offs are more nuanced. A bladder worn on the rider’s back adds bulk to your torso, which is already the largest drag-producing surface on the bike. Depending on how it sits and how much it changes your torso shape in the wind, that added bulk can offset some or all of the drag you saved by removing a bottle from the frame. Bladders also introduce their own access challenges: bite valves can be harder to locate and use quickly at race pace than reaching for a familiar bottle position, and fluid temperature control is tougher since the bladder isn’t shielded the way an insulated bottle can be.
For short, fast time trials where every watt counts and hydration volume needs are low, a well-placed aero bottle usually beats a bladder simply because it avoids adding bulk to your torso silhouette. For longer, hotter long-course events where you need higher volume and frequent access, the choice becomes more personal. Some riders find a bladder’s constant, hands-free access outweighs a small aero cost, while others find the temperature and bite-valve issues aren’t worth it. Test both in training heat, not just a cool morning ride, before committing to either for race day.
Handling Bottle Refills Without Breaking Your Position
Placement choice isn’t just about drag at cruising speed. It also determines how much time and position disruption you absorb every time you grab a fresh bottle at an aid station or transition. A saddle-mounted bottle that’s fast in clean air but awkward to remove and replace one-handed at speed can cost you more in fumbling and lost focus than it ever saved aerodynamically.
Before race day, practice your actual refill motion at race pace, not just at a standstill. If your chosen mount requires two hands or a full stop to swap bottles safely, factor that time into your overall strategy rather than assuming the aero data alone tells the full story. Riders who plan to grab bottles from aid stations should test that their cage or mount accepts a quickly grabbed, unfamiliar bottle rather than only the specific bottle they trained with, since many aid-station bottles differ in shape and cap style from personal race bottles.
For triathletes moving through transition, bottle placement also affects your T1 or T2 setup speed. A between-the-arms system that needs careful clipping into an aerobar mount takes longer to install under transition pressure than a simple cage a volunteer or athlete can drop a bottle into on the move. If your race allows special-needs bags or course aid stations, plan which bottle position you’ll refill and which you’ll leave alone, so you’re not stopping to rebuild your entire hydration setup mid-race. Testing this exact sequence in a brick session, transition included, catches problems no wind tunnel will ever reveal.
What I’d Tell a Rider Chasing Watts Over Bottles
Most riders overweight the wind-tunnel number and underweight their own ability to actually use a bottle at race pace. The data is clear that downtube round bottles cost the most watts, but the riders who benefit most from that finding aren’t the ones blindly copying a between-the-arms setup from a pro they follow online. They’re the ones who test their own reach, their own torso angle, and their own hydration needs against that data before committing.
A fitting approach that accounts for a rider’s actual position and race distance, rather than a generic “fastest” label pulled from a single test, reflects a rider-first logic. A short-course TT specialist and a long-course triathlete carrying three bottles through July heat need fundamentally different hardware, even if both are chasing the same watt savings. The honest answer to “where should my bottle go” is almost never a single universal placement. It’s a short list of good options ranked by how well they match your posture and your race.
— Matt
Get Your Aero Bottle Setup Right With Sport Factory Pro Shop
Reading watt data is one thing. Finding a saddle mount that actually clears your seatpost or an aero bottle that seals properly in a tight cage is another. Specialized cycling shops offer aero bottles, secure saddle mounts, and cage systems built for racing rather than commuting, curated for riders aiming to close the gap between test data and race-day reliability.

Test your chosen placement in training first, checking reach, security, and refill speed exactly as outlined above, then match the hardware to what actually worked. If you’re weighing a between-the-arms system against a saddle mount for your next race, or need a cage that won’t rattle loose on rough pavement, browse cycling gear to find components suited to your frame, position, and race distance. If you’re also planning race travel, our guide on flying with CO2 cartridges covers another logistics detail worth sorting out before race week.
Primary Sources and Further Reading
These are the original test write-ups and expert breakdowns behind the watt and time figures cited above:
- Expert Tested: The Fastest (and Slowest) Places To Attach Your Water Bottle, AeroCoach field testing of common bottle placements.
- Wind Tunnel Tested: Where Should You Carry Your Bottles?, Cyclingnews wind-tunnel comparison of round versus aero bottles.
- Ride Faster With the Right Bottle Placement on Your Bike, simulation-based analysis of posture-dependent placement.
- Aero Fitting on TT and Triathlon Bikes, positioning guidance affecting overall CdA.
Sources
- Expert Tested: The Fastest (and Slowest) Places To Attach Your Water Bottle
- Wind tunnel tested: Where should you carry your bottles? | Cyclingnews
- Ride faster with the right bottle placement on your bike - Triathlon Magazine