


Tire Rotation Direction for Competitive Cyclists
Posted by Matt Russ on 14th Aug 2026
Tire Rotation Direction for Competitive Cyclists
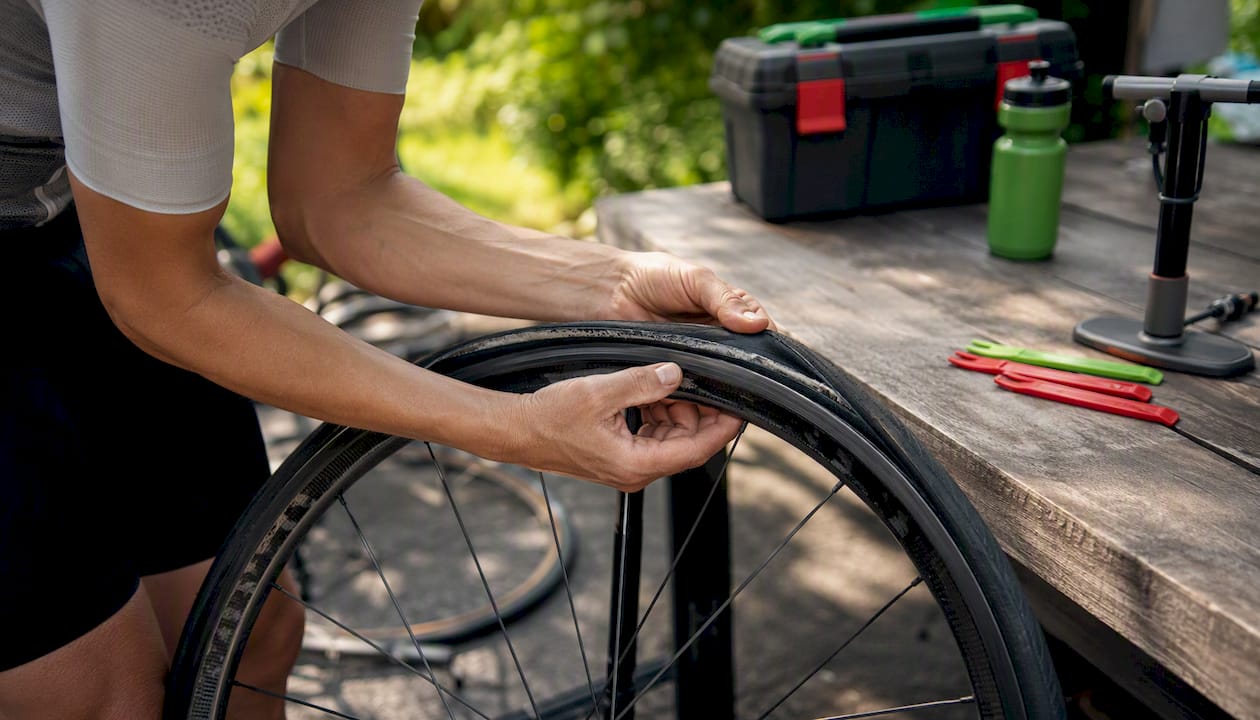
If your tire has a manufacturer-stamped rotation arrow on the sidewall, that arrow is the single authoritative guide. Follow it, no debate needed. When no arrow exists, tread direction only matters if the pattern is asymmetric or aggressive, and especially in wet or loose conditions. Slick road race tires in dry conditions typically show no meaningful performance difference when mounted in either orientation, a point confirmed by manufacturer feedback and independent testing. Schwalbe and other major tire makers use rotation markings primarily to optimize wet-weather water shedding and, in some cases, aesthetics. Sport Factory Pro Shop treats the manufacturer arrow as the starting point for every tire setup, then helps riders tune front/rear placement for braking or propulsion depending on the event.
Here is what this guide covers:
- When the manufacturer arrow is non-negotiable vs. when you have flexibility
- How to inspect a sidewall in under 90 seconds
- Front vs. rear tradeoffs for braking, climbing, and rolling resistance
- Step-by-step mounting for clinchers and tubeless setups
- Whether to rotate front and rear for wear, and what directionality prevents
Pro Tip: If you are unsure whether your tire is directional, check both sidewalls before touching the wheel. The marking is almost always there; it just takes a moment to find it.
Key Takeaways
The manufacturer’s rotation arrow is the single authoritative guide for tire direction; when no arrow exists, tread symmetry and riding conditions determine whether orientation matters at all.
| Point | Details |
|---|---|
| Follow the arrow first | A manufacturer-stamped rotation arrow overrides any assumption from tread shape or visual inspection. |
| Slick road tires are flexible | Many road race tires show no meaningful performance loss when mounted reversed in dry conditions. |
| Front vs. rear placement matters | Front tires prioritize braking; rear tires prioritize drive traction. Choose orientation accordingly. |
| Tubeless remounts need extra care | Re-seat the bead fully and check sealant distribution after every directional remount or rotation. |
| Sportfactoryproshop handles setup | Professional mounting, pressure tuning, and pre-mounted shipping are available for competitive riders. |
Table of Contents
- How do you check a tire for rotation direction markings?
- When does tread orientation actually affect your performance?
- How to mount or remount a directional high-performance tire
- Should you rotate front and rear tires to even out wear?
- What safety checks should you run after mounting a tire?
- Common myths about tire rotation direction
- How Sportfactoryproshop advises customers on tire direction and setup
- Tire direction is a tunable setting, not just a rule to follow
- Sportfactoryproshop has the tires and expertise to get your setup right
- Sources
How do you check a tire for rotation direction markings?
A quick sidewall inspection takes about 60–90 seconds and removes all guesswork. Sidewall arrows, the word “ROTATION,” or explicit “FRONT”/“REAR” markings are authoritative and override any assumption based on tread shape, so the inspection always starts there, not with the knobs.
Inspect both sidewalls in bright, indirect light. Embossed arrows are often camouflaged by black rubber or rim-bead buildup, and they hide in the narrow band between the logo text and the bead edge. Tracing your fingertip around the full perimeter of each sidewall catches markings that eyes alone miss.
Follow these steps:
- Remove the wheel and hold it at eye level in good light.
- Scan both sidewalls for a printed or embossed arrow, the word “ROTATION,” or the labels “FRONT” and “REAR.”
- If you find an arrow, orient the wheel so the arrow points forward at the top of the wheel. That is the correct mounting direction.
- If no marking appears, look at the tread from above. V-shaped channels, ramped knobs, or angled center ramps indicate an asymmetric or directional pattern. Orient the point of the V to face forward.
- If the tread is symmetric or slick with no marking, the tire is non-directional and can be mounted either way.
Pro Tip: Use a phone flashlight held at a low angle to the sidewall. The raking light casts shadows across embossed text and arrows that are invisible under overhead lighting.
When does tread orientation actually affect your performance?
Direction matters most when the tread is doing real work: moving water, biting into loose ground, or generating braking force. On a smooth road in dry conditions, a slick or near-slick race tire mounted backward rarely costs you anything measurable. The calculus changes fast once conditions get wet or the surface gets loose.

Schwalbe explains that separate FRONT and REAR arrows exist because braking and drive forces act in different directions. The front wheel decelerates; the rear wheel accelerates. A tread pattern optimized for one job can be a compromise on the other, which is why some tire lines ship with distinct front and rear models.
For competitive riders, the practical tradeoffs break down like this:
- Rolling resistance: Tread oriented with ramps facing backward (trailing edge leading) tends to roll slightly faster on smooth pavement. The rubber deforms less aggressively on contact.
- Braking bite: Ramps or knobs oriented to dig in as the wheel decelerates improve stopping distance on loose or wet surfaces. This matters most on the front wheel.
- Climbing and acceleration: The rear wheel benefits from tread that grips under drive force. On gravel or mixed terrain, orienting the rear tire for traction over speed is often the right call.
- Wet conditions: Directional V-channels shed water outward when mounted correctly. Reversed, they can funnel water toward the center contact patch instead.
Some off-road tire lines take this further by offering dual arrows that let riders flip orientation intentionally to favor grip or lower rolling resistance, making direction a deliberate setup variable rather than a fixed rule.
Decision checklist:
- Manufacturer arrow present? Follow it.
- Wet criterium or muddy gravel race? Orient for braking on the front, traction on the rear.
- Long dry time-trial on smooth pavement? Either orientation on a slick tire is acceptable; prioritize low rolling resistance.
- Asymmetric tread, no arrow? Point the tread forward when viewed from above.
How to mount or remount a directional high-performance tire
Preparation prevents the mistakes that cost time on race day. Gather tire levers, a floor pump with a gauge, soapy water (for tubeless), and a clean workspace before you start. Confirm the tire’s marked direction and note the valve position on the rim before demounting.
| Step | Action | Notes |
|---|---|---|
| 1 | Confirm arrow direction on sidewall | Mark with chalk if embossed arrow is faint |
| 2 | Seat one bead fully around the rim | Start opposite the valve stem |
| 3 | Insert tube (clincher) or add sealant (tubeless) | Tubeless: shake to distribute sealant evenly |
| 4 | Work second bead onto rim by hand | Avoid tire levers on the final section if possible |
| 5 | Confirm arrow points forward at top of wheel | Rotate wheel to verify before inflating |
| — | Inflate to minimum seating pressure | Tubeless: high PSI burst to seat bead, then reduce |
| — | Check bead is seated evenly around full circumference | Look for the molded line sitting just above the rim edge |
| — | Set final PSI to rim and tire rating | Never exceed the maximum PSI printed on the sidewall |
After remounting a directional tire, re-seat the bead fully and verify rim/tire compatibility and PSI limits. Tubeless systems need particular attention to sealant distribution and bead seating after any rotation or remount.
Pro Tip: Align the tire’s logo or label with the valve stem every time you mount. This gives you a consistent reference point for tracking wear patterns and makes it easy to locate a puncture relative to the valve during a flat repair.
Should you rotate front and rear tires to even out wear?
Rear tires wear faster than front tires on most road and gravel setups because they carry more of the rider’s weight and absorb all the drive force. Swapping them can extend total tire life, but directionality creates a hard constraint.
When rotation makes sense:
- The tire has a symmetric or non-directional tread and no rotation arrow.
- Both tires are the same model and size.
- The rear tire shows significantly more wear than the front.
When rotation is not appropriate:
- The tire has a directional arrow. Swapping front to rear reverses the tread orientation unless you remount the tire on the rim.
- The manufacturer specifies separate front and rear models. These are not interchangeable.
- The rear tire is worn past its wear indicators. Rotating a worn tire to the front increases braking risk.
If you decide to flip a directional tire between positions, you must remount it on the rim so the arrow still points forward in the new wheel position. That means a full demount and remount, not just a wheel swap. Follow the mounting sequence above, confirm the arrow direction after seating the bead, and re-check PSI before riding.
For competitive riders, the honest answer is that preserving directional performance usually outweighs the mileage savings from rotation. Replace the rear tire when it wears out and move the front tire to the rear at that point if it is non-directional and still has usable life.
What safety checks should you run after mounting a tire?
Before any hard training or racing effort, run through these checks after every mount or remount:
- Bead seating: The molded bead line should sit evenly just above the rim edge all the way around. An uneven bead can blow off under load.
- Sidewall alignment: No bulges, folds, or pinched sections visible when you spin the wheel.
- Valve stem position: Straight and unobstructed, not canted at an angle that suggests the tube is twisted (clincher).
- Inflation: Set to the correct PSI for your weight and rim. Confirm with a calibrated gauge, not by feel.
- Tubeless air retention: Listen for hissing, apply soapy water around the bead and valve base, and watch for bubbles.
- Arrow confirmation: With the wheel mounted on the bike, confirm the rotation arrow points toward the front of the bike at the top of the wheel.
A directional tire mounted backward may not deliver intended handling, braking, or water-shedding performance, and the risk is highest on loose or wet surfaces. If anything looks off after the static check, correct it before riding.
On your first shakedown ride, stay at moderate speed for the first few minutes. Notice any odd vibration, squirming under cornering load, or pressure loss. Stop and recheck if any of those appear.
Common myths about tire rotation direction
Myth: Tread always points forward. This is only true for asymmetric or directional patterns. Many road tires have symmetric tread or are fully slick, and the visual “pointing” cue means nothing for them. When no marking exists and the tread is symmetric, either orientation is correct.
Myth: Direction only affects looks. On treaded or off-road tires, orientation has real effects on water shedding, braking distance, and climbing traction. Reversing a directional tire on a wet descent is a genuine handling risk.
Common pitfalls to avoid:
- Ignoring the sidewall arrow because the tread “looks right.”
- Swapping front and rear wheels without checking whether the tire is directional.
- Failing to re-seat tubeless beads after rotating tires, which can cause slow leaks.
- Misreading an embossed arrow because it was inspected in poor light or only on one sidewall.
Pro Tip: When reading a rotation arrow, hold the wheel in front of you and imagine it rolling away. The arrow should point in the direction the top of the wheel is moving. This mental model catches misreads that happen when the wheel is lying flat.
How Sportfactoryproshop advises customers on tire direction and setup
Sportfactoryproshop treats the manufacturer’s rotation arrow as the starting point for every tire installation. During service, wheel and tire orientation are documented so that riders have a clear record for future wear tracking and remounts.
Service offerings include:
- Pre-sale advice: Guidance on front/rear tire selection based on the rider’s event type, terrain, and weight.
- Professional mounting: Clincher, tubeless, and tubular installation with bead seating confirmed before the wheel leaves the shop.
- Pressure tuning: PSI set to the rider’s weight and rim specification, not a generic range.
- Post-mount inspection: Full bead and sidewall check before any test ride.
For riders who prefer to buy tires online, Sportfactoryproshop offers pre-mounted shipping options so the tire arrives correctly oriented and ready to install. In-person mounting appointments are also available for riders who want a mechanic to confirm the setup before a key event.
Pro Tip: If you are ordering tires online and are unsure about front/rear placement for your specific setup, contact Sportfactoryproshop before checkout. A brief conversation about your event type and terrain can save a remount.
Tire direction is a tunable setting, not just a rule to follow
Most riders treat the rotation arrow as a compliance checkbox. The more useful frame is to see it as a starting point for performance tuning. The arrow tells you what the manufacturer optimized for, but some tire lines explicitly allow flipping orientation to shift the balance between grip and rolling resistance. That is a real setup decision, not a workaround.
For a wet criterium, orienting both tires for maximum braking and water shedding is the right call, even if it costs a small amount of rolling efficiency. For a long dry time-trial on smooth pavement, a slick tire in either orientation is unlikely to change your result. The conditions and the event should drive the decision, with the manufacturer’s guidance as the anchor.
Documenting orientation matters more than most riders realize. Mark each tire with a paint pen noting the direction and the date of installation. After a season, you will have real data on wear patterns by orientation and position, which makes the next setup decision faster and more informed.
Sportfactoryproshop has the tires and expertise to get your setup right
Riders who want professional mounting, pressure tuning, or access to a curated selection of high-performance tires will find everything they need at Sportfactoryproshop. The shop stocks tubeless-ready tires, clinchers, and tubular options selected for engineering quality and rider-focused performance.

Professional mounting includes full bead seating confirmation, PSI set to your weight and rim spec, and a post-mount inspection before the wheel ships or leaves the shop. Pre-mounted shipping is available for online orders, so your tire arrives correctly oriented and ready to ride. All installations come with a warranty on the mounting service, and the team is available to answer setup questions before and after purchase.
Browse the full selection and book a mounting service at Sportfactoryproshop.
Sources
These sources informed the guidance above and are worth bookmarking for deeper reference:
- Direction on directional bicycle tires
- Do Bike Tires Have a Direction? How to Check - BikeRideReview
- Do Bike Tires Have a Direction? How to Read Tread Arrows
- Does it matter what way the tires go if no directional arrow?