

How to Service SPD Pedals: A Complete DIY Maintenance Guide
Posted by Matt Russ on 22nd Aug 2026
How to Service SPD Pedals: A Complete DIY Maintenance Guide
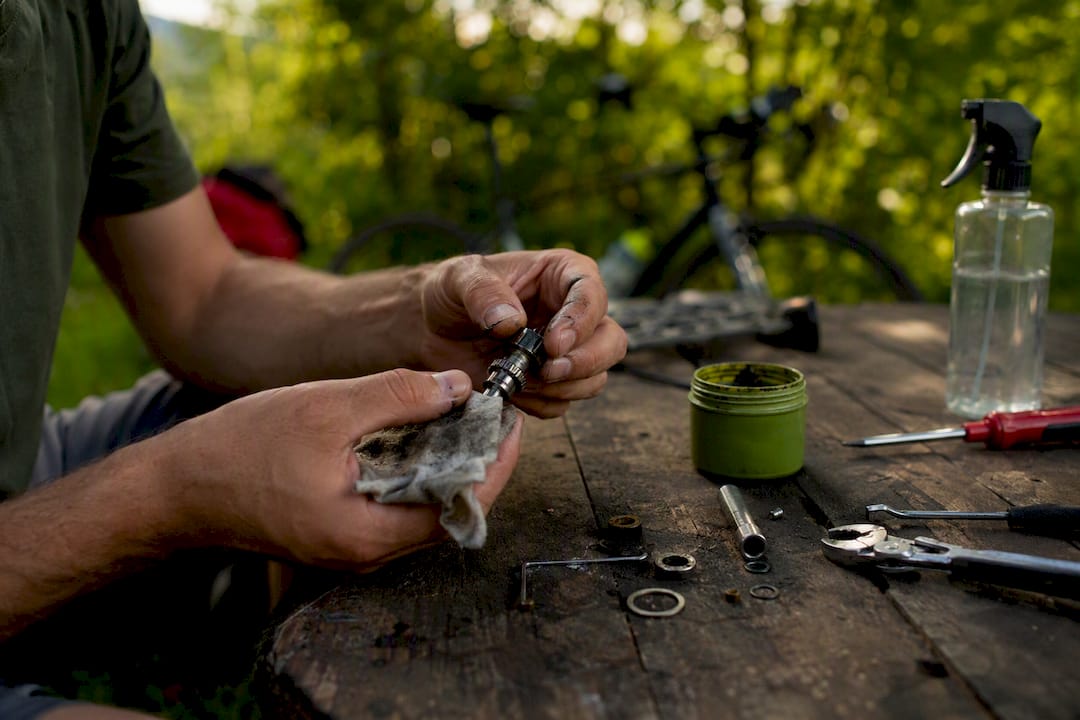
Most Shimano SPD pedals are fully serviceable at home, and the fix usually takes less time than washing your bike. A five-minute grease purge solves the majority of creaks, sluggish clip-in, and light bearing roughness. A full bearing overhaul, needed when there’s noticeable side-to-side play or a grinding feel, runs 30 to 60 minutes for a beginner.
You’ll know which path to take once you spin the axle by hand. Smooth with no wobble but a little dry? Quick refresh. Gritty, loose, or clunky? Full overhaul.
- Quick refresh: clean, purge, re-grease, reinstall (5 minutes)
- Full overhaul: axle removal, bearing inspection, preload adjustment, re-grease (30 to 60 minutes)
- Replace instead of service: seized bearings, pitted races, or a cracked collar
Quick fact: A full teardown at the workbench, done correctly, restores most SPD pedals to like-new smoothness without buying new parts.
Key Takeaways
A five-minute grease purge resolves most SPD pedal problems, while a full bearing overhaul with proper preload adjustment restores pedals that have developed play or grinding.
| Point | Details |
|---|---|
| Diagnose before you disassemble | Spin the axle by hand; smooth but dry means refresh, gritty or loose means full overhaul. |
| Confirm thread direction first | The drive-side collar is reverse-threaded, so check before applying force with a wrench. |
| Use small preload adjustments | Turn the locknut in 15 to 20 degree increments and re-check for play before locking it down. |
| Follow the torque spec | Body cover screws tighten to 2.7 to 3.5 N·m; overtightening cracks the plastic cover. |
| Stock the right supplies | Sportfactoryproshop carries waterproof grease, soft-jaw inserts, and pedal tools for both service paths. |
Table of Contents
- Tools and Supplies You Need Before You Start
- Doing a Five-Minute Pedal Refresh
- When and How to Do a Full Bearing Overhaul
- Cleaning the Pedal Body and Checking Small Parts
- Reassembling and Testing Your SPD Pedals
- Troubleshooting Stubborn SPD Pedal Problems
- Shop-Tested Tips for an Easier, Safer Service
- Why the “Just Replace Them” Advice Gets This Wrong
- Where to Get the Right Grease, Tools, and Parts
- Frequently Asked Questions
- Sources
Tools and Supplies You Need Before You Start
Grabbing the wrong wrench mid-job is how strip a collar or lose a ball bearing under the workbench. Get everything laid out first.
- Pedal wrench or Shimano TL-PD40: the dedicated tool for removing the axle unit on most SPD models; a 17mm cone spanner works as a substitute on some designs
- Allen keys (8mm long-reach): needed for models where the axle unit threads in via a hex fitting instead of a collar
- 7mm and 10mm spanners: for holding the cone while adjusting the locknut during a full overhaul
- Waterproof, Teflon-infused grease: the standard choice for SPD bearing units and pivot points
- Soft-jaw vice inserts: protect the pedal body from crush marks when you clamp it down
- Small-parts tray and rags: keeps loose bearings and springs from vanishing into the shop floor
Pro Tip: Work under strong, direct light. Loose ball bearings are small enough to bounce off a bench and disappear into a shadow, and you won’t notice a missing bearing until the pedal feels rough again a week later.
Doing a Five-Minute Pedal Refresh
This is the maintenance most riders should do every few months, especially after wet or muddy rides. It doesn’t require opening the bearing unit at all.
- Wipe the pedal down externally. Clean off grit and mud before you touch any moving part, so you’re not grinding sand into the mechanism when you loosen it.
- Loosen the collar and slide the axle unit out slightly. This purges old, contaminated grease without a full teardown. Fresh waterproof grease packed into the body forces the old, dirty grease out ahead of it, carrying grit with it.
- Refill the pedal body with fresh grease and reinsert the axle, threading the collar back by hand first to avoid cross-threading.
- Add a single drop of medium-weight oil to the cleat jaw springs, but only if they feel stiff. Excess oil on the pivot springs attracts dirt and creates the same grinding feel you’re trying to fix.
Spin the axle by hand once you’re done. You should feel a smooth, even resistance with no catching. That’s the sign the refresh worked, and for most riders, that’s the entire service they’ll ever need between full overhauls.
When and How to Do a Full Bearing Overhaul
Persistent play, a grinding sensation, or a pedal that’s been ridden hard through a wet winter calls for a complete teardown. This is where the actual bearing surfaces get inspected, not just re-greased.
- Confirm thread direction before touching a wrench. The drive-side (right) pedal collar is reverse-threaded, so turning it the “normal” direction tightens it further instead of loosening it. Getting this backward is the single most common way riders strip a collar.
- Clamp the pedal body in a vice with soft jaws, then use the TL-PD40 or the correct spanner to remove the axle unit as one piece.
- Inspect the bearing surfaces, cones, and races closely. Pitting, discoloration, or a rough grinding feel when you roll a cone by hand means those parts need replacing rather than re-greasing. If play remains after correct adjustment, the races or cones themselves are worn.
- Clean everything with degreaser and let it dry fully before touching new grease to any surface.
- Adjust bearing preload using the cone and locknut. Hold the cone steady with one spanner while turning the locknut with the other, and make small moves. The right feel is no lateral play but still a free, unrestricted spin.
- Pack the bearing area with fresh waterproof grease before final reassembly, using enough to fully surround the bearings without overfilling the cavity.
The adjustment step is where most people rush and get it wrong. Turn in increments of roughly 15 to 20 degrees, then check for play and spin resistance before making another adjustment. Overtightening here is what causes premature bearing wear, not underuse.
Pro Tip: Work on one pedal completely before starting the other. Left and right axle units, cones, and springs are not always interchangeable, and mixing parts between pedals is a fast way to create a fitment problem you didn’t have before.
Cleaning the Pedal Body and Checking Small Parts
A clean pedal body tells you a lot before you even touch a wrench. Grit trapped around the cleat mechanism or body screws is often the real cause of a “pedal problem” that has nothing to do with the bearings.
- Use a citrus-based degreaser and a stiff brush to clear built-up grime from the cleat retention mechanism and body seams.
- A short blast of compressed air clears grit from tight crevices around the spring mechanism without needing to disassemble it.
- If loose ball bearings come out during cleaning, count them and keep them in a magnetic tray. Losing even one changes the preload feel permanently.
- Check the body cover screws for tightness and corrosion. Shimano specifies a torque range of 2.7 to 3.5 N·m for these screws, and a loose cover is often mistaken for bearing play.
- If clip-in or release feels inconsistent, check the cleats themselves before blaming the pedal body. Worn cleats create the same symptoms as a worn mechanism.
Reassembling and Testing Your SPD Pedals
Reassembly mistakes cause more damage than the original wear ever did, so slow down here even if the teardown went fast.
- Start every thread by hand before reaching for a wrench, and remember the drive-side collar tightens counterclockwise, not clockwise.
- Wipe away excess grease once the collar or axle unit is snug. Grease that squeezes out during tightening will attract dirt on your first ride.
- Torque body cover screws to 2.7 to 3.5 N·m if you have a torque wrench that goes that low. Without one, snug plus a quarter turn is a reasonable approximation for these small fasteners.
- Spin the axle by hand and confirm even, smooth resistance with zero lateral play at the platform.
- Compare left and right pedals by feel. They should have matching spin resistance; a mismatch usually means one side needs another small preload adjustment.
- Clip in and out several times off the bike before your first ride to confirm the spring tension and release angle feel normal.
A short parking-lot ride, clipping in and out a few times at low speed, catches problems before they happen at real riding speed. If something still feels off after a correct reassembly, that’s your cue to move to troubleshooting rather than tightening things further.
Troubleshooting Stubborn SPD Pedal Problems
Some issues won’t resolve with grease or adjustment, and knowing the difference saves you from chasing a fix that doesn’t exist.
- Metal-on-metal grinding that persists after a full overhaul almost always means a worn race or cone, not a lubrication problem.
- Lateral play that returns immediately after correct preload adjustment points to worn bearing surfaces rather than a loose locknut.
- A cracked or deformed collar is a safety issue, not a cosmetic one. Replace it before riding again.
- Inconsistent clip-in or unclipping force is frequently a worn cleat, not a pedal fault. Shimano recommends replacing cleats once release behavior changes noticeably, which is often cheaper and faster than servicing the pedal itself.
- A creak that survives regreasing can come from the cleat bolts or shoe sole rather than the pedal, so check those before pulling the pedal apart again.
Shop-Tested Tips for an Easier, Safer Service
A little shop-floor knowledge saves you from the two mistakes that ruin most home services: crushed pedal bodies and over-lubricated springs.
- Soft-jaw vice inserts or a folded rag between the jaws and pedal body prevent the crush marks that come from clamping bare aluminum.
- Waterproof, Teflon-based grease resists washout far better than general-purpose grease on pedals that see wet rides regularly.
- A grease port is a worthwhile upgrade if you service pedals often, since it lets you purge grease without a full teardown, though it isn’t compatible with every model and requires careful drilling to add.
Pro Tip: Keep your fresh grease application to about a fingertip’s worth, roughly half an inch, packed inside the body cavity. More than that just gets forced out and wasted during reassembly.
Why the “Just Replace Them” Advice Gets This Wrong
The prevailing internet wisdom on worn pedals defaults to replacement far too quickly, and it’s worth pushing back on that. A pedal with a little roughness or a slightly stiff spring isn’t dead. Regreasing alone often restores years of smooth operation, and the factory grease that shipped with your pedals was never meant to last forever in wet or muddy conditions.
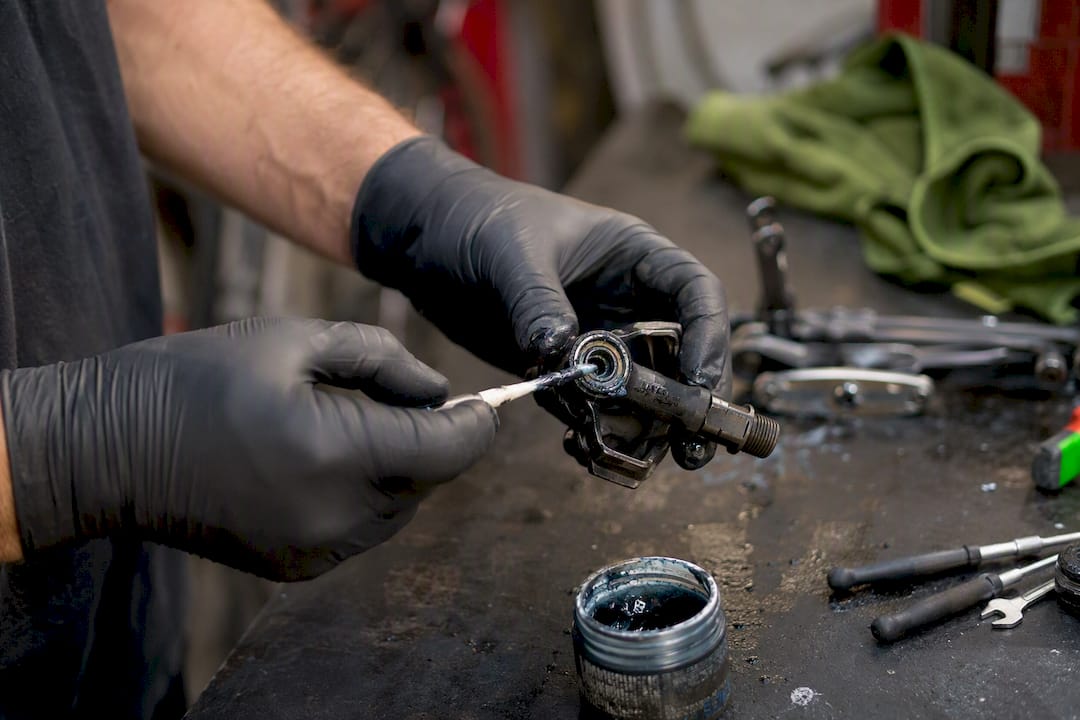
What conventional advice underestimates is how forgiving the preload adjustment actually is once you understand the feel you’re chasing: no lateral play, but still a free spin. That’s a skill built through small, patient adjustments, not brute force. Most riders who “fail” at servicing their own pedals didn’t lack the mechanical ability. They rushed the adjustment step or skipped the thread-direction check on the drive side.
Prioritize the quick refresh as routine maintenance, not a last resort. Riders who regrease every few months rarely need the full overhaul at all, because they never let contaminated grease sit long enough to damage the bearing surfaces in the first place.
Where to Get the Right Grease, Tools, and Parts
Doing this job right depends more on having the correct grease and a properly fitting tool than on mechanical skill. A pedal wrench that slips, or a general-purpose grease that washes out after one wet ride, turns a five-minute job into a frustrating one.

Sportfactoryproshop stocks waterproof, Teflon-based grease built for bearing units like the ones in your SPD pedals, along with soft-jaw vice inserts that protect the pedal body during teardown and small-parts trays that keep loose bearings from disappearing mid-service. If you’re assembling a home tool kit for the first time, start with a proper pedal spanner or TL-PD40 equivalent, a set of 7mm and 10mm cone spanners, and a tube of waterproof grease. That covers both the quick refresh and the full overhaul described above. Visit the Sportfactoryproshop store to browse the current lineup of pedal maintenance supplies and get your next service done right the first time.
Frequently Asked Questions
How often should I service SPD pedals? A quick refresh every few months, or after wet and muddy rides, keeps most pedals running smoothly. A full overhaul is only needed when you notice actual play or grinding, which for many riders happens every year or two depending on mileage.
Can I use regular grease instead of waterproof grease? General-purpose grease works in dry conditions, but it washes out faster in wet weather. Waterproof, Teflon-based grease holds up better against water and grit inside the bearing unit.
Why is my SPD pedal collar not loosening? Check thread direction before forcing it. The drive-side collar on most Shimano SPD pedals is reverse-threaded, so it loosens clockwise instead of counterclockwise.
Do I need to remove the ball bearings to service the pedal? Usually not. Purging old grease with fresh grease and adjusting preload solves most issues without ever separating loose ball bearings from their housing, which also avoids the risk of losing one.
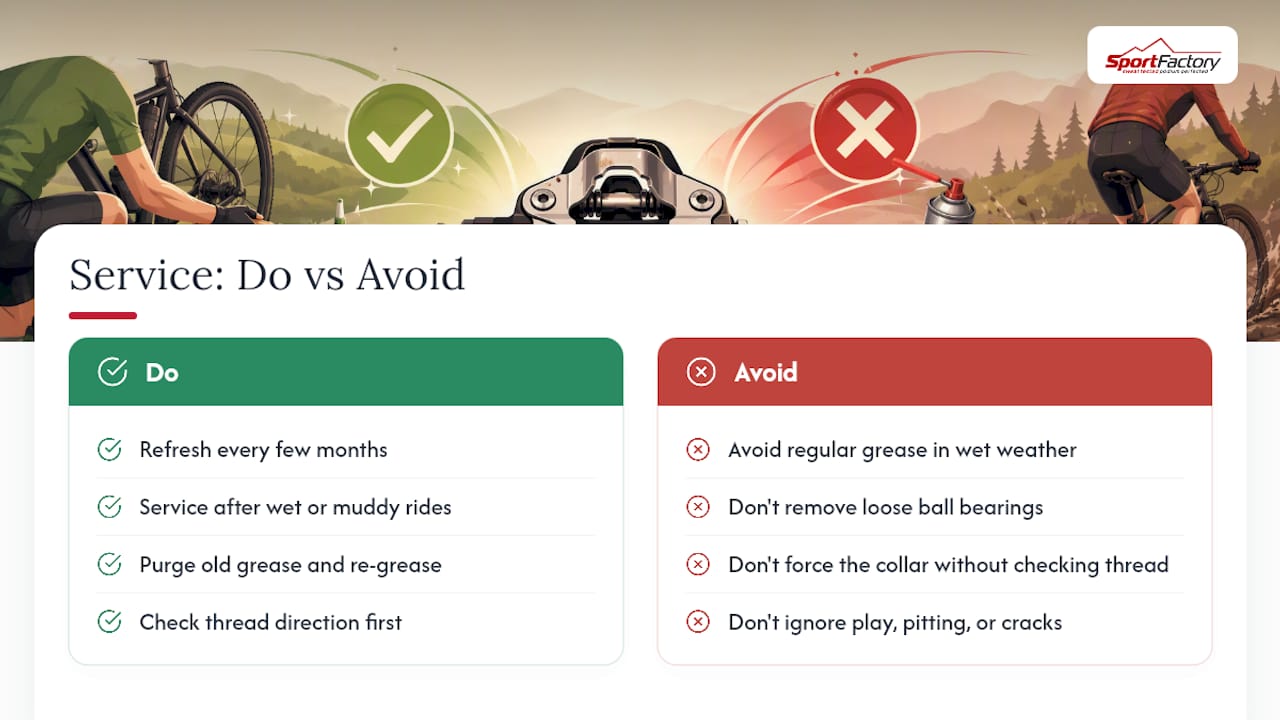
How do I know if my pedal needs replacing instead of servicing? Persistent lateral play after a correct preload adjustment, visible pitting on the bearing races, or a cracked collar all point to replacement rather than another service attempt.
Sources
- Shimano® SPD Pedal Service | Park Tool
- How to service Shimano SPD pedals: walkthrough guide with video | BikeRadar
- Shimano technical manual (SPD maintenance details)
- Workshop: Stripping clipless pedals | BikeRadar
- Caring For Shimano Clipless Pedals – Road Bike Rider