


Q-Factor Pedals: How to Tune Stance Width for Comfort
Posted by Matt Russ on 16th Aug 2026
Q-Factor Pedals: How to Tune Stance Width for Comfort
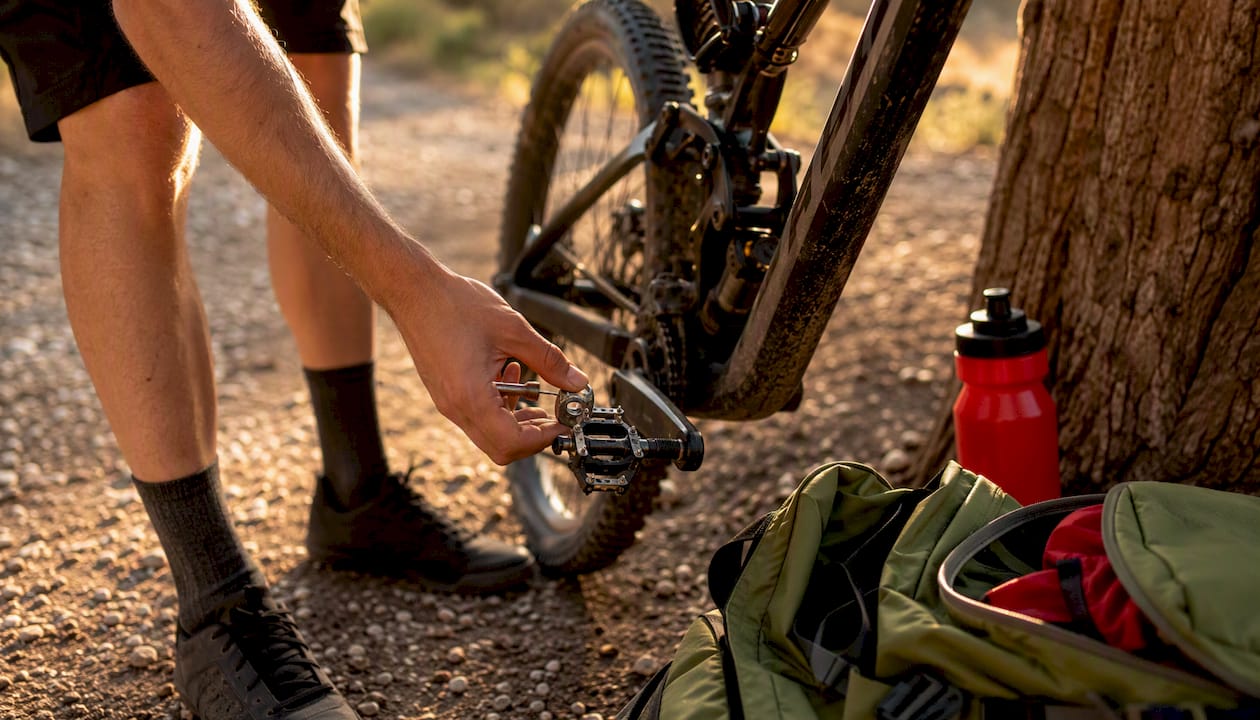
Q-factor is the side-to-side distance between your pedal attachment points, measured parallel to the bottom bracket, and it sets how wide or narrow your feet sit while you pedal. Total stance width is really two numbers stacked together: crank Q-factor (fixed by your crankset design) and pedal or spindle offset (which changes depending on the pedals you run). Before you touch a wrench, here’s your three-step plan: measure your current stance width, run a small controlled test with spacers or a cleat adjustment, and book a professional fitter if pain or asymmetry doesn’t resolve. The rest of this guide walks through the measurement steps, the safe adjustment ladder, typical ranges by discipline, and exactly when self-experimentation should stop and a fitting appointment should start.
Key Takeaways
Getting Q-factor right comes down to measuring your actual stance width, adjusting in small reversible steps, and involving a fitter once pain or asymmetry persists past a basic cleat fix.
| Point | Details |
|---|---|
| Q-factor has two parts | Total stance width equals crank Q-factor plus pedal/spindle offset added on each side. |
| Measure before you buy anything | Use spindle center to spindle center measurements with shoes and cleats on for accuracy. |
| Fix cleat rotation first | Set static cleat angle before touching spacers, pedals, or float, since rotation solves most alignment complaints. |
| Follow the adjustment ladder | Try cleat position, then spacers within manufacturer limits, then pedal swaps before considering a new crankset. |
| See a fitter for persistent pain | Book a professional fit for unresolved knee pain, left-right asymmetry, or multi-parameter changes. |
| Shop compatible parts at Sportfactoryproshop | Sportfactoryproshop carries spacers, pedals, and cleats selected for crank and bottom bracket compatibility to support safe stance-width changes. |
Table of Contents
- What Q-Factor Pedals Actually Change on Your Bike
- How Stance Width Changes Your Pedal Stroke
- Typical Q-Factor Ranges by Riding Discipline
- How to Measure Your Current Stance Width
- Ways to Change Your Stance Width, From Simple to Structural
- What Pedal Spindle Offsets Typically Look Like
- When a Bike Fitter Should Be Your Next Call
- What Years of Fit Questions Have Taught Us About Q-Factor
- Get Your Stance Width Right With Parts Built to Fit
- Frequently Asked Questions About Q-Factor Pedals
- Sources
What Q-Factor Pedals Actually Change on Your Bike
Q-factor and pedal offset aren’t the same measurement, even though riders often use the terms interchangeably. Crank Q-factor is the distance between the outer faces of the crank arms, dictated by the bottom bracket shell width, spindle design, and crank arm geometry. Pedal or spindle offset is the extra distance added (or occasionally subtracted) by the pedal body and spindle length itself. Your actual stance width, the number that matters when your foot meets the pedal, is the sum of both.
This distinction matters because two bikes with identical cranksets can produce noticeably different foot positions once you swap pedals. A rider changing from one pedal system to another) can shift stance width by a centimeter or more without ever touching the bottom bracket.
Here’s where the actual measuring happens:
- Crank Q-factor: measured from the outside face of one crank arm to the outside face of the other, parallel to the bottom bracket centerline.
- Pedal/spindle offset: measured from where the crank arm ends to the center of the pedal platform where your cleat clips in.
- Total stance width: the outside-to-outside distance between the centers of both pedal spindles, which is what your feet and knees actually respond to.
Picture the bottom bracket as the midpoint of a seesaw. The crank arms extend out symmetrically from that center, and the pedals then add their own offset beyond the crank arm’s end. Change either half of that equation and you change where your foot lands relative to your hip socket.
How Stance Width Changes Your Pedal Stroke
Wider stance width pushes your knees outward through the pedal stroke, which can ease pressure on riders with wider hips or bowed lower legs but tends to reduce the sensation of a stable, direct power platform for narrower-framed riders. Narrower stance width brings the knees closer to the top tube, which often feels more efficient to riders with narrow hips but can crowd the ankle and knee joints for anyone whose natural gait tracks wider.

Neither direction is universally “correct.” Your hip width, femur length, and natural foot rotation determine which side of that spectrum suits you, and biomechanical research on crank and pedal spacing continues to explore how these width changes affect joint loading and injury risk over long-term riding.
Watch for these specific symptoms, because they usually point to a specific fix:
- Medial (inside) knee pain often signals a stance that’s too narrow or a cleat rotated to force the foot inward.
- Lateral (outside) knee pain tends to show up when stance width is too wide relative to your natural hip alignment.
- Pressure on the outside edge of your foot can mean your pedal platform sits too far outboard for your foot’s natural angle.
- Saddle discomfort that shows up only while pedaling sometimes traces back to a stance width forcing your pelvis to rock side to side.
Riders experiencing any of these symptoms are generally better served by a fit evaluation than trial-and-error part swapping, especially if the pain is new or worsening.
Pro Tip: Set your cleat rotation (the angle your foot points relative to straight ahead) before you touch Q-factor or float. Fitters at BikeFit treat rotation as the primary alignment tool and float as a secondary safety margin, not a fix for a cleat that’s pointed the wrong way to begin with.
Float, the rotational play your foot has while clipped in, plays a supporting role here. Most clipless systems offer somewhere between 5 and 15 degrees of total float, with some Speedplay models allowing considerably more. More float forgives a slightly imperfect cleat angle, but too much float can leave your foot searching for a stable platform mid-stroke, which costs you a firm sense of connection to the pedal.
Typical Q-Factor Ranges by Riding Discipline
Stance width varies by discipline because bike geometry, tire clearance, and drivetrain design all push crank width in different directions. Road bikes generally run the narrowest cranksets, since narrow Q-factor reduces aerodynamic drag and matches the tighter hip angles common in road-specific fit. Gravel and cyclocross bikes typically run slightly wider crank Q-factor than road, largely to clear wider tires and provide mud clearance, even though the pedals themselves may use similar spindle lengths to road pedals.
Mountain bikes and e-MTBs sit at the wide end of the spectrum. Wider bottom bracket shells, chainstay clearance for larger tires, and motor housings on e-bikes all push crank Q-factor outward, sometimes by a meaningful margin compared to a road crankset.
A few things complicate any attempt to reduce this to a clean chart:
- Track bikes sometimes run unusually narrow Q-factor because there’s no need to clear wide tires or suspension pivots.
- Older and retro cranksets were often built to different bottom bracket standards, so a vintage frame paired with a modern crank can produce an unexpected stance width.
- Some pedal systems publish selectable Q-factor options. Look, for example, documents specific Q-factor choices such as 53mm and 56mm configurations on certain Keo Blade pedal models, letting riders dial in stance width without changing cranksets at all.
Discipline is a starting point, not a rulebook. Your femur length, hip width, and how your knees track naturally through a pedal stroke usually matter more than whatever category your bike falls into. Two riders on identical gravel bikes can need completely different setups once you account for anatomy.
How to Measure Your Current Stance Width
The most reliable home method uses a caliper or a rigid ruler measured pedal spindle center to pedal spindle center, done with the cranks positioned horizontally so both pedals sit at the same height.
- Position the crank arms horizontally, parallel to the ground, so both pedal spindle centers sit at the same height for an accurate comparison.
- Locate the spindle center on each pedal. This is the imaginary line running through the axle, not the outer edge of the pedal body.
- Measure from bottom bracket centerline to one pedal spindle center, then repeat for the other side. Add the two measurements together for total stance width.
- Record left and right separately before adding them. Small manufacturing or installation differences can create asymmetry you’d otherwise miss.
- Repeat the measurement with your shoes and cleats on, standing over the bike if possible, since cleat position and shoe sole thickness both shift your actual foot placement relative to the spindle.
- Compare against manufacturer specifications for your crankset and pedals. Brands sometimes list crank Q-factor and pedal spindle length as separate figures rather than a single combined number, so check both.
If your numbers look inconsistent between left and right, run through this checklist before assuming something’s wrong with your body:
- Confirm both pedals are torqued to the same specification. An under-tightened pedal can sit slightly proud of the crank arm.
- Check spacer orientation if you’ve installed any. A spacer seated unevenly changes effective offset on that side only.
- Inspect chainline and crank arm clearance, especially after a bottom bracket swap. A shifted chainline can look like a Q-factor problem when it isn’t.
Ways to Change Your Stance Width, From Simple to Structural
Start with the least invasive option and work outward. Cleat position and rotation cost nothing and take minutes to adjust, while a new crankset is a bigger investment with more downstream effects.
Here’s the order most fitters recommend working through:
- Cleat position and rotation — the cheapest, most reversible change, and the one that should happen before anything else on this list.
- Pedal spacers — thin washers, commonly available in 2mm and 4mm increments, that slide between the crank arm and pedal to add small amounts of outboard offset. Wolf Tooth’s spacer kit is a good example of how manufacturers package these adjustments for riders.
- Different pedal models or spindle lengths — some pedals, like certain Look Keo Blade options, come with selectable Q-factor built into the spindle design, letting you skip spacers entirely.
- Alternate crankset or bottom bracket choice — the most structural change, since it affects chainline, bottom bracket standard compatibility, and potentially frame fit.
Spacers are convenient, but they’re not infinite. Adjustments should stay within manufacturer-specified limits to avoid overloading pedal bearings or losing thread engagement on the spindle. Stack too many spacers and you risk the pedal spindle bottoming out before it’s fully seated, which is a real mechanical failure point, not just a comfort issue.
| Adjustment | Pros | Cons |
|---|---|---|
| Cleat rotation/position | Free, reversible, fixes most alignment issues | Doesn’t change actual stance width, only foot angle |
| Pedal spacers (2 to 4mm) | Cheap, precise, easy to reverse | Limited range before compromising bearing load or thread engagement |
| Different pedal/spindle length | Can add several millimeters without touching the crank | Cost of new pedals; some systems limit spindle length options |
| New crankset/bottom bracket | Largest possible range of adjustment | Most expensive; may require new bottom bracket standard and can shift chainline |
One thing experienced fitters watch closely: changing Q-factor also changes your effective lever arm length, which can shift how your cleat fore-aft position feels even if you didn’t touch the cleat itself. Fitters typically re-check cleat fore-aft position any time stance width changes meaningfully, rather than treating it as an isolated adjustment.
What Pedal Spindle Offsets Typically Look Like
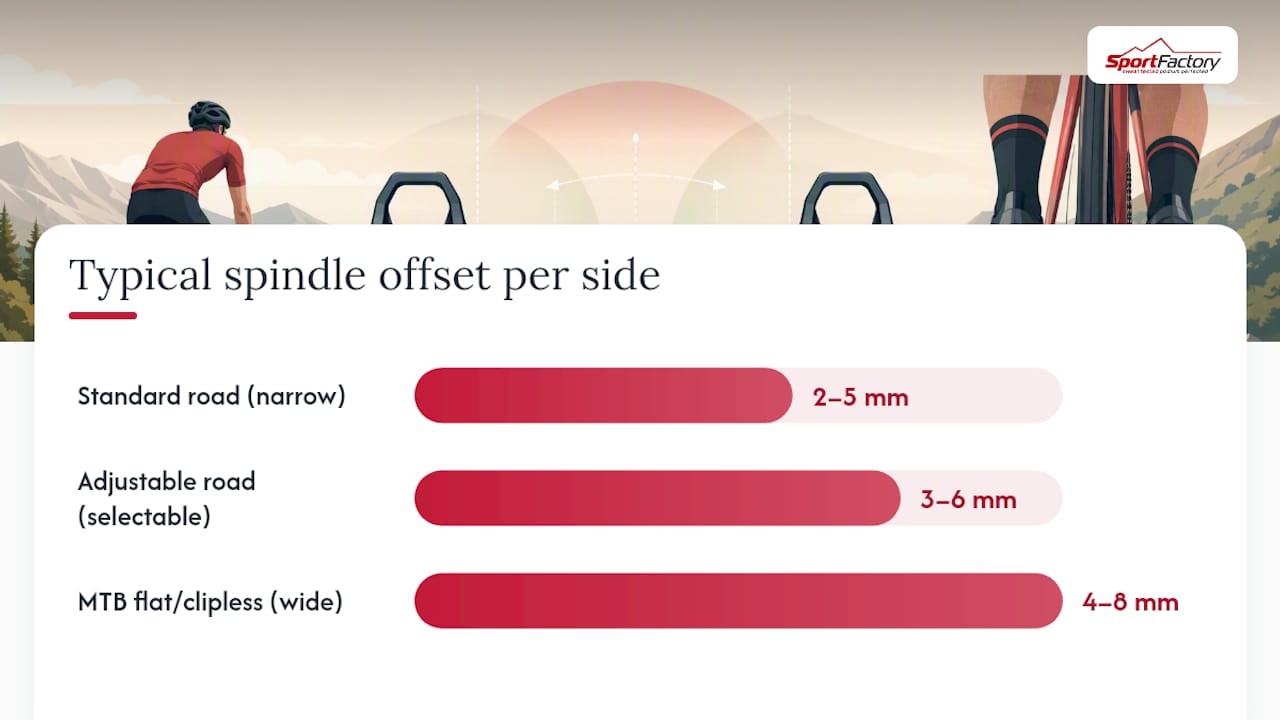
Pedals and their spindles commonly add somewhere between 2mm and 8mm of offset per side compared to bare crank Q-factor, though the exact figure depends heavily on the pedal system and body design. This is illustrative territory rather than a shopping list; think of it as a way to understand where your own pedal choice sits.
| Pedal category | Typical added offset per side | Notes |
|---|---|---|
| Standard road (three-hole cleat) | 2 to 5mm | Narrowest common category, prioritizes aero and direct power feel |
| Adjustable road (selectable Q) | 3 to 6mm, selectable | Some models offer distinct Q options, such as 53mm and 56mm configurations on certain pedals |
| MTB/flat clipless spindles | 4 to 8mm | Wider spindles common to clear knobby tires and off-road stance needs |
| Platform pedals (flat, no cleat) | Variable, foot-position dependent | Rider can shift foot placement on the platform itself, adding a manual adjustment layer |
A handful of riders use a workaround worth knowing about, even if it’s not something to reach for casually: installing a left pedal on the right crank arm (or vice versa) to shift stance width slightly using the spindle’s natural asymmetry. Some fitters and mechanics treat this as a legitimate stop-gap, but it’s a workaround with real trade-offs. It can affect pedal entry and release feel, and not every pedal system tolerates the swap without binding or uneven wear. Confirm compatibility with the specific pedal model before trying it, and treat it as a temporary test rather than a permanent setup.
When a Bike Fitter Should Be Your Next Call
Persistent pain that doesn’t improve after a cleat adjustment, a noticeable left-right asymmetry you can’t explain mechanically, or a situation where you’re changing multiple fit parameters at once are all clear signals to book a professional fitting instead of continuing to guess.
Fitters bring tools and a trained eye that are hard to replicate at home:
- Static foot rotation checks performed off the bike, often with the rider standing, to see how the foot naturally wants to point before a pedal ever gets involved.
- Pedaling video analysis, usually shot from behind and in front, to catch knee tracking issues that are invisible from a saddle-height perspective.
- In-shoe pressure mapping, which shows exactly where load concentrates across the sole during a pedal stroke, often revealing outside-foot pressure long before it becomes painful.
- Cleat position verification with the shoe on the bike, checking that what you set on the workbench actually translates once you’re clipped in and pedaling under load.
A thorough fit follows a sequence for a reason: saddle height and fore-aft first, then cleat fore-aft and static rotation, then stance width, and finally float as a last fine-tuning step. Changing Q-factor partway through can shift your effective lever arm enough that cleat fore-aft needs a second look.
Bring a written record of anything you’ve already changed, including spacer thickness, pedal model swaps, and cleat rotation adjustments, along with the date you made each change. A fitter working from guesswork about your history will waste half the appointment reconstructing what you’ve already tried. If nagging knee tightness or hip mobility is part of what’s driving you toward a fit appointment, a pre-fit mobility check like the one outlined in this [mobility screening checklist for athletes](https alarmed://htktrainingco.wpcomstaging.com/2026/07/19/mobility-restoration-checklist-athletes) can help separate a true fit issue from a flexibility limitation that no amount of spacer tuning will solve.
What Years of Fit Questions Have Taught Us About Q-Factor
Most riders overcorrect. Someone feels a twinge on the outside of one knee, reads that wider stance can help, and jumps straight to a crankset swap before ever checking whether their cleat rotation was the actual culprit. That’s backward. Cleat rotation is free, reversible, and fixes a surprising share of what riders assume is a Q-factor problem.
The other pattern worth calling out: treating manufacturer spec sheets as gospel. A crankset’s published Q-factor tells you nothing about your actual stance width once pedals, spacers, and shoe sole thickness enter the picture. We’ve seen riders chase a “narrow Q-factor” crankset only to land right back where they started because their pedal choice added several millimeters of offset the spec sheet never accounted for. Measure your own bike. The number on the box is a starting assumption, not your answer.
Get Your Stance Width Right With Parts Built to Fit
Once you know the direction you need to move, whether that’s a few millimeters wider for hip clearance or narrower for a tighter power feel, the right spacers and pedals turn that plan into a real adjustment instead of a guess. Before installing anything, check thread compatibility, spacer stacking limits, and torque specifications for your specific crank and pedal combination, since exceeding a manufacturer’s spacer limit is the fastest way to turn a comfort fix into a mechanical problem.

Sportfactoryproshop stocks pedals, cleats, and Q-factor spacer kits selected for compatibility with common crank and bottom bracket standards, so you’re not stacking mismatched parts and hoping for the best. If you’re ready to test a stance width change, browse the current lineup of pedals and stance-width components and check the compatibility notes listed with each product before you order.
Frequently Asked Questions About Q-Factor Pedals
Does changing pedals really change my Q-factor? Yes. Pedal spindle length and body design add offset beyond your crank’s fixed Q-factor, and switching pedal models can shift your total stance width by several millimeters per side without touching the crankset at all.
Is a wider or narrower Q-factor better for power output? Neither is universally better. A stance width matched to your hip width and natural knee tracking tends to feel more stable and efficient than either extreme, which is why measuring your current setup matters more than chasing a specific number.
Can I use pedal spacers safely, or do they weaken the pedal? Spacers are safe within the limits set by the manufacturer, typically in 2mm to 4mm increments. Stacking beyond those limits risks reduced thread engagement and added stress on the pedal spindle bearings.
How much float should my pedals have? Most riders do well with a moderate amount of total float, generally under 8 degrees, enough to accommodate natural foot movement without sacrificing a stable pedaling platform.
What’s the difference between pedal float and Q-factor? Q-factor is the fixed side-to-side stance width your feet sit at. Float is the rotational freedom your foot has while clipped in at that stance width. They solve different problems and should be adjusted separately.
When should I stop experimenting and see a fitter? If cleat rotation adjustments and small spacer changes haven’t resolved knee pain, foot pressure, or noticeable left-right asymmetry within a few rides, a professional fitting will diagnose the issue faster and more precisely than continued trial and error.
Sources
- Tech Q&A: What Does It Mean For A Pedal To Have Float?
- What’s the Difference Between Cleat Rotation and Cleat Float? - BikeFit
This guidance draws on published measurement protocols, manufacturer spacer specifications, and fitter-documented adjustment sequences rather than any single source, since stance width fit decisions genuinely benefit from cross-checking mechanical limits against biomechanical recommendations.