

Racers: Choose a Power Meter That Won't Make You Buy Twice
Posted by Matt Russ on 5th Sep 2026
Racers: Choose a Power Meter That Won’t Make You Buy Twice
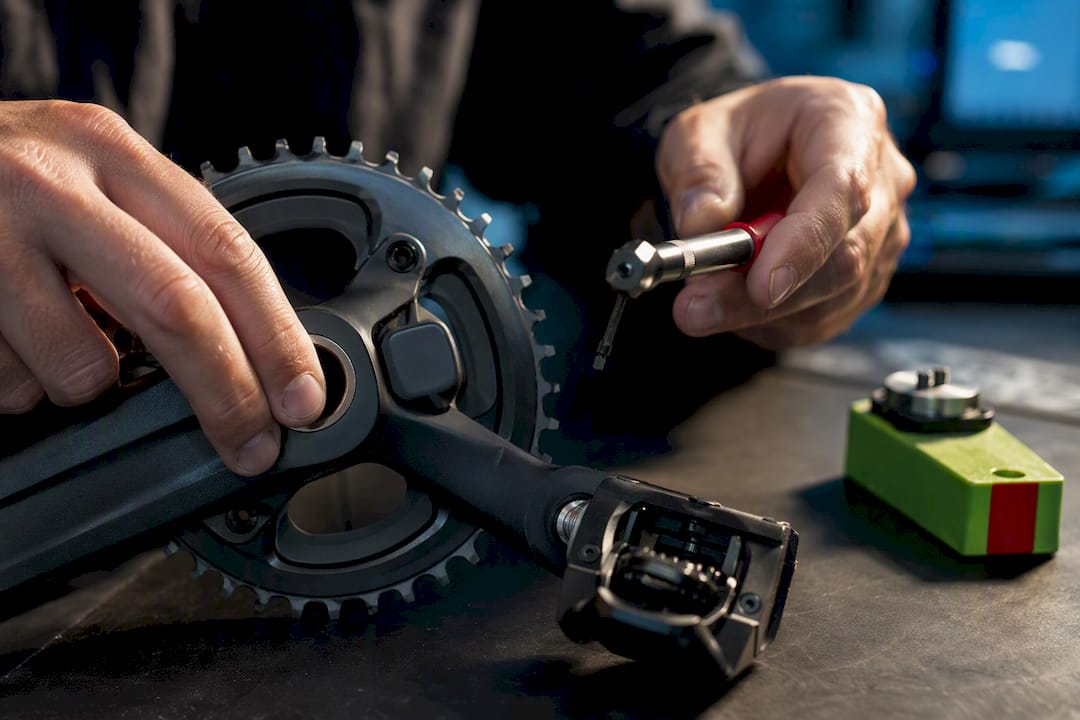
A cycling power meter is the single most effective objective training tool for riders who want measurable, repeatable performance gains. Yes, competitive riders should own one. Pedal, crank, and hub systems each measure watts a little differently, and the right pick depends on how many bikes you own and whether you value swapability or upstream accuracy more. Once you know which family fits, check crank and pedal compatibility before you buy.
TL;DR:
- Pedal-based power meters are easily movable between bikes but are more exposed to impacts and wear.
- Crank or spider-based meters offer upstream accuracy and durability but depend on compatibility with specific bike standards.
- Price varies from around $199 for entry-level single-sided units to over $1,250 for top-tier dual-sided systems, mainly favored by competitive riders.
- Accurate, consistent readings depend on features like Active Temperature Compensation and proper calibration before each ride.
- Data analysis and regular calibration routines are crucial for tracking true fitness progress and maintaining long-term reliability.
Table of Contents
- What Are the Main Types of Power Meters?
- Which Specs Actually Affect Accuracy and Reliability?
- How Do You Choose the Right Power Meter for Your Bike?
- What Should You Expect to Pay for a Power Meter?
- How Do You Use a Power Meter to Train Smarter?
- How Does Sport Factory Pro Shop Help You Choose?
- How Do You Calibrate a Power Meter and Keep It Accurate?
- What Are Common Power Meter Problems and How Do You Fix Them?
- Which Power Meter Brands and Models Are Worth Knowing?
- How Do Temperature and Weather Affect Power Meter Readings?
- How Do You Transfer and Analyze Power Meter Data?
- How Does a Power Meter Compare to Heart Rate and Cadence?
- A Rider’s Honest Take on Making the Switch
- Ready to Add a Power Meter to Your Setup?
- Sources
What Are the Main Types of Power Meters?
Every power meter measures force and converts it into watts, but where that measurement happens on the bike changes what you get. That single design choice drives price, durability, and how easily you can move the unit between bikes.
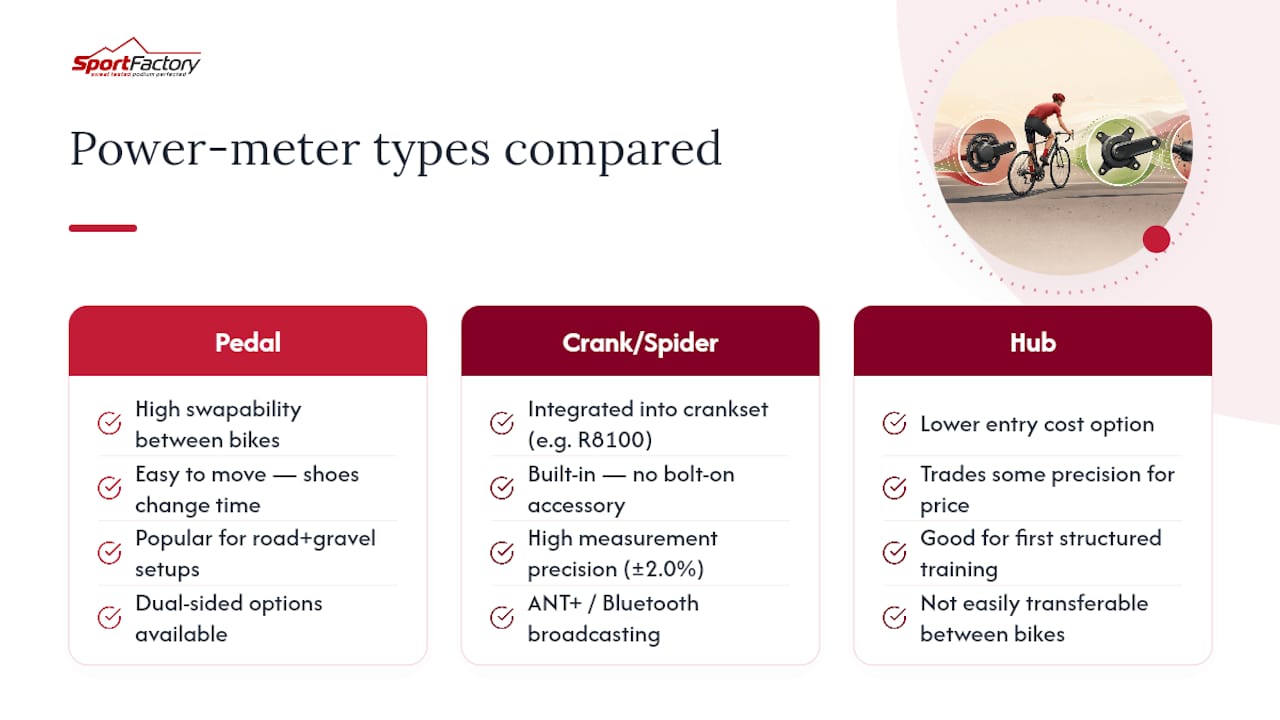
Pedal-based power meters sit in the spindle of the pedal itself. They’re the easiest to swap between bikes, since most riders can move a pedal-based system from one bike to another in minutes. Dual-sided versions capture left/right power independently, which matters if you’re chasing pedaling symmetry. The tradeoff is exposure: pedals take the brunt of curb strikes, gravel spray, and the occasional crash, so they see more wear than components tucked closer to the frame.
Crank or spider-based meters measure force further upstream, at the crank arm or the spider connecting the crank to the chainrings. Because they capture power before it travels through the chain and cassette, upstream measurement at the crank or pedal provides a more accurate reflection of rider output than downstream readings, which lose a small percentage to drivetrain friction. Crank-based units are also more robust than pedals, but installation depends on your bottom bracket standard and chainring compatibility, so a spider designed for one crankset won’t necessarily fit another.
Hub-based systems live in the rear wheel’s freehub. They’re appealing if you already swap wheelsets for racing versus training, since the power data travels with the wheel rather than the bike. The catch is that hub measurement is downstream of the drivetrain, meaning it can read slightly lower than crank-based numbers under the same effort.
Opposing-force units, often built into trainers or standalone devices, cost less and install with almost no mechanical fuss. They’re not as precise as strain-gauge systems at the crank or pedal, but for a rider who splits time across multiple bikes and just wants ballpark wattage for structured indoor sessions, they’re a reasonable budget play.
-
- Pedal based: best for multi-bike households, easy swaps, dual-sided options common.
-
- Crank/spider based: best for single-bike racers who want upstream accuracy and durability.
-
- Hub based: best for riders who already rotate wheelsets between race day and training.
-
- Opposing-force: best for budget-conscious or multi-bike setups with frequent drivetrain changes.
Which Specs Actually Affect Accuracy and Reliability?
Not every number on a spec sheet matters equally. Some determine whether your data is trustworthy from one ride to the next; others are mostly marketing.
Accuracy rating is the headline figure, and competitive-grade power meters commonly advertise accuracy within ±1.0% to ±2.0%. That range sounds small, but at 300 watts, a ±2% margin is a 12-watt swing, enough to shift which training zone you think you’re in. Consistency matters more than chasing the tightest published number, since a meter that drifts unpredictably is worse than one with a slightly wider but stable margin.
Dual-sided versus single-sided measurement determines whether you get true left/right power or an estimate doubled from one leg. Single-sided units assume symmetrical pedaling and multiply by two, which is fine for most training decisions but misses the story if you’re recovering from an injury or chasing a pedaling imbalance.
Active Temperature Compensation (ATC) keeps strain-gauge readings stable as the metal in the crank or pedal expands and contracts with temperature. Riders who train at dawn and race in afternoon heat notice this the most: without ATC, the same effort can read differently depending on ambient conditions.
Connectivity shapes how the data reaches your head unit and apps. Most current meters broadcast over both ANT+ and Bluetooth, so they pair with Garmin, Wahoo, and phone-based training apps without a dongle.
- Accuracy: look for ±1% to ±2%, and prioritize consistency over the tightest advertised figure.
- ATC: essential if you ride across a wide temperature range.
- Connectivity: confirm ANT+ and Bluetooth support for your head unit and apps.
- Waterproofing: an IPX7-level rating handles rain and washing without hesitation.
- Battery: replaceable coin cells are simpler on tour; rechargeable units save long-term cost but need a charging routine.
Pro Tip: Before buying, check whether the meter’s firmware updates over Bluetooth via a phone app or require a computer and cable. A meter that updates in thirty seconds from your phone saves real hassle mid-season.
How Do You Choose the Right Power Meter for Your Bike?
Picking a power meter is really three decisions stacked on top of each other: what you’re training for, how many bikes you ride, and what you’re willing to spend. Work through them in order and the right family becomes obvious.
- Define your training goal. If you’re chasing structured FTP-based training and racing, upstream accuracy and dual-sided data earn their keep. If you mostly want consistent numbers for pacing and long-term tracking, a reliable single-sided meter is plenty.
- Count your bikes and decide how often you swap. One bike, one race season, favors crank or spider systems for durability. Multiple bikes or frequent wheel changes favor pedal-based or hub-based systems you can move in minutes.
- Set a real budget before you shop features. Decide what you can spend first, since it narrows the field faster than any spec comparison.
- Check compatibility before you check reviews. Confirm your bottom bracket standard, chainring bolt pattern, pedal cleat system, and frame or fork clearance for the meter’s specific footprint. A spider-based power meter designed for one crankset rarely bolts onto another without adapters.
- Ask the vendor direct questions. What’s the warranty length? Are firmware updates free and easy? Does the unit include Active Temperature Compensation? What’s the return policy if fit or pairing doesn’t work out?
- Watch for red flags. No published accuracy claim, no mention of ATC, a pairing process buried in a PDF manual, or a thin customer-support track record are all reasons to keep shopping.
Once you’ve matched a family to your priority (swapability versus upstream accuracy), confirm the fit against your exact crank, pedal, or hub specs before you commit. Experts consistently point out that prioritizing durability and ease-of-use over marginal accuracy differences pays off more than obsessing over a tenth of a percent on the spec sheet. A reliable, waterproof, easy-to-calibrate meter delivers more usable training data over a season than a fragile unit with a slightly tighter accuracy claim.
What Should You Expect to Pay for a Power Meter?
Power meter pricing splits into three rough bands, and current 2026 pricing runs from around $199 for entry-level crank-arm options up to $1,250 or more for high-end dual-sided systems.
- Entry level (single-sided, roughly $199 to $400): Solid for tracking training load and pacing, though you’re working with estimated rather than measured balance between legs.
- Mid range (single pedal-based or basic dual options, roughly $400 to $800): Often adds better waterproofing, ATC, and easier bike-to-bike swaps.
- High end (dual-sided, pro-level, $800 to $1,250+): Shimano’s Ultegra R8100 dual-sided crankset, for example, lists ±2.0% accuracy, ANT+/Bluetooth connectivity, a rechargeable battery, and force-vector analysis for pedaling technique. This tier typically offers increased durability, lighter weight, and more detailed analytics.
A lower-cost single-sided meter is a fine choice for a recreational racer or a single-bike commuter who wants consistent numbers without chasing every metric. It becomes a false economy if you’re a serious racer who needs left/right data for injury rehab or technique work and ends up upgrading within a season anyway. Weigh transferability between future bikes, warranty length, and whether the brand’s app ecosystem will still be supported in three years.
How Do You Use a Power Meter to Train Smarter?
Your Functional Threshold Power, or FTP, is the highest average power you can sustain for roughly an hour. Every major training zone, from recovery rides to VO2 max intervals, gets calculated as a percentage of that one number, so nailing it matters more than any single spec on the meter itself.
- Pair the meter before your first ride. Most units broadcast on both ANT+ and Bluetooth, so pairing with a Garmin, Wahoo, or phone app usually takes under a minute. If pairing fails, check that the meter is awake (pedal a few strokes) and that no other device is already connected to it.
- Zero-offset calibrate before hard efforts. This resets the baseline reading so the strain gauges start from a clean zero, which matters more on cold mornings when metal contracts.
- Keep your measurement point consistent. Power data is most useful when it stays consistent across sessions, so comparing an indoor trainer reading (often downstream) to an outdoor crank reading can mislead you into thinking you’ve lost or gained fitness when you’ve simply changed measurement points.
- Run a starter protocol. Establish FTP with a field test, then schedule one structured interval session built around that number, and log every ride so trends show up over weeks rather than single workouts.
Power meters give you a rider’s actual watt output rather than an estimate, which is why coaches lean on them over heart rate for setting daily training intensity. If you want to go deeper on how peak output differs from sustained FTP, the concept is worth understanding on its own terms.
How Does Sport Factory Pro Shop Help You Choose?
Picking between crank, pedal, and hub systems gets easier with a shop that actually specializes in racing gear rather than treating power meters as an afterthought. Sportfactoryproshop focuses specifically on high-performance cycling products for competitive cyclists and enthusiasts, with an emphasis on engineering quality over sheer volume.
The curated catalog covers aerobar systems, gravel pedals, and tires selected to complement the demands of serious training and racing, so compatibility questions (crank standards, cleat systems, frame clearance) come up naturally as part of the buying conversation rather than as an afterthought. Sportfactoryproshop selects products from brands recognized for engineering excellence and rider-focused design, and highlighted products come with user reviews and performance insights so you’re not guessing at how a component performs in real conditions before you commit.
How Do You Calibrate a Power Meter and Keep It Accurate?
Calibration on most modern power meters means a zero-offset reset, not a full recalibration against a lab standard. You do this through your head unit or the meter’s companion app, typically by holding the crank or pedal still for a few seconds while the device confirms a baseline of zero watts under no load.
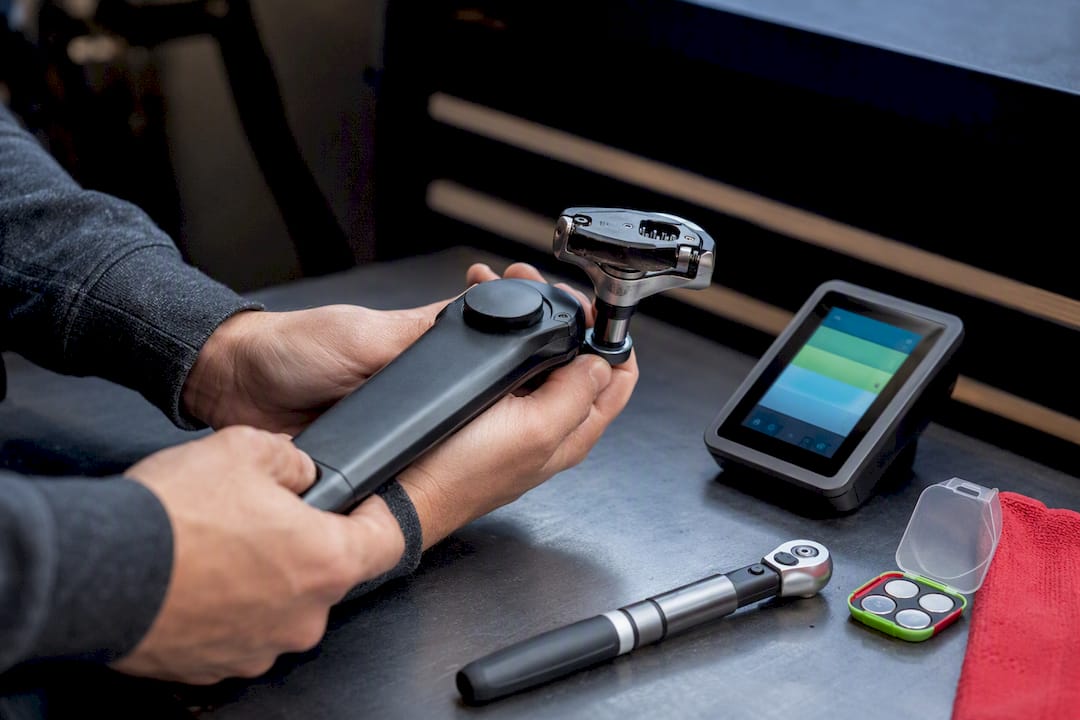
Do this before every hard training session, and especially after temperature swings. A meter that sat in a cold garage overnight and hits 40-degree morning air will read differently until it settles, which is exactly the drift Active Temperature Compensation is designed to correct. Even meters with ATC benefit from a fresh zero-offset before intervals, since it takes the guesswork out of whether a flat or unusually strong number reflects your legs or the hardware.
Beyond the daily reset, a few habits protect long-term accuracy. Keep the mounting bolts torqued to spec, since a loose crank arm or pedal spindle introduces mechanical play that strain gauges read as noise. Clean contact points after wet or muddy rides, since grit can work into pedal spindle seals over time. Replace batteries before they run critically low rather than after the meter starts dropping connection, since some units show subtle accuracy drift as voltage drops. If you ever suspect a meter is reading consistently high or low compared to a known baseline, a side-by-side comparison ride against a second known-good meter or a trusted indoor trainer is the most practical way to confirm it, since dedicated lab calibration tools aren’t something most riders have access to.
What Are Common Power Meter Problems and How Do You Fix Them?
Most power meter complaints trace back to a handful of repeat offenders, and nearly all of them have a quick fix.
Dropouts or missing data usually mean a pairing conflict, often because your phone app and head unit are both trying to claim the same Bluetooth connection. Close one before starting the other, or switch the head unit to ANT+ if the meter supports it, since ANT+ allows multiple simultaneous connections where Bluetooth typically does not.
Inconsistent or jumpy numbers on a ride usually point to a stale zero-offset, a loose mounting bolt, or a battery running low. Re-calibrate first, since it takes seconds and rules out the simplest explanation before you start checking hardware.
A meter that won’t wake up is often just asleep from disuse. Give the pedals or crank a few firm rotations, and check that the battery contact points aren’t corroded if the unit has sat unused for months.
Numbers that seem too high or too low compared to your sense of effort deserve a temperature check first. A unit without reliable ATC can genuinely misread power on a big swing between a cold start and a warm finish. If the drift persists across sessions and temperatures, it’s worth comparing against a second meter or a bike shop’s diagnostic tools rather than assuming your fitness changed overnight.
Which Power Meter Brands and Models Are Worth Knowing?
The market has matured enough that most serious riders gravitate toward a handful of proven approaches rather than experimenting with unknowns.
Crank-based systems from established component makers, like the Shimano Ultegra R8100 dual-sided crankset, sit at the high end of the category with ±2.0% accuracy, ANT+ and Bluetooth broadcasting, a rechargeable battery, and force-vector pedaling analysis. The appeal here is integration: the power meter is built into a crankset you’d likely choose anyway, so you’re not bolting on a separate accessory.
Pedal-based systems remain popular specifically because of swapability. Riders with a road bike and a gravel bike, or a race bike and a trainer bike, can move one pair of pedals between them in the time it takes to change shoes.
Hub-based and opposing-force options round out the lower end of the price spectrum. They trade some measurement precision for a lower barrier to entry, which makes sense for a rider building a first structured training plan without committing to the top tier immediately. Dual-sided data is especially valuable for rehabilitation and pedaling technique work, but plenty of riders get the bulk of their training benefit from a well-maintained single-sided meter used consistently, week after week.
How Do Temperature and Weather Affect Power Meter Readings?
Strain gauges, the tiny sensors inside every power meter, respond to more than just the force you put through the pedals. Metal expands slightly in heat and contracts in cold, and that physical change can shift the baseline reading if the meter isn’t compensating for it.
This is exactly what Active Temperature Compensation addresses, and it’s why the feature matters more than it might seem on a spec sheet. A rider who trains at dawn in cool air and races in afternoon heat, or one who moves between an unheated garage and outdoor summer rides, will notice more drift without ATC than a rider training in a stable indoor environment year round.
Humidity and moisture matter less for the sensor itself, assuming a properly waterproofed unit, but they matter enormously for the housing and connection points. This is where a solid IP or IPX7-level waterproof rating earns its keep: rain, road spray, and the occasional post-ride hose-down shouldn’t compromise a well-sealed meter, but a cheaper or poorly gasketed unit can develop corrosion at contact points over a season of wet riding.
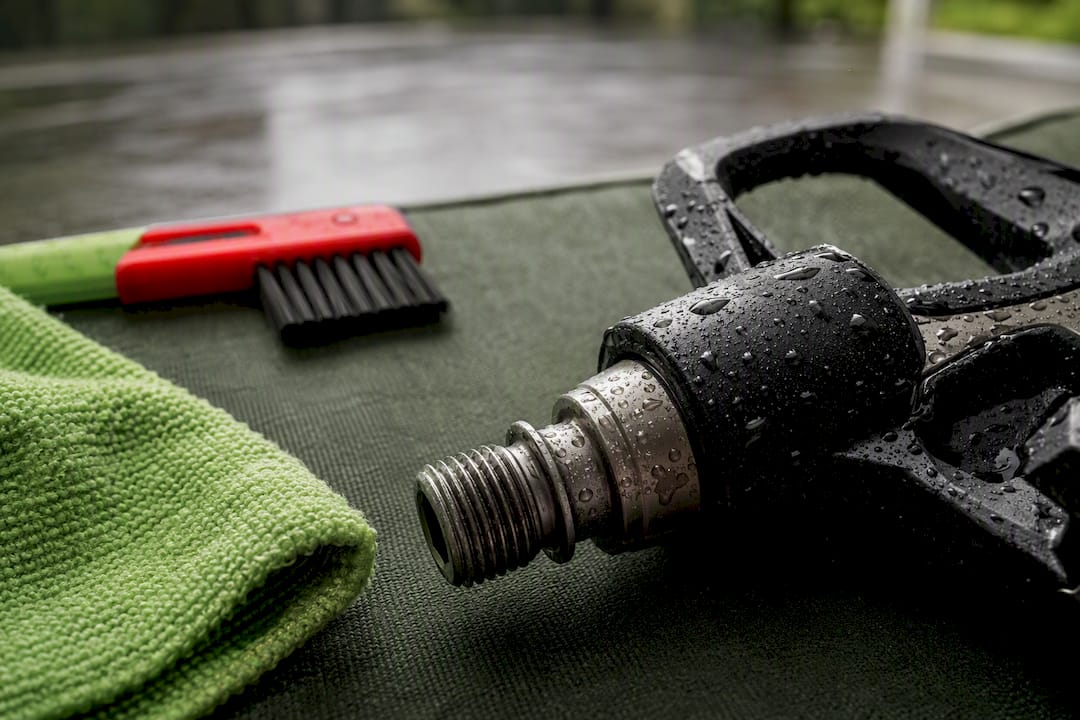
Road conditions play a smaller but real role. Rough gravel or cobbles introduce vibration and micro-impacts that pedal-based meters, sitting at the far end of the crank arm, feel more than crank or spider-based units mounted closer to the bottom bracket. It’s one more reason gravel racers sometimes lean toward hub or crank-based systems over exposed pedal units.
How Do You Transfer and Analyze Power Meter Data?
Getting watts onto your head unit is only half the job. The real value shows up when you pull that data into software built to spot trends across weeks and months, not just within a single ride.
Most riders start with whatever platform their head unit syncs to automatically, whether that’s a Garmin Connect account or a Wahoo companion app, both of which log power alongside heart rate, cadence, and speed. From there, dedicated training platforms let you build structured workouts, track FTP changes over a season, and compare interval-by-interval power against a target. File formats like FIT and TCX carry that data between platforms, so a ride recorded on one head unit can usually be analyzed in a completely different piece of software without losing the underlying numbers.
The habit that actually moves the needle is consistency, not sophistication. A rider who logs every ride in the same platform, using the same measurement point on the bike, builds a dataset that shows real fitness trends. A rider who bounces between apps and measurement points ends up comparing numbers that were never meant to be compared directly.
How Does a Power Meter Compare to Heart Rate and Cadence?
Heart rate, cadence, and power all measure something real, but only one of them measures effort directly. A power meter captures actual watts produced, while heart rate measures your cardiovascular response to that effort, which lags behind the effort itself and shifts with heat, hydration, caffeine, sleep, and stress.
That lag is the practical difference riders notice most. Push hard on a short climb and your power number responds instantly; your heart rate takes ten to twenty seconds to catch up, and it keeps climbing even after you’ve eased off. For short, sharp intervals, that lag makes heart rate nearly useless for real-time pacing, while power gives an immediate, repeatable number to hold.
Cadence, meanwhile, measures pedaling rate rather than effort or output at all. It’s a useful complement to power, since two riders can produce the same wattage at very different cadences, and dialing in your own efficient cadence range can shave real fatigue off a long race. But cadence alone tells you nothing about how hard you’re actually working.
The strongest training setups use all three together: power for the objective effort number, heart rate for tracking fatigue and recovery trends over days and weeks, and cadence for pedaling efficiency. None of them replace the others, but power is the one number that stays honest regardless of how tired, hot, or caffeinated you are on a given day.
A Rider’s Honest Take on Making the Switch
Adding a power meter changes how you train faster than it changes how fast you are. The first few rides feel like information overload, and it’s tempting to chase every number instead of trusting the process. My advice: pick the family that fits your actual bike situation, not the one with the flashiest spec sheet, and give yourself a full month of consistent logging before you judge whether it’s working. The data only gets useful once you stop staring at it mid-ride and start reading it after.
— Matt
Ready to Add a Power Meter to Your Setup?
Choosing between pedal, crank, and hub systems gets a lot less stressful when the shop you’re buying from actually races and trains on this gear too. Sportfactoryproshop curates high-performance cycling components, including compatible cranksets, pedals, and the accessories that go with a serious training setup, so compatibility questions get answered before checkout instead of after.

The shop offers products curated from brands known for engineering quality, with highlighted picks including performance insights to help customers make informed decisions. If you’re ready to move from guessing your effort to measuring it, browse the current lineup of cycling gear and components and find the setup that matches your bike and your training goals.
Sources
- Training with a power meter: What every cyclist should know – TrainerRoad
- Best power meter cycling – Pro Cycling Coaching
- Best power meters 2026: expert-tested options and explanation – Cycling Weekly