

Which Gravel Tread Pattern Actually Fits Your Ride?
Posted by Matt Russ on 24th Aug 2026
Which Gravel Tread Pattern Actually Fits Your Ride?
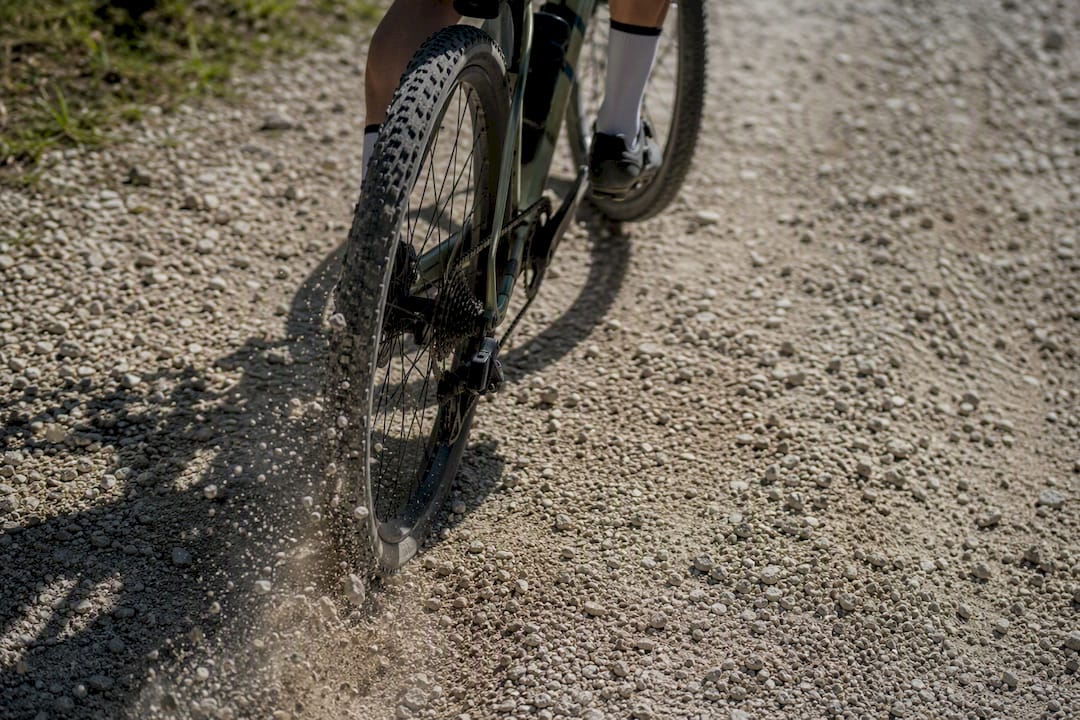
Match your tread to the hardest surface on your route: slick or file tread for pavement and hardpack, semi-knob for mixed gravel, and knobbed tread for loose, muddy, or sandy terrain. That’s the whole rule. Everything else in tread selection is a variation on this theme.
- Slick/file tread: fastest option for pavement, gravel roads, and packed dirt with no loose surprises.
- Semi-knob (semi-slick): the default for riders who mix hardpack, loose corners, and the occasional rutted climb in one ride.
- Knobbed/aggressive: reserved for mud, sand, and technical terrain where the tire needs to dig in, not just roll over.
One more thing before you shop: tread pattern usually isn’t the biggest lever you can pull. Tire width, casing construction, and air pressure often move the needle on grip and speed more than the tread you pick, so don’t let tread pattern alone drive your buying decision.
Table of Contents
- Why Gravel Tread Patterns Matter (and When They Don’t)
- Tread Pattern Types: Slick, Semi-Knob, and Knobbed
- Should Your Front and Rear Tires Match?
- How Tread Interacts With Width, Casing, and Pressure
- Matching Tread to Your Route: A Practical Decision Matrix
- Example Tire Builds for Common Gravel Rides
- How Sport Factory Pro Shop Helps You Choose the Right Tire
- What the Research Actually Tells You About Tread
- Get the Right Gravel Tire Setup From Sportfactoryproshop
- Sources
Why Gravel Tread Patterns Matter (and When They Don’t)
A knob only works when it has something to bite into. On hardpack or dry, compacted gravel, the surface is essentially solid, and knobs just flex and squirm without gaining any real purchase. That’s why knobbed tires are most effective when they have a surface to engage, such as mud, snow, or loose gravel, where widely spaced lugs let the tire sink slightly into the substrate and generate mechanical grip instead of relying on friction alone.
This is the part that surprises a lot of riders moving from mountain biking to gravel: on many dry gravel surfaces, tread pattern makes very little difference in outright grip. According to a scientific guide to choosing gravel tires, tire width and casing suppleness tend to have a bigger influence on speed and comfort than the tread itself once the surface is firm and dry. You can spend an extra $20 chasing a fancier tread pattern and get less improvement than switching from a 38mm to a 42mm tire.
Rolling resistance is the trade-off that trips people up. Tall, aggressive knobs create more contact patch deformation and more hysteresis loss on pavement, which is why a knobby tire feels sluggish on a paved climb. But on a genuinely loose or chunky course, that same knob pattern can make you faster overall, because it prevents the wheel from spinning out or washing through corners, saving you the energy cost of constant micro-corrections and traction loss.
The practical takeaway breaks down into three scenarios:
- On smooth, dry gravel and pavement, tread barely factors in. Width and pressure do the real work.
- On loose, embedded, or wet gravel, tread starts to matter, and knob spacing determines whether you get traction or clogging.
- On mud or sand, tread becomes the dominant variable, because nothing else compensates for a tire that can’t shed material or find purchase.
Pro Tip: Before buying based on tread photos alone, think about the driest, hardest 20% of your typical route. If that section is smooth and firm, an aggressive tread is mostly dead weight for the other 80% of the ride.
Tread Pattern Types: Slick, Semi-Knob, and Knobbed
Gravel tires generally fall into three families, and each one solves a different problem. Understanding the anatomy of each helps you read a tire’s spec sheet instead of just its marketing photo.
- File/slick tread. These tires use tightly packed, low-profile ridges (the “file” pattern resembles the teeth of a metal file) across the center, sometimes with a few small side knobs near the shoulder for cornering security. They roll fast, wear evenly, and handle pavement and hardpack gravel with minimal drama. Their weakness shows up the moment the surface gets loose or wet: with almost no void space to clear debris or bite into soft ground, they slide.
- Semi-knob (semi-slick). This is the workhorse category for mixed gravel. A low, fast center section handles straight-line rolling on hardpack, while larger transition knobs and shoulder lugs take over once you lean the bike into a corner or hit looser ground. The engineering detail that matters here is how the first row of side knobs is anchored. Product design notes from manufacturers show that anchoring that transition row stiffens cornering performance noticeably compared to a tire where the center and shoulder knobs blend together with no clear structural break.
- Knobbed/aggressive tread. Wider spacing, taller lugs, and often an open, mud-tire-inspired layout. These patterns exist to self-clean and to sink into soft substrate. Knob height and spacing both matter more than knob count.
A detail that catches experienced riders off guard: small, densely packed knobs aren’t automatically better than fewer, larger ones. Research on tire design notes that small, densely spaced knobs can actually squirm and roll slower than larger, well-spaced knobs, because the dense pattern doesn’t deform as predictably under load. A tire that looks aggressive in a product photo can underperform a tire with fewer, smarter-placed lugs.
Quick reference for what each pattern optimizes for:
- File/slick: rolling speed and low weight, at the cost of loose-surface grip.
- Semi-knob: cornering confidence and drainage, at a modest rolling resistance penalty.
- Knobbed: traction in soft or technical terrain, at a real cost on pavement and hardpack.
Should Your Front and Rear Tires Match?
Not always, and understanding why comes down to what each wheel is actually doing. The front tire governs cornering traction and braking control. It’s the tire that decides whether you wash out on a loose bend or hold your line. The rear tire, meanwhile, spends most of its time managing rolling resistance and putting power down under acceleration, since it carries more of your weight and does less of the steering work.
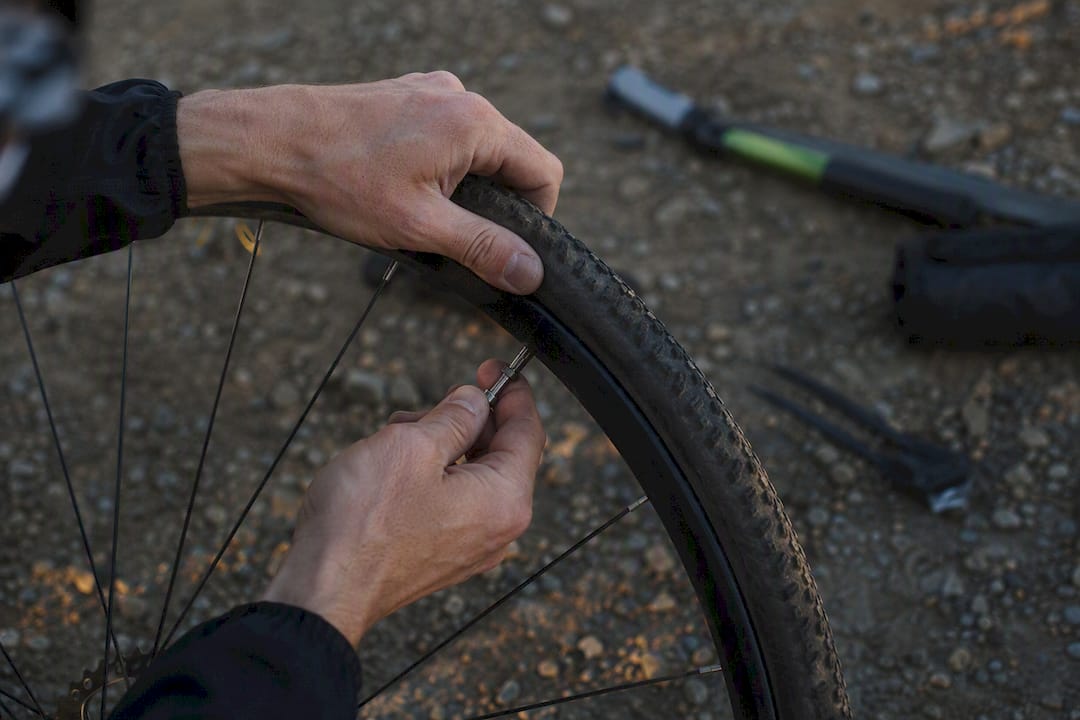
This functional split is why a lot of experienced gravel riders run a grippier front tire paired with a smoother rear. According to reporting on tread-mixing habits among gravel riders, the front tire has the greatest effect on cornering and braking traction, while the rear matters more for rolling resistance. If your route has a technical, twisty singletrack section followed by miles of smooth doubletrack or pavement, a semi-knob or knobbed front with a file-tread rear can give you cornering security where you need it and rolling speed everywhere else.
There are situations where mixing isn’t worth the complexity:
- If your route is uniformly loose or uniformly hard, matched front and rear tread keeps handling predictable and avoids the odd feel of asymmetric braking traction.
- Racing courses with variable, unpredictable line choices reward a consistent feel over marginal rolling-resistance gains.
- If you only own one spare tire or tube pattern for repairs, matching front and rear simplifies your kit.
The simplest heuristic: mix when your route has a clear technical section that demands front-end confidence, and match when the terrain is consistent enough that a split setup adds complexity without a real payoff.
How Tread Interacts With Width, Casing, and Pressure
Tread pattern doesn’t operate alone. It’s one variable in a system that includes tire width, casing construction, air pressure, and rim compatibility, and changing any one of those can undo or amplify what your tread is trying to do.
Width often outperforms tread as a grip lever. A wider tire creates a larger, shorter contact patch at the same pressure, which spreads load more evenly and lets the casing conform to surface irregularities instead of bouncing over them. Rim internal width matters here too: mounting a 40mm tire on a narrow rim distorts its intended shape, effectively narrowing it and changing how the tread pattern sits on the ground.
Casing choice is the second lever. Supple, lower-thread-count-per-inch casings flex more easily and track terrain better, improving both comfort and grip, but they generally offer less built-in puncture resistance than stiffer, reinforced casings. Riders chasing speed on a groomed gravel race course often accept the puncture risk for the ride feel; riders heading into rocky, remote terrain usually don’t.
Pressure ties it all together, and it can make or break whatever tread you’ve chosen:
- Too much pressure turns even an aggressive knob pattern into a skittering, bouncing mess that can’t stay in contact with the ground long enough to bite.
- Too little pressure invites pinch flats and rim strikes, and it can cause a file tread to squirm under cornering loads it wasn’t designed to handle.
- A reasonable starting range for most gravel riders is somewhere in the 25 to 40 psi window, adjusted for rider weight, tire width, and terrain roughness, then fine-tuned from there.
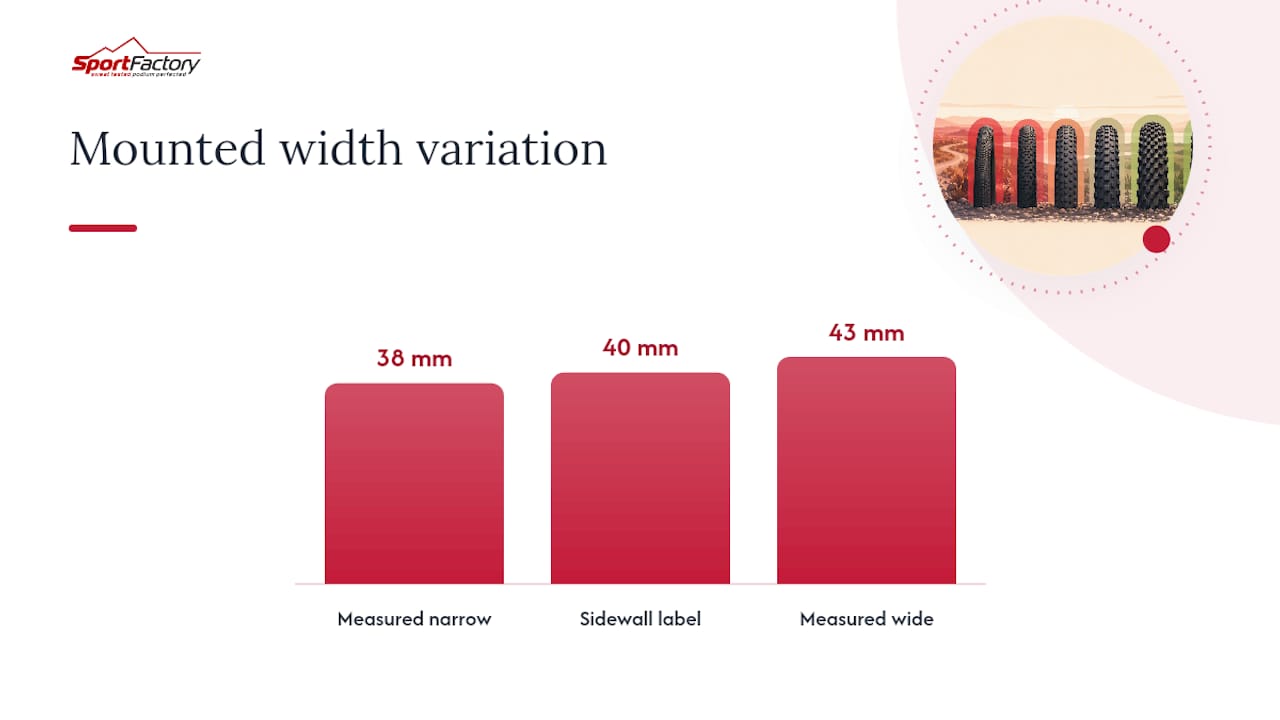
Pro Tip: Always check your tire’s mounted width once it’s on your actual rim and inflated, not just the number printed on the sidewall. A tire labeled 40mm can measure anywhere from 38mm to 43mm depending on your rim’s internal width, and that shift affects both frame clearance and how the tread contacts the ground.
Before finalizing any setup, confirm your frame and fork clearance with the tire mounted and inflated, not just eyeballed in the shop.
Matching Tread to Your Route: A Practical Decision Matrix
The single most useful habit in tire selection is designing around your worst section, not your average one. A route that’s 90% smooth gravel and 10% loose, rutted climb should be built around that climb, because that’s where you’ll actually lose time or skin if the tire is wrong.
Here’s how that breaks down by common route profiles:
- Pavement or hardpack only: file/slick tread, prioritizing low rolling resistance and wear life.
- Road-heavy gravel with occasional loose patches: file tread with a low center pattern, maybe a slightly reinforced casing for peace of mind.
- True mixed terrain (hardpack, loose corners, some chunk): semi-knob tread, which a practical tread matrix identifies as the standard recommendation for varied surface routes.
- Loose gravel, mud, or sand-heavy terrain: knobbed tread, sized and spaced for self-clearing performance.
- Remote routes or organized events far from support: prioritize puncture protection and carry a full repair plan, since a mechanical far from help costs more time than any tread choice saves you.
That last point deserves emphasis, because tread choice without a repair strategy is an incomplete plan. A tread pattern reference guide notes that puncture resistance, sealant volume, and plug kits matter just as much as the tread pattern itself once you’re hours from a bike shop or a support vehicle.
Before you roll out, run through this checklist:
- Confirm frame and fork clearance with the tire mounted and inflated, including mud clearance if conditions are wet.
- Check your actual mounted width against your rim’s internal width, not the printed sidewall number.
- Set your pressure range for the day’s conditions, not a fixed number you use every ride.
- Pack sealant refill and a plug kit sized for tubeless, or spare tubes if you’re running tubes.
- Identify a bailout option, whether that’s a shortcut route or a plan for flagging down help, for remote sections.
The manufacturer and rider consensus on mixed courses tends to favor a fast center tread with more aggressive shoulder knobs as a strong all-around default, since it covers the middle ground without fully sacrificing performance at either extreme.
Example Tire Builds for Common Gravel Rides
Translating the matrix into actual purchases makes the decision concrete. These starting points assume a typical gravel bike with room for at least 40mm tires.
- Road-heavy commuter or mixed-surface build: a file/slick tread on a supple casing, run at a pressure suitable for your rider weight. Prioritizes speed and low maintenance for riders who spend most of their time on pavement and light gravel.
- Fast mixed-gravel race setup: a semi-knob tread with moderate casing protection, run at pressure adjusted for rider weight and conditions. This is the setup that handles a course with hardpack straights and loose, punchy corners without a rolling-resistance penalty on the flats.
- Loose or technical terrain setup: a knobbed tread on a tubeless-ready, puncture-resistant casing, paired with extra sealant volume and a stocked plug kit. Run pressure toward the lower end of your safe range to maximize contact and grip.
- Bikepacking or remote-route setup: prioritize a reinforced, puncture-resistant casing over an aggressive tread pattern, carry double your usual sealant volume, and pack multiple tubeless plugs or a spare tube. Being reliable matters more than being fast when you’re a day from the nearest bike shop.
How Sport Factory Pro Shop Helps You Choose the Right Tire
When customers come to Sportfactoryproshop looking for gravel tires, the conversation rarely starts with tread photos. It starts with the route: what surfaces dominate, how remote the rides get, and whether the rider is chasing race times or just wants a dependable all-rounder. Casing durability, actual mounted width on the customer’s own rims, and a realistic repair plan usually matter more than which tread looks the most aggressive on the shelf.
Before buying any tire, run through this shopping checklist:
- Confirm the tire’s mounted width will fit your rim’s internal width without distorting the intended tread shape.
- Check frame and fork clearance with the specific tire and rim combination you’re considering.
- Look at return policies and verified customer reviews for real-world wear and puncture-resistance feedback, not just marketing copy.
- Ask about tubeless compatibility if you’re planning to run sealant, since not every casing seats the same way on every rim.
| Point | Details |
|---|---|
| Match tread to your worst surface | Build tire choice around the hardest section on the route, not the average terrain. |
| Width and casing often outweigh tread | On dry gravel, tire width and casing suppleness influence speed more than tread pattern. |
| Front and rear can differ | A grippier front and smoother rear suits routes with a technical section followed by smooth terrain. |
| Sportfactoryproshop guides the full setup | Sport Factory Pro Shop helps confirm rim compatibility, casing choice, and repair planning, not just tread. |
What the Research Actually Tells You About Tread
Most gravel tire marketing wants you to believe tread pattern is the headline decision. It isn’t. The strongest signal across the research is that width and casing suppleness carry more weight on typical dry gravel than tread does, and conventional advice oversells tread as the primary lever when pressure and mounted width usually matter more.
Where tread genuinely earns its reputation is in mud, sand, and loose, embedded gravel, where knob spacing and engagement become the deciding factor rather than a marginal one. Outside those conditions, you’re often better off spending your attention on getting pressure right and confirming your mounted width matches your rim, rather than agonizing over knob shape.
If you take one thing from this, prioritize matching tread to your worst expected surface, then let width, casing, and pressure do the fine-tuning. That order of operations, not tread pattern alone, is what actually changes how a tire performs once you’re out on the road.
— Matt
Get the Right Gravel Tire Setup From Sportfactoryproshop
Sportfactoryproshop is built for the exact decision this article just walked through: matching tire, casing, and pressure to your actual route instead of guessing from a tread photo. As a curated retailer, Sport Factory Pro Shop stocks tubeless-ready gravel tires alongside the pumps, sealant, and repair tools that make a tread choice actually work in the field, so you’re not piecing together a setup from three different sources.

If you’re weighing a file-tread commuter setup against a knobbed race tire, browsing the full tire and accessory lineup lets you compare width and casing options side by side before you commit. Reach out to Sport Factory Pro Shop for fitting guidance on rim compatibility and pressure ranges, and get your next gravel setup dialed in before your next ride instead of after a flat teaches you the hard way.