

Gravel Tire Width: Find Your Perfect Size in 2026
Posted by Matt Russ on 10th Aug 2026
Gravel Tire Width: Find Your Perfect Size in 2026
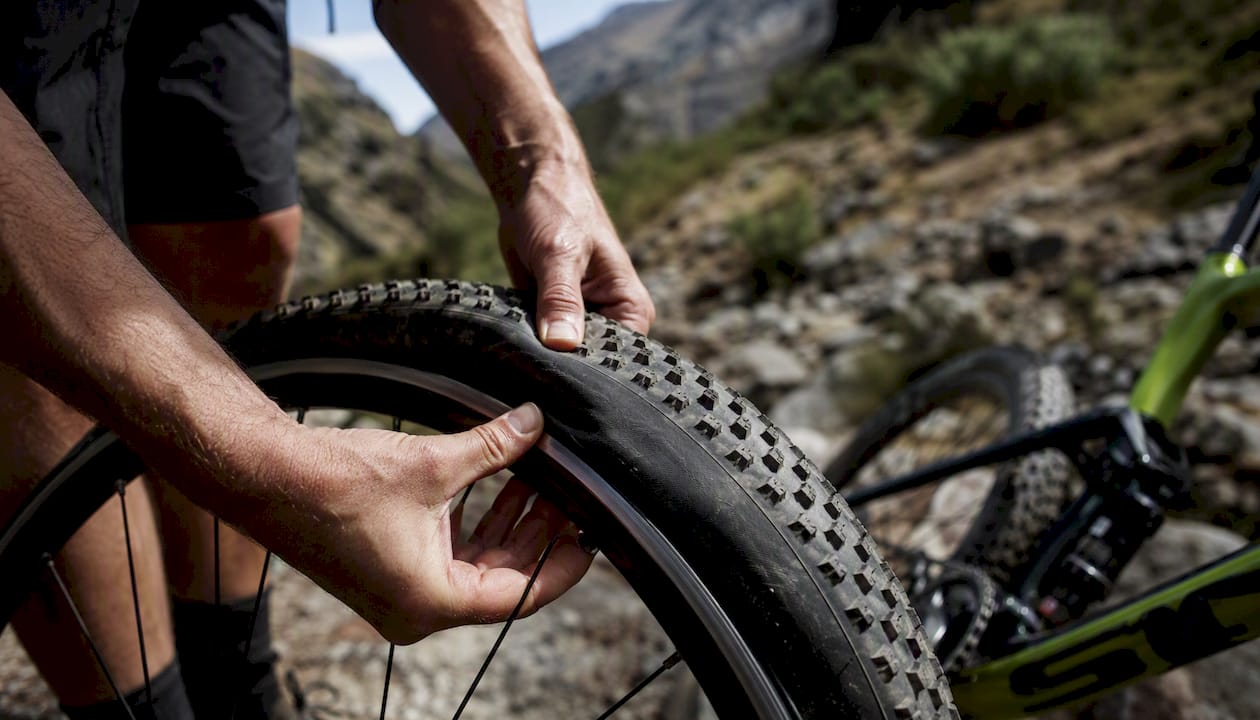
For most gravel riders, a 40–45 mm tire is the right choice. That range delivers the best balance of rolling speed, comfort on mixed surfaces, and enough traction to handle dirt, gravel, and light singletrack without sacrificing too much on pavement. Practical guides from Go Grava and Bicycles & Cycling both converge on 40–45 mm as the do-it-all sweet spot for mixed-surface riding.
Three caveats can shift that recommendation:
- Frame/fork clearance: Your bike must physically fit the tire. Measure your current clearance before buying anything wider.
- Rim internal width: A 40 mm tire on a 19 mm internal rim performs differently than the same tire on a 25 mm internal rim. Check your rim spec first.
- Goal-specific exceptions: If you race on pavement-heavy courses, 35–38 mm may be quicker. For loaded bikepacking on rough terrain, 48–50 mm makes more sense.
Your immediate next steps: look up your rim’s internal width (stamped on the rim bed or listed in your wheel spec sheet) and measure the gap between your current tire and the nearest frame surface. Those two numbers define your real options.
Key Takeaways
For most gravel riders, the 40–45 mm width band delivers the best combination of speed, comfort, and traction across mixed terrain, but rim internal width and pressure tuning determine whether that width actually performs.
| Point | Details |
|---|---|
| Sweet spot for most riders | 40–45 mm covers mixed gravel, all-day comfort, and moderate loads for the majority of U.S. gravel cyclists. |
| Rim internal width matters | Changing rim internal width by ~2.5 mm shifts measured tire width by ~1 mm; always confirm your rim spec before buying. |
| Pressure by weight and width | Start at the low end of your weight bracket (e.g., 32–38 psi for a 42–45 mm tire under 150 lb) and tune in 2–3 psi steps. |
| Clearance check first | Measure your mounted tire gap and leave at least 4 mm to the nearest frame surface before sizing up. |
| Sportfactoryproshop for setup | Sportfactoryproshop stocks tubeless-ready gravel tires across all width bands with fitment guidance and tubeless setup support. |
Table of Contents
- How does gravel tire width affect your ride?
- What width band fits your gravel riding?
- How rim internal width changes your tire’s actual size and handling
- How to pick and tune tire pressure for your width and weight
- Does your frame actually fit the tire you want?
- Why tubeless makes gravel tire width work better
- How to choose the right gravel tire width for your setup
- What independent testing actually shows about width and speed
- An honest shop perspective on fitting gravel tires
- Sportfactoryproshop stocks tubeless-ready gravel tires for every width band
- Sources
How does gravel tire width affect your ride?
Width is not a single dial. Changing it shifts several linked factors at once, and understanding those trade-offs helps you make a choice you won’t regret after the first ride.
The clearest effect is on rolling resistance, but the direction depends on surface. On smooth pavement, a narrower tire at higher pressure can be faster because aerodynamic drag is lower and the contact patch is smaller. On rough gravel or dirt, a wider tire at lower pressure deforms around obstacles rather than bouncing over them, reducing vibration losses and keeping more power going forward.
Here is how the trade-offs stack up across the key factors:
- Rolling resistance on rough surfaces: Wider tires run at lower pressures, which tends to reduce energy lost to vibration, often making them faster than a narrow tire pumped hard over gravel.
- Rolling resistance on smooth pavement: Narrower tires typically have an aerodynamic advantage at road speeds. The aero penalty of going wider may outweigh rolling resistance gains on perfectly smooth surfaces.
- Comfort and fatigue: More air volume absorbs trail chatter. On long gravel days, a wider tire reduces hand and back fatigue noticeably.
- Traction and cornering: A wider contact patch grips better in loose dirt and corners with more confidence. Narrower tires feel skittish on loose surfaces.
- Stability: Wider tires are more forgiving over ruts and roots. They also tend to track straighter on rough descents.
- Weight and gearing: Each step up in width adds a small amount of rotational weight. Guides from CrankSmith note measurable gear-inch changes per width step, though the effect is modest for most riders.
Width alone does not determine performance. Rim internal width, casing construction, and pressure all shape the final outcome. A supple, lightweight casing on a 42 mm tire will often outperform a stiff, heavy-belted 40 mm tire on the same surface.
What width band fits your gravel riding?
Four practical bands cover nearly every gravel use case. Each has a natural home terrain, a realistic setup, and a pressure range that gets you close on the first ride.
Setup examples by band:
- 35–38 mm: 700c wheel, 19–21 mm internal rim, start at 45 psi (under 150 lb rider) or 52 psi (over 180 lb). Best on gravel events with significant pavement sections.
- 40–42 mm: 700c wheel, 21–25 mm internal rim, start at 38 psi (under 150 lb) or 45 psi (over 180 lb). The most versatile setup for U.S. gravel riding.
- 42–45 mm: 700c or 650b wheel, 23–27 mm internal rim, start at 32 psi (under 150 lb) or 38 psi (over 180 lb). Ideal for riders who prioritize all-day comfort without abandoning speed.
- 45–50 mm+: 650b wheel preferred, 25–30 mm internal rim, start at 26 psi (under 150 lb) or 32 psi (over 180 lb). Built for loaded adventure riding and rough terrain.
Pro Tip: If you are deciding between two adjacent bands, choose the wider one. Rene Herse Cycles’ scientific gravel tire guide recommends starting with the widest tire that fits your frame and the most supple casing you can afford, because wider tires reduce vibration losses and often improve real-world speed on gravel.
How rim internal width changes your tire’s actual size and handling
The rim your tire mounts on changes the tire’s measured width, its profile, and how it handles. This is one of the most overlooked variables in gravel tire sizing.
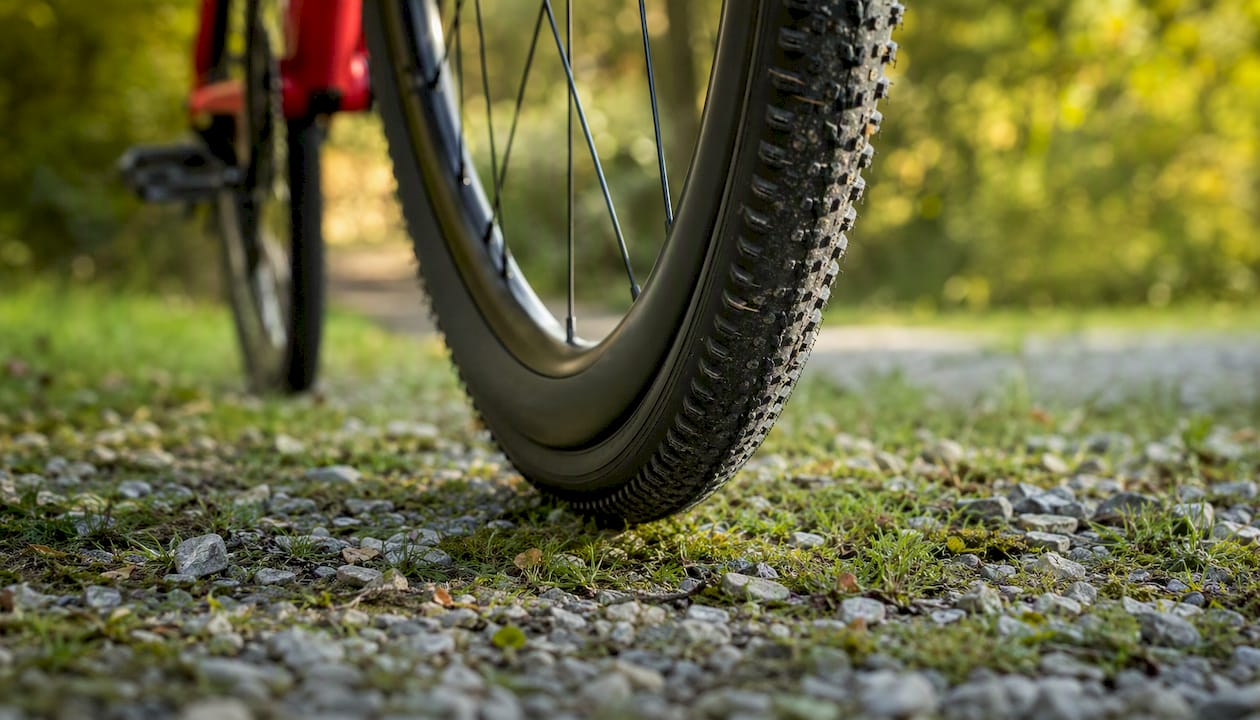
A wider internal rim spreads the tire’s sidewalls outward, increasing the measured section width and lowering the tire’s profile. A narrower rim pinches the sidewalls inward, making the tire taller and narrower than its label suggests. According to WTB’s measurement guidance, changing rim internal width by approximately 2.5 mm alters the tire’s section width by around 1 mm. That sounds small, but across a 5 mm rim difference, you could be running a tire that measures 2 mm wider or narrower than the label.
Here are the numeric rules-of-thumb to use when pairing tires to rims:
- 35–38 mm tires: pair with 19–21 mm internal rim width.
- 40–42 mm tires: pair with 21–25 mm internal rim width.
- 42–45 mm tires: pair with 23–27 mm internal rim width.
- 45–50 mm+ tires: pair with 25–30 mm internal rim width.
Measured width versus labeled width matters for clearance. A tire labeled 42 mm can measure 44–45 mm when mounted on a 25 mm internal rim. If your frame has 3 mm of clearance beyond the labeled size, that mounted tire may rub. Always measure the mounted width at maximum recommended pressure after 24 hours, which is the method WTB and ETRTO/ISO standards recommend for reliable results.
Pro Tip: ETRTO/ISO markings on the tire sidewall show the casing width and bead seat diameter (e.g., 42-622 for a 42 mm tire on a 700c rim). The casing width is the reference number, but total tread width varies by tread profile. Measure the mounted tire with a caliper at the widest point of the tread, not the sidewall, to get the number that matters for clearance.
How to pick and tune tire pressure for your width and weight
Pressure is as important as width. Width sets the usable pressure range; pressure determines whether that width actually performs. Running a 45 mm tire at 50 psi wastes its comfort advantage. Running a 38 mm tire at 25 psi risks rim strikes on hard impacts.
Starting pressure by width and rider weight
| Tire width | Under 150 lb | 150–180 lb | Over 180 lb |
|---|---|---|---|
| 35–38 mm | 40–45 psi | 45–50 psi | 45–50 psi |
| 40–42 mm | 35–40 psi | 40–45 psi | 45–48 psi |
| 42–45 mm | 32–38 psi | 32–38 psi | 38–42 psi |
| 45–50 mm | 24–27 psi | 26–32 psi | 32–38 psi |
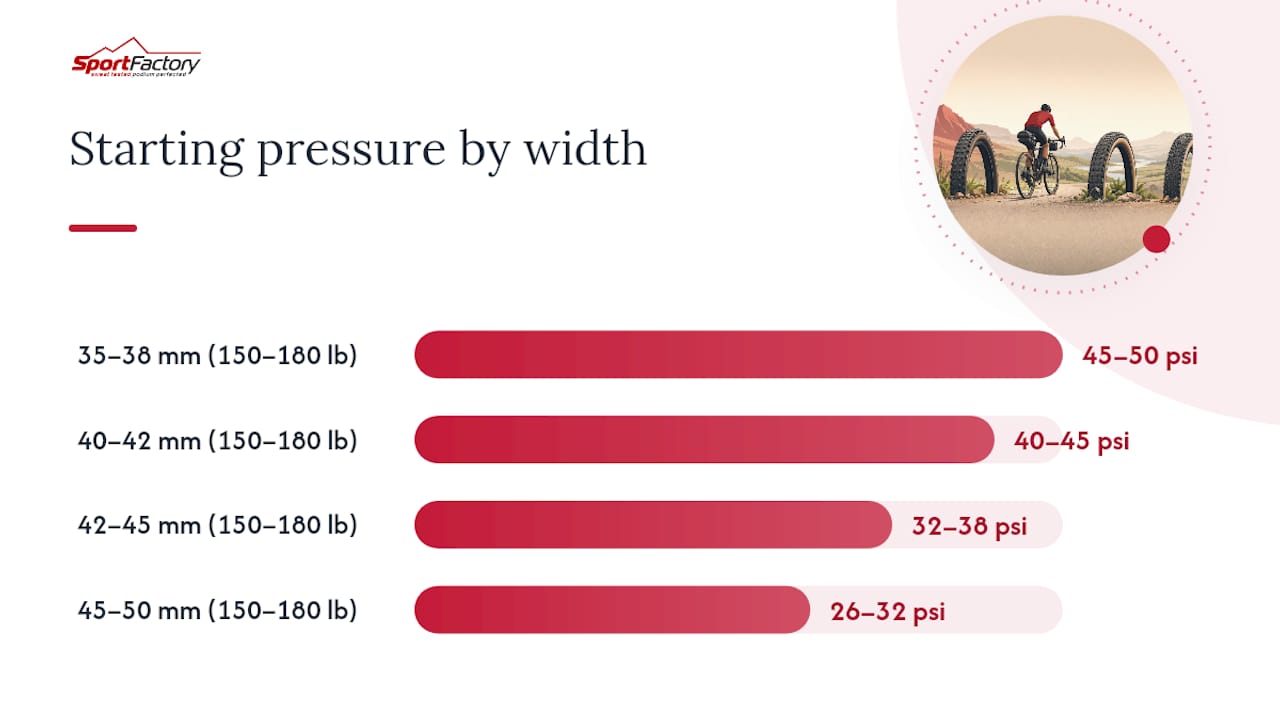
These ranges align with practical guidance from Bicycles & Cycling, which provides approximate starting pressure ranges by tire width for typical rider weights.
Tuning steps:
- Set pressure at the lower end of your weight bracket before the ride.
- Ride your normal terrain for 15–20 minutes, then stop and assess: if the tire feels vague in corners or squirms under braking, add 3–5 psi. If you feel every pebble through the bar, drop 2–3 psi.
- Repeat the assessment loop until the tire feels planted in corners and absorbs trail chatter without buzzing your hands.
- Note the final pressure and use it as your baseline for that tire/terrain combination.
Safety note: Running pressure below the minimums above on narrow tires (35–38 mm) significantly increases the risk of rim strikes on sharp edges and embedded rocks. If you want to run very low pressures, move to a wider tire first. Tubeless setups reduce pinch-flat risk but do not eliminate rim-strike damage at extreme lows.
Does your frame actually fit the tire you want?
Buying a tire that won’t clear your frame is an expensive mistake. A five-minute check before you order saves the hassle of a return.
Clearance check steps:
- Measure the gap between your current tire’s widest point and the nearest frame or fork surface (chainstay, seatstay bridge, fork crown, or brake caliper). Use a ruler or feeler gauge.
- Add the measured gap to your current tire’s actual mounted width (not the label). That sum is your approximate maximum safe mounted width.
- Subtract at least 4 mm from that maximum for mud clearance and tire deformation under load. Subtract 6 mm if you ride in wet conditions or plan to run fenders.
- Cross-reference the result with the mounted width of your target tire on your rim (use the 2.5 mm rim rule from the previous section to estimate).
- If the numbers work, proceed. If they are within 2 mm of the limit, measure again or consult your frame manufacturer’s published clearance spec.
Clearance minimums to keep:
- Top of tire to fork crown or seatstay bridge: at least 4 mm, 6 mm preferred.
- Sides of tire to chainstay or fork blade: at least 3 mm per side.
- At full suspension compression (if applicable): confirm clearance does not close at the bottom of travel.
Quick red flags before you buy:
- Chainstay width is narrower than 42 mm on older or road-derived frames. Wide tires may pinch.
- Disc caliper position conflicts with a wider tire’s sidewall on some frames with tight tolerances.
- Crank arm clearance: on frames with short chainstays, a very wide tire can contact the crank arm at the heel of the tire’s tread.
- Fender mounts: if you plan to run fenders, add another 8–10 mm of required clearance beyond the bare tire.
Why tubeless makes gravel tire width work better
Tubeless is not a requirement for gravel riding, but it changes what your chosen width can actually do. The core benefit is simple: without an inner tube, you can run lower pressures without the risk of pinch flats, which unlocks the comfort and traction advantages of wider tires more fully.
Benefits of tubeless on gravel:
- Lower safe operating pressures, which improves grip and reduces vibration losses.
- Small punctures (thorns, small glass) seal automatically with sealant, reducing mid-ride flats.
- Reduced rolling resistance compared to a tubed setup at the same pressure, because there is no tube friction against the casing.
- Better cornering feel because the tire can deform more freely without tube interference.
Trade-offs and maintenance notes:
- Sealant dries out. Replace it every 2–4 months depending on your climate and riding frequency. Dry sealant stops working and can cause the bead to unseat.
- Bead seating requires a high-volume floor pump or a blast inflator. A standard pump often cannot generate the airflow needed to seat the bead cleanly.
- Not all rims are tubeless-ready. Check for a tubeless-compatible rim bed and valve hole before converting.
- Carry a tube as a backup. Large cuts that sealant cannot seal require a tube to get home.
Pro Tip: When setting up tubeless for the first time, seat the bead dry (no sealant), confirm it seats fully, then deflate, add sealant through the valve, and re-inflate. This prevents sealant from blocking the valve core during the high-pressure seating process.
How to choose the right gravel tire width for your setup
Map your typical rides to a width band first, then confirm the three compatibility checks before buying.
Decision-flow questions:
- What surface do you ride most? Pavement-heavy routes favor 35–40 mm. Mixed gravel and dirt favor 40–45 mm. Rough terrain and bikepacking favor 45 mm and up.
- How do you weight comfort versus speed? If you want to go fast on smooth gravel events, lean narrower. If you want to ride longer with less fatigue, lean wider.
- Are you carrying gear? Bikepacking loads compress tires more and require higher pressure or wider tires to maintain clearance and comfort.
- What is your rim’s internal width? Confirm this before selecting a tire. A 40 mm tire on a 19 mm rim is a different animal than the same tire on a 25 mm rim.
- Is your rim tubeless-ready? If yes, plan for tubeless from the start. If not, budget for a rim upgrade or accept tubed pressures.
Questions to ask when comparing specs online:
- What is the ETRTO/ISO size (e.g., 42-622)?
- What is the measured mounted width on the manufacturer’s reference rim (and what is that rim’s internal width)?
- What casing ply count and puncture-protection belt does the tire use?
- What is the manufacturer’s suggested PSI range?
Red flags that should make you pause:
- No ETRTO/ISO marking on the tire. Sizing is unverified.
- Manufacturer lists only a single PSI recommendation with no weight adjustment.
- Labeled width is significantly different from mounted width on the reference rim (more than 2 mm variance without explanation).
- No tubeless compatibility listed on a tire you plan to run tubeless.
Rene Herse Cycles’ guide reinforces a practical rule: start with the widest tire that fits your frame and the most supple casing you can afford, then tune pressure down until handling feels planted.
What independent testing actually shows about width and speed
The research picture is more nuanced than the “wider is always faster on gravel” narrative that circulated widely a few years ago.
Cyclingnews’ combined aero and rolling-resistance lab tests found that wider tires are not automatically faster. The fastest choice depends on speed, surface roughness, casing and tread design, and the specific tire model. At higher speeds on smooth surfaces, aerodynamic drag from a wider tire can outweigh its rolling-resistance advantage.
Field tests from Bicycling reinforce this: on perfectly smooth pavement at road speeds, the narrowest tire in the test was the fastest. The aerodynamic advantage and lower frontal area outweighed the rolling benefits of more air volume.
What this means practically:
- On rough gravel, a wider tire at optimized pressure is almost always faster than a narrow tire pumped hard, because vibration losses dominate.
- On smooth pavement or pavement-heavy gravel events, a narrower tire (35–38 mm) can be the quicker choice if aerodynamics matter to you.
- Casing construction changes rolling-resistance numbers more than a few millimeters of width. A supple, lightweight casing on a 42 mm tire can outroll a stiff 40 mm tire.
- Pressure optimization matters as much as width selection. The wrong pressure on the right tire is slower than the right pressure on a slightly narrower tire.
The practical takeaway: choose width for your dominant surface, then optimize casing and pressure for speed. Do not assume wider always wins.
An honest shop perspective on fitting gravel tires
When a customer walks in asking for a do-it-all gravel setup, the first question is always the same: what does your rim measure inside? That single number narrows the field faster than any other spec.
Most riders who come in thinking they want a 38 mm tire end up on a 42 mm once they ride both. The comfort difference on a three-hour gravel ride is significant, and the speed difference on mixed terrain is minimal or nonexistent. The riders who genuinely benefit from 35–38 mm are those doing gravel events with long pavement sections at competitive speeds, where aerodynamics and lower weight matter.
The advice for in-store validation: measure the mounted width on your actual rims, not the manufacturer’s reference rim. Then do a demo ride if the shop allows it. Tubeless setup is worth doing from the start rather than retrofitting later. Once you have a width and pressure dialed in, run a simple field test: a fixed-power loop on your local terrain, timed. Repeat with 3 psi more and 3 psi less. The fastest pressure is usually obvious within two laps. If you want to test width, swap tires and repeat the loop. Field testers at Bicycling recommend exactly this kind of controlled loop because aero effects, rim interaction, and local surfaces produce different winners in different places.
Sportfactoryproshop stocks tubeless-ready gravel tires for every width band
Choosing the right width is only half the equation. Getting a tire that is actually tubeless-ready, properly matched to your rim, and set up at the right pressure is where most riders lose time.

Sportfactoryproshop carries tubeless-ready gravel tires across the full width range, from 35 mm road-adjacent options to 50 mm adventure builds, with fitment guidance built into the buying process. The team can match your rim internal width to the right tire, confirm your frame clearance, and walk you through tubeless setup so you leave with a system that works from the first ride. Browse the full gravel tire selection and get fitment help at Sportfactoryproshop. If you are ready to set up tubeless or want a pressure-tuning consult, note it at checkout and the team will sort it out.
Sources
- We thought wider gravel tyres were always faster — but it’s not as simple as that: new aero and rolling-resistance lab tests combined | Cyclingnews
- Gravel Tire Width Explained: Speed, Comfort, and Control | Go Grava
- Scientific Guide to Choosing Gravel Tires, 2026 Edition | Rene Herse Cycles
- Road tire field tests showing narrow tires fastest on smooth pavement | Bicycling
- How wide should gravel bike tyres be? | Bicycles & Cycling