

What PSI Should You Run for Gravel Tires?
Posted by Matt Russ on 17th Aug 2026
What PSI Should You Run for Gravel Tires?
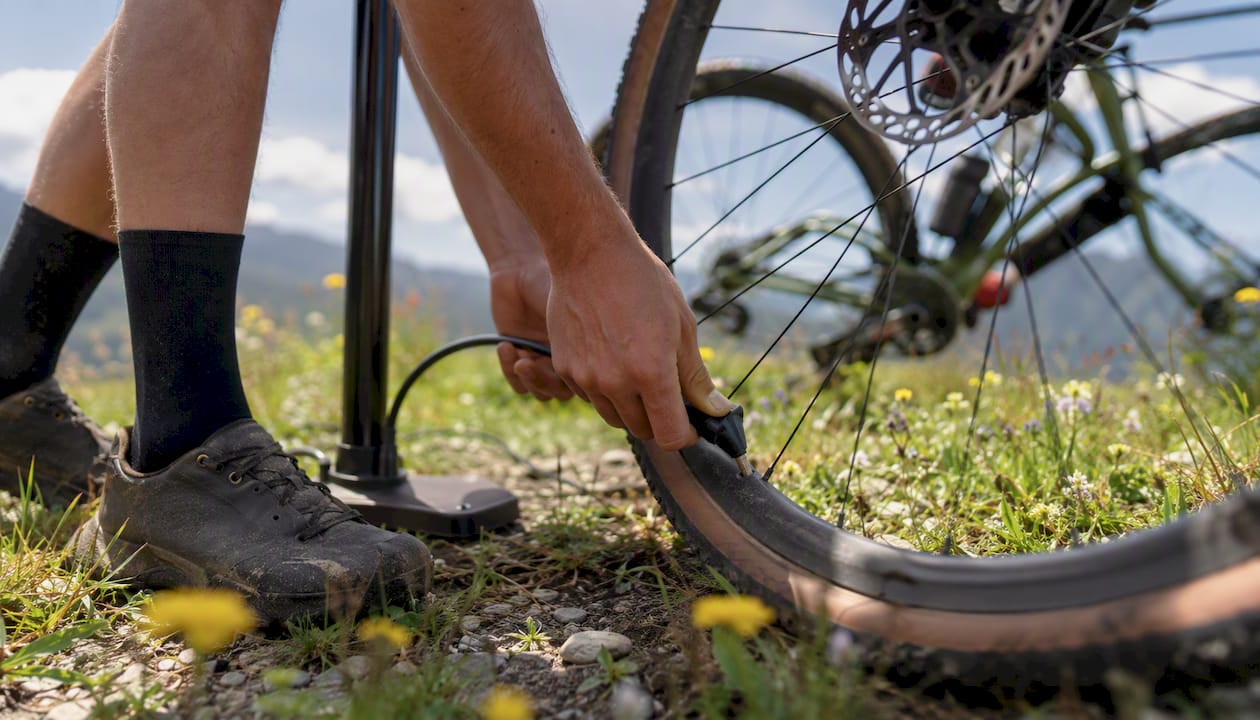
For most gravel setups, start at 35–45 psi for 35mm tires, 30–40 psi for 40mm tires, 25–35 psi for 45mm tires, and 22–30 psi for 50mm tires, then fine-tune from there. The one-line rule to remember: start in the range, then adjust in 2-psi steps until the ride feels right. Tubeless setups usually let you run 5 to 8 psi lower than tubes without extra flat risk.
- Front tire: typically run 2–3 psi lower than the rear, since the rear carries more of your weight
- Tubeless vs. tubed: tubeless setups tolerate lower pressure because there’s no tube to pinch
- Most gravel riders land somewhere in the 25–45 psi range overall, with width and body weight pulling that number up or down
Key Takeaways
Gravel tire pressure works best when you start from rider weight and tire width, then fine-tune in small steps rather than guessing at a single “correct” number.
| Point | Details |
|---|---|
| Start with the table | Use your system weight and tire width to pick a front and rear psi range before you ride. |
| Tune in 2-psi steps | Adjust small increments during test rides rather than large jumps that overshoot the sweet spot. |
| Respect the lower limit | Always follow whichever is lower between the rim’s and tire’s max-pressure rating. |
| Tubeless allows softer setups | Tubeless tires typically run 5–8 psi lower than tubed setups for the same feel. |
| Sportfactoryproshop for gear | Calibrated gauges, quality pumps, and tubeless kits from Sportfactoryproshop remove the guesswork from getting pressure right. |
Table of Contents
- Why Gravel Tire Pressure Changes Speed, Traction, and Comfort
- What Factors Should You Weigh When Choosing Tire Pressure?
- Practical Starting Pressure Ranges by Weight and Tire Width
- How Do You Test and Fine-Tune Your Tire Pressure?
- Which Calculators and Apps Help You Dial in Pressure?
- Safety Limits: Rim, Tire, and Hookless Cautions
- Tools and Techniques for an Accurate Pressure Reading
- Gear We Recommend for Dialing In Your Pressure
- Sources
Why Gravel Tire Pressure Changes Speed, Traction, and Comfort
Your tires are doing the job a suspension fork does on a mountain bike. When pressure is too high, the tire can’t absorb small bumps, so the whole bike bounces off every rock and root instead of rolling over it. That bouncing, known as impedance loss, actually slows you down even though high pressure “feels” fast. Running gravel tire pressure a bit lower lets the tire flex around obstacles and keep forward momentum instead of losing energy to vertical bounce.
- Traction: lower pressure widens the contact patch, giving you more rubber gripping loose or wet surfaces
- Comfort: softer pressure dampens vibration, which matters enormously on rides longer than two hours
- Rolling resistance: too low and the tire drags on smooth sections; too high and it skips over rough ones
The right number depends on what you’re optimizing for that day: raw speed on hardpack favors slightly firmer pressure, while technical or loose terrain rewards a softer setup.
What Factors Should You Weigh When Choosing Tire Pressure?
Picking the right psi isn’t a single-variable problem. A handful of factors interact, and getting the order of importance right saves you a lot of trial and error.
- Rider plus bike system weight — the single biggest lever; add roughly 2–3 psi for every 10–20 pounds of combined rider and gear weight
- Measured tire width — wider tires need less pressure to support the same load, since there’s more air volume doing the work
- Rim internal width — a wider rim stretches the tire out and lowers the effective pressure needed for the same feel
- Terrain and conditions — loose gravel and mud reward lower pressure for grip; hardpack and pavement sections favor a bit more
- Casing construction — a supple, high-thread-count casing can run lower pressure comfortably; a stiffer, reinforced casing often needs more air to avoid a dead feel
- Tubeless vs. tubed — tubeless setups tolerate several psi less before you risk pinch flats or rim strikes
- Riding style — aggressive cornering and hard braking benefit from slightly firmer pressure for stability
Rim width materially shifts the optimal number: wider internal rim widths let you drop pressure without paying a rolling-resistance penalty, according to Silca-backed lab testing.
Pro Tip: When you’re unsure which way to lean, err a few psi lower for grip and comfort. Just keep an eye out for rim strikes on rocky sections and burping on tubeless setups if you go too soft.
Practical Starting Pressure Ranges by Weight and Tire Width
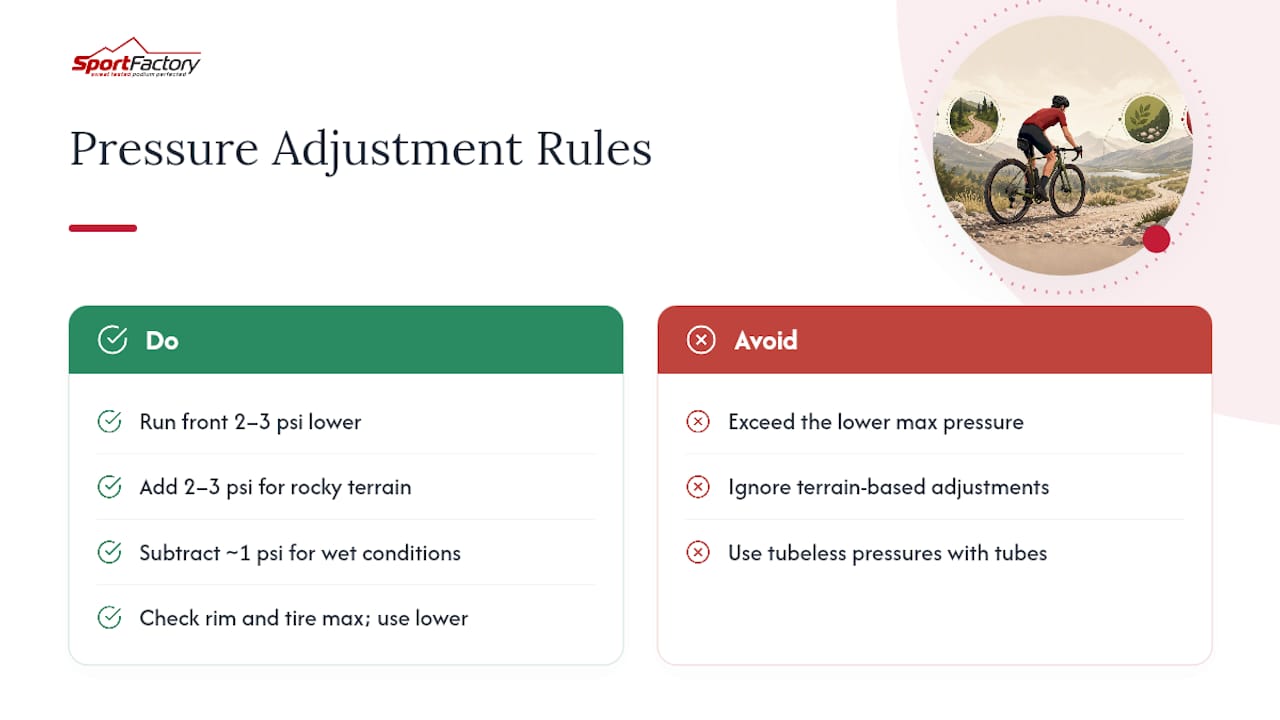
Use your combined rider-and-bike system weight and your tire’s measured width to find a front and rear starting point. These ranges assume tubeless setups on standard gravel terrain.
Run the front 2–3 psi lower than the rear across every row. Add 2–3 psi for very rocky or chunky terrain, subtract about 1 psi for wet conditions, and add 5–8 psi across the board if you’re running inner tubes instead of tubeless. Before you settle on a number, check both the rim and tire sidewall for max pressure and always use the lower of the two limits.
How Do You Test and Fine-Tune Your Tire Pressure?
Dial in your personal sweet spot with a short, repeatable field test rather than guessing:
- Weigh yourself with your bike and gear to get your system weight, then find your starting psi in the table above.
- Inflate both tires to that starting point, front 2–3 psi lower than rear.
- Ride a familiar 10 to 20 minute loop that includes the terrain you actually ride most.
- Adjust in 2-psi steps: drop pressure if the ride feels harsh or you’re bouncing off bumps, add pressure if the tire feels squirmy or you’re hitting the rim on impacts.
- Re-test after each change and note how it feels before adjusting again.
Change both tires together when the whole bike feels off, but adjust only the front or only the rear when the issue is isolated. Squirrely front-end cornering usually means the front needs a couple more psi.
Pro Tip: Keep a simple log: tire model, casing type, rim width, conditions, and the psi you landed on. After three or four rides you’ll have a personal baseline you can trust instead of guessing every time.
Which Calculators and Apps Help You Dial in Pressure?
A calculator gets you close before you ever throw a leg over the bike. The SILCA Professional Tire Pressure Calculator pulls from lab data and factors in your rim type and surface category. Mobile options like the Bike Tire Pressure Calculator app work well for quick checks trailside, and some manufacturers build pressure guidance directly into their companion apps for their own wheel and tire combos.
Feed a calculator your measured tire width, rim internal width, system weight, and surface type. Treat the output as a mid-range starting number, then run the 2-psi field test to refine it for your actual casing and riding style.
Safety Limits: Rim, Tire, and Hookless Cautions
Always follow the lower of the rim’s and tire’s max-pressure markings, never one alone. Many hookless rims cap out around 72.5 psi (5 bar), and exceeding that limit risks a tire blowing off the bead entirely.
- Tubeless setups let you run lower pressure safely, but only with proper sealant and a clean bead seat
- Watch for burping (air escaping past the bead on hard impacts) as a sign you’ve gone too soft
- Read the sidewall stamp, check any paperwork that came with your rims, and confirm hookless compatibility before running unusually high or low numbers
Exceeding a hookless rim’s pressure rating isn’t a minor risk. It’s the difference between a tire that stays seated and one that separates from the rim under load.
Tools and Techniques for an Accurate Pressure Reading
Getting the right number on paper doesn’t help if your gauge is lying to you. Use these tools:
- A quality floor pump with a built-in gauge for home setup and baseline checks.
- A separate calibrated digital gauge to cross-check your pump’s accuracy.
- A compact pump or CO2 inflator for topping off mid-ride.
- A shop-grade electronic inflator when precision matters most, like before a race.
Check pressure when tires are cool, bleed a touch of air from the pump head before reading, and check twice to rule out gauge drift. Temperature matters too: psi shifts roughly 1 psi per 10 to 12°F swing, so a pressure set in a warm garage will read differently on a cold morning.
A Slightly Lower Number Usually Wins on Mixed Gravel
On typical mixed-terrain rides, I lean a few psi below whatever a calculator calls “optimal” for rolling resistance. Silca’s own testing backs this up: sacrificing a small amount of pressure buys a real drop in vibration and fatigue over a long ride, for barely any measurable speed cost. Comfort compounds over hours in the saddle.
Gear We Recommend for Dialing In Your Pressure
Getting your gravel tire pressure right depends on having tools you can actually trust, not a pump gauge that’s been lying to you for two seasons.

A few categories worth having in your kit:
- A high-accuracy floor pump with a gauge you don’t have to second-guess
- A separate digital pressure gauge for cross-checking on race morning
- A compact high-pressure pump or CO2 inflator for mid-ride adjustments
- Tubeless valve kits and fresh sealant to keep your setup sealed and reliable
- A tubeless-compatible gravel tire built for the pressures and terrain you actually ride
Sportfactoryproshop curates gear from brands chosen for engineering quality rather than shelf space, which matters when a $20 gauge can throw your whole pressure calculation off by several psi. If you’re ready to stop guessing at your pump’s accuracy, browse the calibrated gauges and tubeless supplies at Sportfactoryproshop and get your setup dialed before your next ride.
Sources
- SILCA Professional Tire Pressure Calculator
- The Gravel Tire Pressure Testing That Changes Everything | The CycleLytic Pulse
- Gravel bike tyre pressure | Recommendations & what to consider | BikeRadar
- Gravel Bike Tire Pressure: PSI by Rim and Tire Size – HED Cycling Products
- The Gravel Manual: Tyre Pressure, Braking & Technique Guide