

How Many Bike Light Lumens Do You Actually Need?
Posted by Matt Russ on 12th Aug 2026
How Many Bike Light Lumens Do You Actually Need?
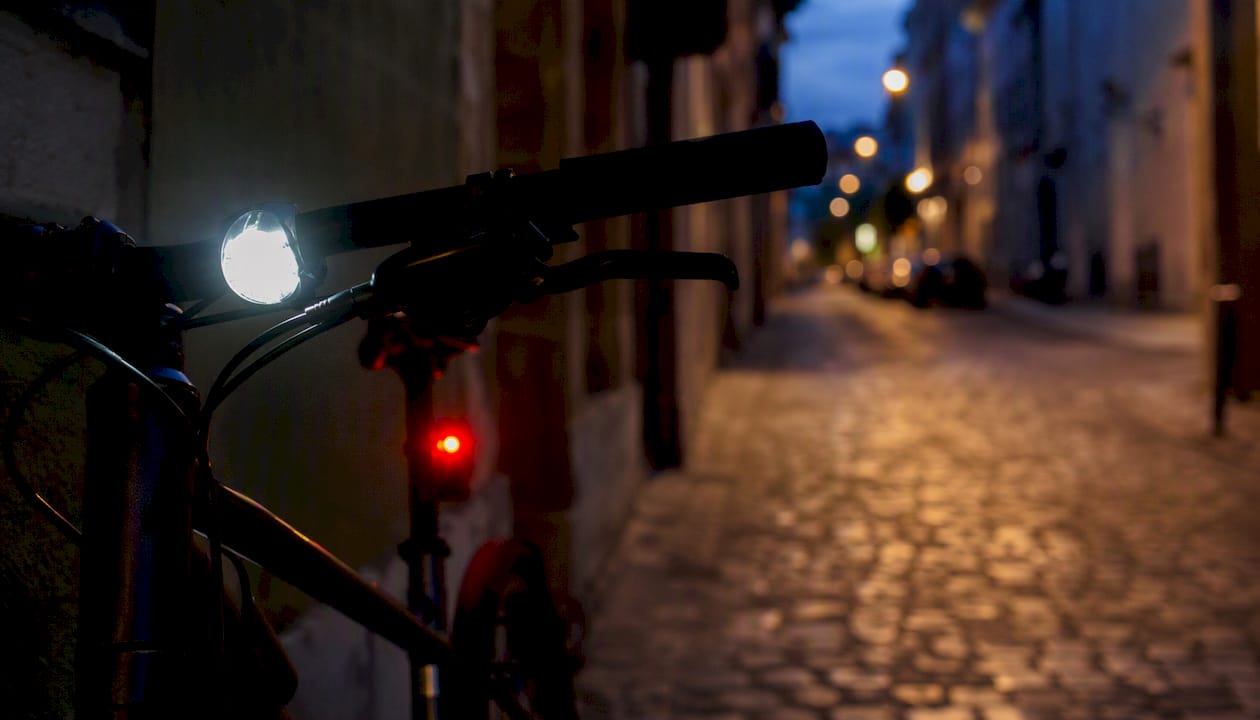
For most riders, the right output depends on where you ride. A 200–400 lumen front light handles lit urban streets. 600–1,000 lumens covers mixed or unlit roads. Technical night trails and fast gravel demand 1,000–2,000+ lumens up front. Rear lights work differently: 20–50 lumens is standard for urban night riding, while 50–150 lumens suits daytime or high-traffic roads where conspicuity matters most.
A solid commuter starter setup: a 400-lumen front with a 50-lumen rear. That combination covers most lit-to-mixed city routes with runtime to spare.
Quick action steps before your next ride:
- Identify your typical route: lit city streets, mixed roads, or unlit rural paths
- Match your front light to the lumen band above for that environment
- Confirm the light’s sustained output at its medium or high mode, not just the advertised peak
- Add a rear light with a pulse or flash mode for maximum conspicuity
- Aim the front beam slightly downward so it illuminates 10–15 feet ahead without blinding oncoming traffic
Key Takeaways
Matching bike light lumens to your riding environment, not chasing the highest peak number, is what keeps you visible and safe on every ride.
| Point | Details |
|---|---|
| Match lumens to your route | 200–400 lumens for lit urban, 600–1,000 for unlit roads, 1,000–2,000+ for fast trail riding |
| Prioritize sustained output | Check medium-mode runtime; peak lumen figures often drop within minutes due to thermal regulation |
| Beam pattern over raw lumens | Lux at distance and beam shape predict real-world visibility better than headline lumen counts |
| Pair front and rear correctly | Front light illuminates the path; rear light signals your position with flash modes for maximum conspicuity |
| Sportfactoryproshop | Carries curated lights selected for real sustained output and beam performance across commuter and performance tiers |
Table of Contents
- What do bike light lumens actually measure, and why don’t they tell the whole story?
- Recommended lumen ranges by riding condition
- Why front and rear lights have completely different jobs
- How to choose a bike light: a practical buying checklist
- Aiming, dazzling others, and U.S. legal basics you should know
- Sample setups for commuters, mixed-use riders, and performance cyclists
- What to look for in manufacturer specs: lux, beam diagrams, and sustained output
- The lumen number that actually matters is the one you’ll ride on
- Curated bike lights and accessories at Sportfactoryproshop
- Sources
What do bike light lumens actually measure, and why don’t they tell the whole story?
A lumen measures total light output in every direction at once. Think of it as the raw energy a bulb produces. Lux, by contrast, measures how much of that light lands on a specific surface at a given distance. For cycling, lux often predicts real-world visibility better than lumens because it tells you how bright the road ahead actually appears, not how much light the unit emits into the sky or sideways.
A compact light with tight optics and high central lux can outperform a floodier unit with twice the lumen rating. That’s the core reason beam pattern, spill, and glare control matter more than raw output when choosing a light.
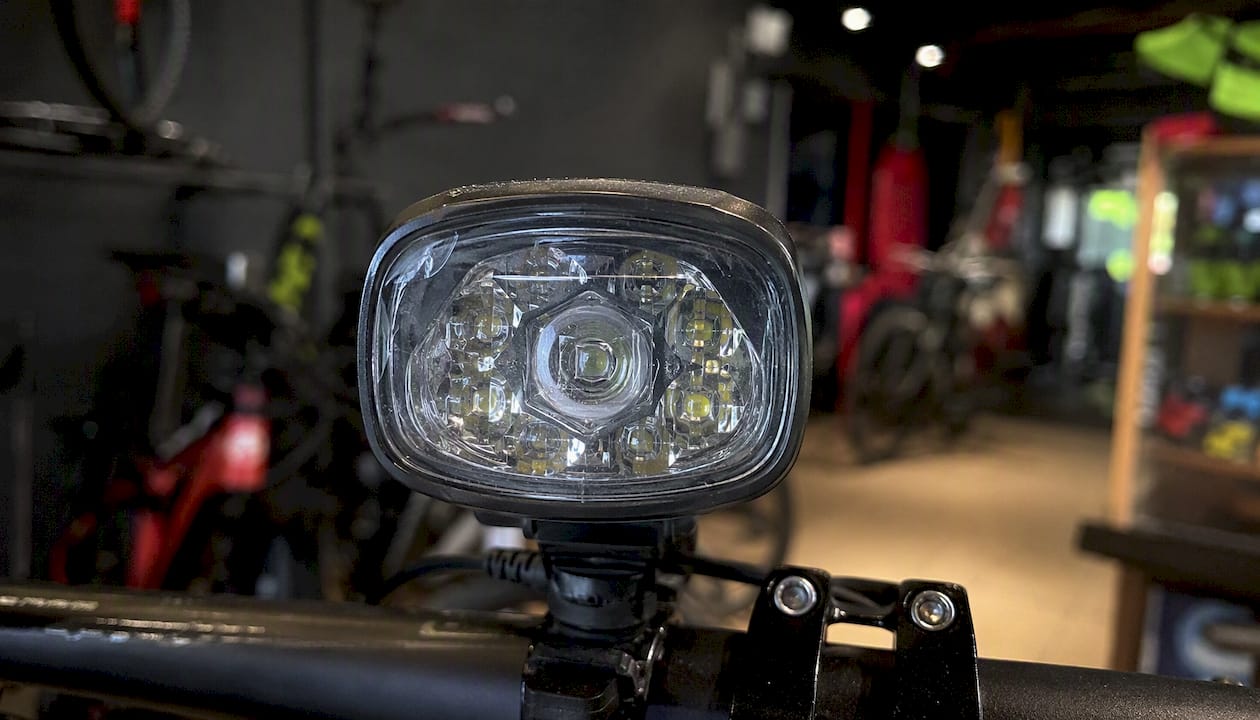
Peak vs. sustained output is the other gap riders miss. Manufacturers test and advertise maximum lumen figures, but lab testing shows those peaks are often brief, dropping within minutes as the LED heats up and thermal regulation kicks in. The number that matters is sustained output at the mode you’ll actually use, typically medium or high.
Beam pattern breaks down into three types:
- Spot: narrow, long-throw beam; best for seeing far ahead on fast descents or open roads
- Flood: wide, even spread; best for urban riding where peripheral awareness matters
- Mixed/combo: a central hot spot with side spill; the most versatile for mixed-use riders
Pro Tip: When comparing lights, look for medium-mode runtime and lux figures at 10 meters rather than relying on the headline lumen number. Real-world tests from outlets like Bicycling or BikeRadar will show you what a light actually delivers after the first few minutes of use.
Recommended lumen ranges by riding condition
The table below organizes front and rear output targets by riding environment, along with beam priorities and general runtime expectations at a usable mode.
| Riding Condition | Front Lumens | Rear Lumens | Beam Priority | Runtime at Usable Mode |
|---|---|---|---|---|
| Lit urban (city streets) | 200–400 | 20–50 | Flood / wide | 4–8 hours |
| Mixed urban (some dark sections) | 400–600 | 50–100 | Mixed | 3–5 hours |
| Unlit rural roads | 600–1,000 | 50–150 | Mixed / spot | 2–4 hours |
| Gravel / trail (moderate pace) | 800–1,200 | 50–100 | Mixed / spot | 2–3 hours |
| Fast night roads / high-speed | 1,000–2,000+ | 100–150 | Spot + flood combo | 1.5–3 hours |
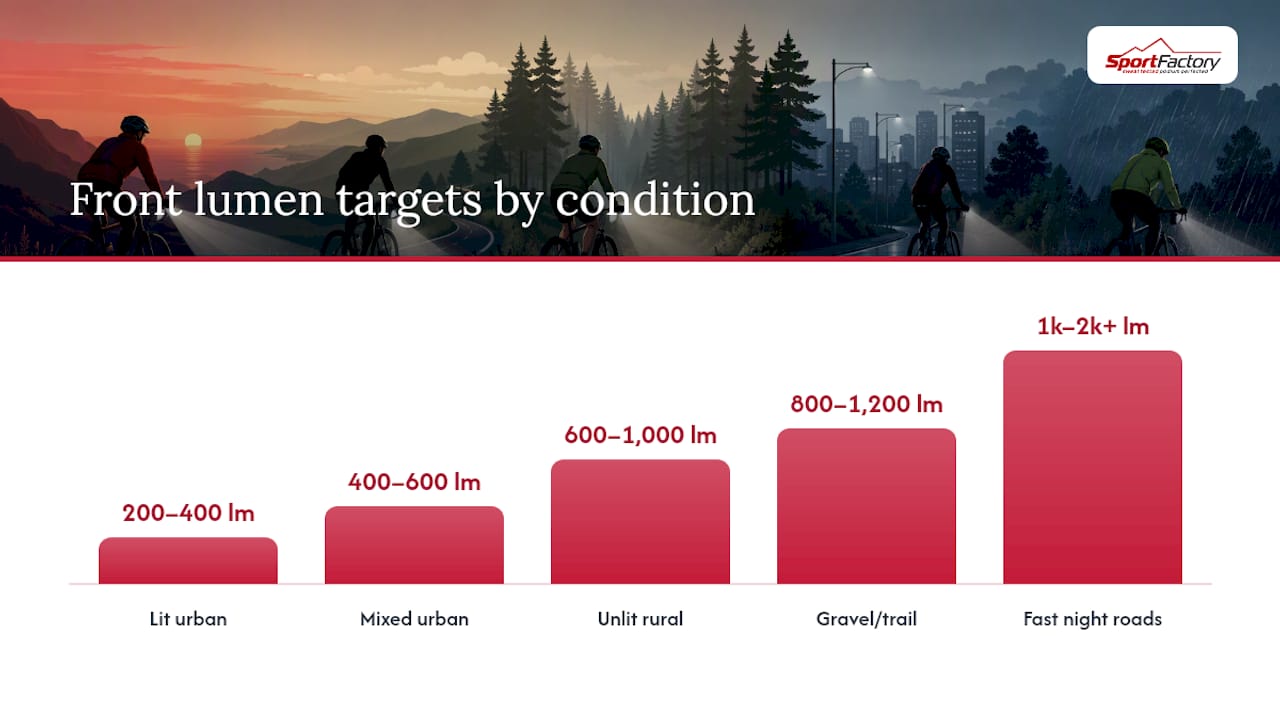
For unlit roads, a practical minimum of around 600 lumens up front is the standard recommendation, with 1,000+ lumens for fast or technical riding. Urban commuters generally do well with 200–500 lumens front and 20–150 lumens rear, depending on day or night conditions.
A few condition-specific notes:
- Lit urban: Flash mode on the rear is preferred here; it draws attention in busy, visually cluttered environments
- Unlit rural: Steady mode up front for consistent road illumination; flash rear for driver conspicuity
- Gravel/trail: Prioritize beam width and throw; a narrow spot alone misses trail edges
- Daytime riding: Daytime running lights require higher output than you’d expect, typically 200+ lumens front and 50+ lumens rear, because ambient light competes with your beam. Flash modes significantly help here
Bad weather adds another variable. Fog, rain, and snow scatter light, which can reduce effective visibility even at higher lumen outputs. In those conditions, a wider, lower-glare beam often preserves contrast better than a tight spot at maximum power.
Why front and rear lights have completely different jobs
Front and rear lights solve different problems, and confusing their roles leads to poor choices on both ends.
A front light’s job is to illuminate the path. You need enough sustained output to see obstacles, road surface changes, and turns before you reach them. Beam shape and cutoff matter here: a well-aimed light with a defined upper edge keeps light on the road and off oncoming drivers’ eyes. Sustained lumens at your riding mode, not peak output, determine whether you can actually see at speed.
A rear light’s job is conspicuity, not illumination. Drivers behind you need to detect your position quickly, especially in mixed traffic. That means a pulsed or flash mode often outperforms a steady beam for getting noticed. Flashing rear lights increase conspicuity and are generally preferred for commuting. Raw lumen output matters less than pulse design, side visibility, and mounting angle.
Practical pairing guidance:
- A 400-lumen front with a 50-lumen flashing rear covers most lit-to-mixed urban routes
- On high-traffic roads or in daylight, step the rear up to 100–150 lumens with a strong pulse pattern
- For gravel or night trails, a brighter rear (100+ lumens) helps riders behind you track your position on technical terrain
Pro Tip: For fast descents or technical trail riding, pair a bar-mounted flood light with a helmet-mounted spot. The bar light gives wide peripheral coverage; the helmet light points where your head turns, giving you focused throw exactly where you’re looking. This dual-light strategy is standard practice among performance riders.
How to choose a bike light: a practical buying checklist
Before you buy, work through these steps in order. Skipping straight to lumen numbers is where most riders go wrong.
- Identify your typical route. Is it lit, mixed, or fully dark? That single answer narrows your front lumen target immediately.
- Choose your target lumen range from the condition table above. This is your floor, not your ceiling.
- Check sustained output at medium or high mode. Ignore the headline max. Find the runtime at the mode you’ll actually use. If a manufacturer only lists max-mode runtime, that’s a red flag.
- Confirm beam pattern. Flood for urban, spot or mixed for rural and trail. A beam diagram on the product page is a good sign; its absence is not.
- Check mounting stability. A light that vibrates loose on rough roads or gravel is useless regardless of output.
- Match runtime to your longest likely ride, with a buffer. A 2-hour runtime at high mode is fine for a 45-minute commute; it’s a problem on a 3-hour evening gravel ride.
What manufacturers often misrepresent: Peak lumen claims are the most common issue. A light advertised at 1,200 lumens may sustain only 600–800 lumens after the first few minutes of thermal regulation. Third-party lux and beam tests from cycling publications give a more honest picture.
Price tiers and what to expect:
- Economy commuter ($20–$50): 200–400 lumens, 3–5 hours at usable mode, basic flood beam, USB charging
- Midrange mixed-use ($50–$120): 400–800 lumens, multiple modes, 2–4 hours at high mode, better optics and mounting
- High-performance trail/road ($120–$300+): 1,000–2,000+ lumens, sustained output with thermal management, beam diagrams available, 1.5–3 hours at high mode
Pro Tip: Test any new light on your actual route at your usual riding time before committing to it as your primary setup. A light that looks impressive in a parking lot can disappoint on a fast descent where you need throw, or overwhelm in a tunnel where you need flood.
Aiming, dazzling others, and U.S. legal basics you should know
A powerful front light aimed incorrectly is a hazard to everyone around you. Blinding a driver or pedestrian with 1,000+ lumens is a real risk, and it’s avoidable with a simple adjustment.
How to aim your front light correctly:
- Mount it on the handlebar or fork, pointed slightly downward
- The beam’s brightest point should hit the road roughly 10–20 feet ahead, not at eye level
- On roads with oncoming traffic, tilt the beam down further or switch to a lower mode
- If your light has a cutoff (a defined upper edge to the beam), use it; it’s designed for exactly this
Excessive brightness in the wrong direction causes glare that reduces other road users’ ability to see. Using a 2,000-lumen spot on full power in a lit city tunnel is the kind of situation where dropping to medium mode protects everyone, including you.
U.S. legal context: Bicycle lighting laws vary by state. Most states require a white front light visible from at least 500 feet and a red rear reflector or light visible from 200–500 feet. NHTSA provides authoritative safety resources on bicycle visibility and interaction with motor vehicles. For state-specific rules, your state DOT is the definitive source; New York’s DOT bicycle FAQ is one example of the kind of practical guidance states publish.
This article provides general information only. Confirm current lighting requirements with your state DOT or a qualified legal resource before riding.
- Always check your state’s specific visibility distance requirements
- Some states specify light color, mounting position, or flash-mode restrictions
- Reflectors are required separately from lights in most states; lights don’t always substitute
Sample setups for commuters, mixed-use riders, and performance cyclists
Three practical configurations that map the lumen guidance above to real rider types.
Commuter (daily lit-city rides) Target: 300–400 lumens front, 30–50 lumens rear. Beam priority: flood front, pulse rear. Runtime needed: 3–5 hours at medium mode for back-to-back commutes. Price band: $30–$80 for a reliable pair. Look for USB-C charging and a simple two-mode setup (steady + flash). A modular light that doubles as a daytime running light on flash mode saves you from carrying two separate units.
Mixed-use (urban plus occasional dark roads) Target: 600–800 lumens front, 50–100 lumens rear. Beam priority: mixed front (hot spot with side spill), strong pulse rear. Runtime needed: 2–3 hours at high mode. Price band: $80–$150 for the front, $30–$60 for the rear. At this tier, look for a light with at least three modes so you can drop to 400 lumens in lit sections and push to full output when the road goes dark.
Performance / gravel / night trail Target: 1,000–2,000 lumens front (bar mount), 800–1,200 lumens on a helmet mount for trail direction, 100–150 lumens rear. Beam priority: bar flood + helmet spot. Runtime needed: 1.5–2.5 hours at high mode; carry a spare battery or a second light for rides over 2 hours. Price band: $150–$300+ for a quality front, $40–$80 for rear. At this level, peak power output during fast training rides changes your visual demands significantly; a higher approach speed means you need more throw distance, not just more lumens.
What to look for in manufacturer specs: lux, beam diagrams, and sustained output
Lux figures on product pages tell you how much light reaches the road at a specific distance, typically 10 meters. A light rated at 500 lux at 10 meters will illuminate the road surface brightly enough to see obstacles at speed; a light rated at 50 lux at the same distance will not, regardless of its lumen headline.
Reading beam diagrams: A good beam diagram shows the light’s distribution pattern as a contour map. For commuters, you want a wide, even spread with no harsh hot spot that causes glare. For trail or road riding, a defined central zone with moderate spill gives you throw distance plus peripheral awareness. A diagram that shows light spilling upward above the horizon is a sign of poor cutoff design.
Sustained output and thermal regulation: Quality lights include thermal management that reduces output gradually as the LED heats up, rather than cutting off abruptly. Look for spec sheets that list output at 1 minute and at 10 minutes separately. A light that drops from 1,000 lumens to 600 lumens after 5 minutes is performing normally; one that claims flat 1,000-lumen output for 3 hours almost certainly isn’t measuring honestly.
Key insight: Lux at distance, beam diagram shape, and medium-mode runtime are the three specs that predict real-world performance. A light with a published beam diagram and honest sustained-output figures is almost always a better buy than one that leads only with a peak lumen claim. Prioritizing sustained output over advertised peaks is the single most consistent advice from independent testers.
- Check for IEC 62471 or similar photobiological safety ratings on high-output lights
- Waterproofing rating (IPX4 minimum for rain resistance, IPX6 for wet trail riding) is a practical spec that often gets overlooked
- Mounting system quality affects beam aim stability; a loose mount on a rough road shifts your beam unpredictably
The lumen number that actually matters is the one you’ll ride on
Most riders spend too much time comparing peak lumen figures and not enough time asking what a light does after the first five minutes. The headline number is marketing. The medium-mode sustained output, the beam shape, and the runtime at the setting you’ll actually use are the specs that determine whether you get home safely.
There’s also a tendency to over-buy on lumens for urban riding and under-buy for rural or trail use. A 2,000-lumen spot in a lit city is uncomfortable for everyone around you. A 400-lumen flood on an unlit country road at 20 mph leaves you riding blind. Matching output to environment is the whole game.
One more thing worth saying directly: the best light is the one you actually carry. A high-performance unit left at home because it’s heavy or inconvenient to charge does nothing. A reliable 400-lumen USB commuter light clipped to your bar every single day is worth more than a 2,000-lumen trail unit that stays in the garage.
Curated bike lights and accessories at Sportfactoryproshop
Sportfactoryproshop carries a curated selection of cycling safety lights and accessories chosen for real-world performance, not just spec-sheet numbers. Whether you’re outfitting a daily commuter setup or building a high-output trail rig, the range covers the lumen bands and beam types covered in this guide.

Before you check out, confirm two things: the sustained output at the mode you’ll use most, and the runtime at that setting against your longest typical ride. Every light in the Sportfactoryproshop lineup is selected with those criteria in mind, so you’re not sorting through inflated claims. Browse the full cycling gear and accessories range at Sportfactoryproshop and match your setup to your route.