

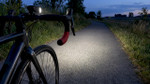
Choosing A Front Bicycle Light: 200 Lumens to Be Seen, 1,000 to Spot Hazards
Posted by Matt Russ on 14th Oct 2026
Choosing Front Bicycle Light: 200 Lumens to Be Seen, 1,000 to Spot Hazards

For road riding, aim for 100 to 200 lumens on well-lit city streets, 200 to 500 lumens for mixed urban commuting, 400 to 1,000 lumens on unlit rural roads, and 700 to 1,200 or more lumens for faster rides in the dark, with 800 to 2,000-plus lumens when your route dips onto gravel. Beam pattern, sustained output, and mounting often matter more than the headline number, a point echoed in cycling lighting guidance and testing standards like Germany’s StVZO. At Sport Factory Pro Shop, we help riders consider real-world factors, not just the number on the box.
TL;DR:
Compare lux at distance and beam charts, because a focused 600 lumen light can deliver 60 lux at 10 meters, outperforming a scattered 1,000 lumen model.
Check runtime at your intended setting: the Lezyne Fusion Drive 500+ sustained full power for about 1.5 hours before dropping to a lower mode.
Use a wide flood beam in fog, since a narrow spot can bounce glare back; in rain, lower steady output may be easier to use.
Pair a handlebar mounted flood light with a helmet mounted spot light for fast rides, giving you road coverage and light that follows your turns.
Check local rules before traveling abroad, because Germany’s StVZO limits output and requires a cutoff beam designed to reduce glare.
Table of Contents
Quick Reference: Lumen Ranges by Riding Condition
Picking a target starts with being honest about where and when you actually ride. A light sized for your darkest regular route will cover every easier condition, but a light sized only for city commuting will leave you underlit the first night you head out of town.
-
Well-lit city streets (100 to 200 lumens): primarily a “to be seen” light; drivers and pedestrians need to notice you, not for you to see road texture.
-
Mixed urban commuting (200 to 500 lumens): still largely about visibility, but dim stretches between streetlights mean you need some actual illumination too.
-
Suburban roads with darker patches (400 to 600 lumens): a hybrid zone where you are both being seen and starting to see potholes and debris.
-
Unlit rural roads (500 to 1,000 lumens): this is “to see” territory, where you depend on the beam to spot hazards with enough warning to react.
-
Faster road rides in the dark (700 to 1,200-plus lumens): higher speed shrinks your reaction window, so you need light reaching further ahead.
-
Occasional gravel or off-road sections (800 to 2,000-plus lumens): uneven surfaces demand a wider, brighter spread to catch ruts and rocks early.
These ranges line up closely with the recommendations in a bike lights jargon guide from Cyclingnews, which notes that 600 lumens is generally sufficient for city riding while 1,200 lumens is common guidance for trail use. A separate Cyclingnews feature on lumen targets recommends 100 to 200 lumens for city visibility and 600 to 1,200 lumens or more for rural and faster riding, which is the backbone of the ranges above.
One figure worth knowing before you shop: testing has shown that battery life typically shortens substantially at a light’s highest output setting, so a light rated for 1,000-plus lumens may only sustain that brightness for a fraction of a typical ride.
Matching your light to the darkest condition on your regular routes, rather than your average ride, keeps you from getting caught short on the one night a streetlight is out or you take a wrong turn onto an unlit road.
What Lumens and Lux Actually Measure
Lumens measure total light output, the full volume of light a bulb or LED produces in every direction before any lens or reflector shapes it. Lux measures illuminance, meaning how much of that light actually lands on a surface at a given distance, which is the number that tells you how well you can actually see the road ahead.
A light advertising 1,000 lumens with a poorly focused beam might throw only 20 lux at 10 meters, while a well-engineered 600-lumen light with a tight reflector can throw 60 lux at the same distance. According to the Cyclingnews jargon buster, city riding typically calls for 20 to 60 lux at 10 meters, while trail riding often needs 150-plus lux at 10 meters, numbers that depend far more on beam design than on raw lumen count.
-
Lumens tell you how much light a source produces in total, in every direction.
-
Lux tells you how much usable light actually reaches the road in front of your wheel.
-
A tighter, well-focused beam can outperform a higher-lumen light with a scattered, inefficient pattern.
-
Lights that publish lux-at-distance figures or beam graphs give you a far more honest read on real-world performance than a lumen number alone.
When two lights list similar lumen figures but one includes a lux chart or a beam distance spec and the other does not, that detail alone can tell you which one will actually light your way rather than just glow brightly on the shelf.
Beam Pattern Choices for Road Riders
Lumens set the ceiling, but beam shape decides how much of that light actually helps you. Road cyclists generally choose between three beam types, each suited to a different kind of riding.
-
Flood beams spread light wide across your peripheral view, which helps on slower city or suburban roads where you need to catch debris, parked car doors, or pedestrians stepping off a curb.
-
Spot beams throw a narrower, longer beam down the road, which matters most on fast descents or rural stretches where you need advance warning well before your front wheel arrives.
-
Cut-off beams, often built to StVZO-style standards, shape the light so it illuminates the road without throwing glare into the eyes of oncoming riders or drivers, which matters on any shared road at night.
For riders who mix city commuting with the occasional fast club ride, a dual-beam light or a flood-plus-spot combination offers the broadest coverage, though it typically costs more and can add weight compared to a single-pattern unit.
Pro Tip: Test any new light in your driveway against a wall about 10 meters away before your first night ride, so you know exactly how wide and how far the beam actually throws.

The Exposure Sirius Mk10 Daybright review is a useful illustration here: at roughly 900 claimed lumens, it uses a strong forward-throw beam pattern specifically built for unlit road riding, which shows how a well-designed beam can make a mid-to-high lumen light punch well above its number on paper.
Why Peak Lumen Claims Often Overstate Real Performance
The lumen number printed on a box is almost always the peak output measured fresh off the charger, not the number you will see 20 minutes into a ride. Heat buildup inside the light housing causes thermal throttling, where the LED automatically dims to protect its components, and as the battery drains, voltage drop reduces brightness further unless the circuitry is regulated to hold output steady.
BikeRadar’s testing notes point out that manufacturers’ peak-lumen claims can overstate real-world performance because of exactly these two factors, and that regulated circuitry paired with a published runtime-at-output figure gives a far more useful read than the headline number alone.
A figure that catches a lot of riders off guard: testing of the Lezyne Fusion Drive 500+ found that its 500-lumen setting provided usable illumination for riding around 25 km/h, but full power lasted only about 1.5 hours before the light dropped to a lower mode, a trade-off worth knowing when planning a ride on a single charge.
When comparing lights, prioritize these specs over the peak lumen figure alone:
-
Runtime at a specified lumen level, not just “max runtime” on the lowest flash mode.
-
Regulated output claims, meaning the manufacturer states the light holds a consistent brightness rather than fading gradually.
-
Battery capacity in mAh, which gives you a rough sense of total energy available regardless of mode.
-
USB-C charging, which simplifies topping off a battery with the same cable you likely already carry for other devices.
-
Mode variety, including a genuine mid-power “enduro” or balanced setting between full blast and basic flash.
A light with a lower peak number but a longer, steadier sustained output at your target brightness will often serve you better than one that claims an eye-catching figure it can only hold for a few minutes.
Converting Speed and Stopping Distance Into Lumen Targets
Speed compresses your reaction time, and reaction time is really what lumen and lux targets are protecting. As speed increases, you have less time to react to a pothole, gravel, or a fallen branch, so a light needs to reveal hazards farther ahead.
-
At city commuting speeds, a 100 to 200 lumen light aimed at visibility is usually adequate, since traffic and lighting infrastructure do much of the work for you.
-
At moderate speeds, step up to 500 to 1,000 lumens so your beam reaches far enough ahead to give you time to brake or swerve.
-
On descents or fast group rides, 700 to 1,200 lumens or more gives you the margin you need, since a beam that only reveals a nearby hazard is effectively useless at speed.
Building in margin matters more than hitting an exact number: a slightly brighter light with a strong beam gives you a buffer for the nights visibility is worse than expected, whether from fog, a dying battery, or simple fatigue slowing your reaction time.
For riders who regularly ride at higher speeds, pairing a helmet-mounted spot light with a handlebar-mounted flood light covers both needs at once. The helmet light follows your line of sight for aiming into corners, while the bar light handles near-field visibility and keeps debris in view right in front of your wheel.

A Short Checklist for Choosing a Front Light
Picking a light gets much simpler once you run it through a short, deliberate checklist rather than comparing lumen numbers across browser tabs.
-
Set your lumen target first, based on the darkest condition you regularly ride in, not your easiest route.
-
Look for regulated output language in the spec sheet, which signals the light holds brightness steady rather than fading as the battery drains.
-
Check runtime at your target output level, not just the maximum runtime on the dimmest flash setting.
-
Choose beam shape to match your roads, flood for slower urban riding, spot or combination for faster and darker routes.
-
Prefer USB-C charging and simple controls, since a light you can charge with one shared cable and operate with gloves on gets used more consistently.
-
Weigh mount compatibility and weight, especially for a helmet light, where even small weight differences affect comfort over a long ride.
For mode settings, daytime rides benefit from a lower steady output or a distinctive flash pattern that catches driver attention without wasting battery, since full brightness is unnecessary in daylight. Night rides call for a steady beam when you need to see the road surface, and a strong flash or pulse mode when your main concern is being seen at an intersection or in traffic.
Pro Tip: Keep one preset mode dialed in for your regular commute and a second for faster night rides, so you are never fumbling through a dozen flash patterns at a stoplight in the dark.
Handlebar mounting suits flood and general-purpose beams well, since the light sits close to the ground and illuminates the road surface directly. Helmet mounting shines for spot beams, letting the light follow your head turn into corners, though it adds weight up top that some riders notice on longer rides.
Setting Up Your Light for Different Rides
A light that works perfectly for your commute can leave you underlit on a weekend club ride, so it helps to have a few presets ready rather than guessing each time you clip in.
-
Well-lit commute: a steady low mode around 100 to 200 lumens, or a daytime flash pattern if you are riding during daylight hours.
-
Mixed-light commute: a steady mode in the 200 to 500 lumen range, switching to flash only at well-lit intersections to conserve battery.
-
Dark rural group ride: 500 to 1,000 lumens on steady mode, since a flashing light in a group can be disorienting to riders behind you.
-
Solo fast night ride: 700 to 1,200-plus lumens on steady or a regulated high mode, paired with a helmet spot light if you have one.
Before any night ride, aim your beam with a quick road test: point your bike at a flat stretch of pavement or a garage door and adjust the angle so the brightest part of the beam lands about 10 to 15 meters ahead rather than straight out at eye level, which keeps you from dazzling oncoming riders or drivers.
Battery conservation matters most on longer rides, so switching from steady high to a mid or flash mode during well-lit stretches extends your runtime for when you actually need full output. Carrying a small USB charger or spare battery is cheap insurance on long night rides, and our portable pump battery life guide covers similar backup-power thinking that applies just as well to lights as to inflation tools.
Lighting Regulations Vary by Region
Legal requirements for bike lights differ significantly depending on where you ride, and some countries impose limits that have nothing to do with how bright you might want to be seen. Germany’s StVZO standard, for example, caps beam output and mandates a specific cut-off pattern designed to prevent glare on shared roads, which is stricter than most lumen-based buying advice assumes.
In the United States, lighting requirements are generally set at the state level and tend to focus on minimum visibility distance and the presence of a front white light and rear red light or reflector, rather than a maximum lumen cap. That means a bright, StVZO-style cut-off beam is not required by law in most US states, but the controlled beam pattern still helps you avoid blinding other road users, which is worth doing regardless of what the law strictly requires.
Before buying a light for travel or racing abroad, it is worth checking the specific rules for that country, since a light that is perfectly legal at home could run afoul of beam or brightness restrictions elsewhere. When in doubt, a light with a built-in cut-off beam tends to satisfy the stricter end of most regional rules without sacrificing much visibility.
How Weather Affects the Lumens You Need
Rain, fog, and heavy overcast conditions all reduce visibility in ways that raw lumens alone cannot fully fix. Fog scatters light, which means a tightly focused spot beam can actually create a wall of glare that bounces back at you, while a wider flood pattern often cuts through fog more effectively by lighting the road surface rather than the air in front of you.
Rain adds reflective glare off wet pavement, which can make it harder to judge distance and contrast even with a bright light, so riders often find that a slightly lower, steadier output feels more usable than cranking to maximum brightness in wet conditions. Reduced ambient light during heavy overcast days also means a light sized for “mixed urban commuting” conditions may need to shift toward the higher end of that range, or into the next range up, even during daylight hours.
The practical takeaway is that weather should push your lumen choice upward within your usual range rather than downward, and a light with easy on-the-fly mode switching lets you adjust output as conditions change mid-ride rather than committing to one setting for the whole route.
How LED Technology Has Changed Lumen Output
LED technology has advanced considerably in recent years, and the practical effect for riders is that today’s lights produce more usable light per watt of battery power than earlier generations did. Modern LED chips run cooler and more efficiently, which reduces the thermal throttling that caused older high-output lights to dim noticeably partway through a ride.
That efficiency has also enabled genuinely high claimed outputs in compact housings. The Magicshine Monteer 12000 review documents a claimed output of up to 12,000 lumens, though the review also notes that extremely bright full-power modes drain the battery relatively quickly and that beam quality still affects how usable that brightness actually is on the road. Similarly, the Sigma Buster 1600 review found that a focused beam made 1,600 lumens feel genuinely useful for long-distance reach, even though the narrow spread left less peripheral coverage.
The lesson across both reviews is consistent: LED efficiency gains have raised the ceiling on what is possible, but beam engineering still determines how much of that raw output actually becomes useful light on the road in front of you.
Coach Matt’s Perspective and Practical Recommendation
When I work with competitive road cyclists on lighting setup, I prioritize three things in this order: whether the light meets a recognized beam standard like StVZO or at least avoids glaring oncoming traffic, whether the beam shape actually matches the rider’s typical road and speed, and whether the manufacturer publishes a realistic runtime at the output level the rider actually plans to use. The raw lumen number comes a distant fourth on that list, mostly because it tells you almost nothing on its own.
For a weeknight race-pace group ride on rolling rural roads, my go-to setup is a bar-mounted light with a regulated steady mode, paired with a smaller helmet light on a narrower spot beam for descents and corners. That combination covers both the “to be seen” need in the rotating paceline and the “to see” need when the pack strings out on a fast downhill.
We curate cycling products from trusted brands selected for their engineering quality and rider-focused features. If you want a second opinion on matching a light to your regular routes, that is exactly the kind of question our team is happy to work through with you.
— Coach Matt
Find the Right Light at Sport Factory Pro Shop
We offer cycling lights and related accessories. Our team can help you consider a lumen target and beam pattern for your typical rides, whether that is a well-lit commute, a mixed-light evening ride, or a fast club run on unlit rural roads.

-
Browse our full bike accessories category, including bicycle lights alongside pumps, maintenance tools, and wheelsets.
-
Reach out to our team for a personalized recommendation if you are weighing a few specific models against your usual routes.
-
Pair a new light with fresh tires if your current set is already showing wear heading into darker riding months.
Visit our bike category page to see what is currently in stock and find a light built for the conditions you actually ride in.
FAQ
How many lumens should bike lights have?
For road riding, 100 to 200 lumens works for well-lit city streets, while unlit rural roads typically call for 500 to 1,000 lumens or more. The right number depends on your riding speed and how dark your route gets, with faster or darker riding pushing the target higher, as outlined in Cyclingnews’ lumen guidance.
Is 1,000 lumens bright for a bike light?
Yes, 1,000 lumens sits at the high end of what most road cyclists need, suitable for fast rides on unlit roads or occasional gravel sections. At that output, runtime on full power is often limited, so checking the manufacturer’s runtime-at-output figure matters as much as the lumen number itself.
Is 500 lumens bright for a bike light?
500 lumens is a solid mid-range choice, well-suited to mixed urban commuting or suburban roads with darker patches. Testing of a 500-lumen light found it provided usable illumination for riding around 25 km/h, though full power lasted only about 1.5 hours before dropping to a lower mode.
Is 300 lumens bright for a bike light?
A light with output just above that of basic “to be seen” city lights, but below that of lights suited for unlit rural or faster night rides, makes a reasonable choice for mixed urban commuting with decent streetlight coverage. It is generally not enough for unlit rural roads or faster night rides, where 500 lumens or more gives a safer margin.