


How to Choose the Right Tubeless Tape Width
Posted by Matt Russ on 8th Aug 2026
How to Choose the Right Tubeless Tape Width
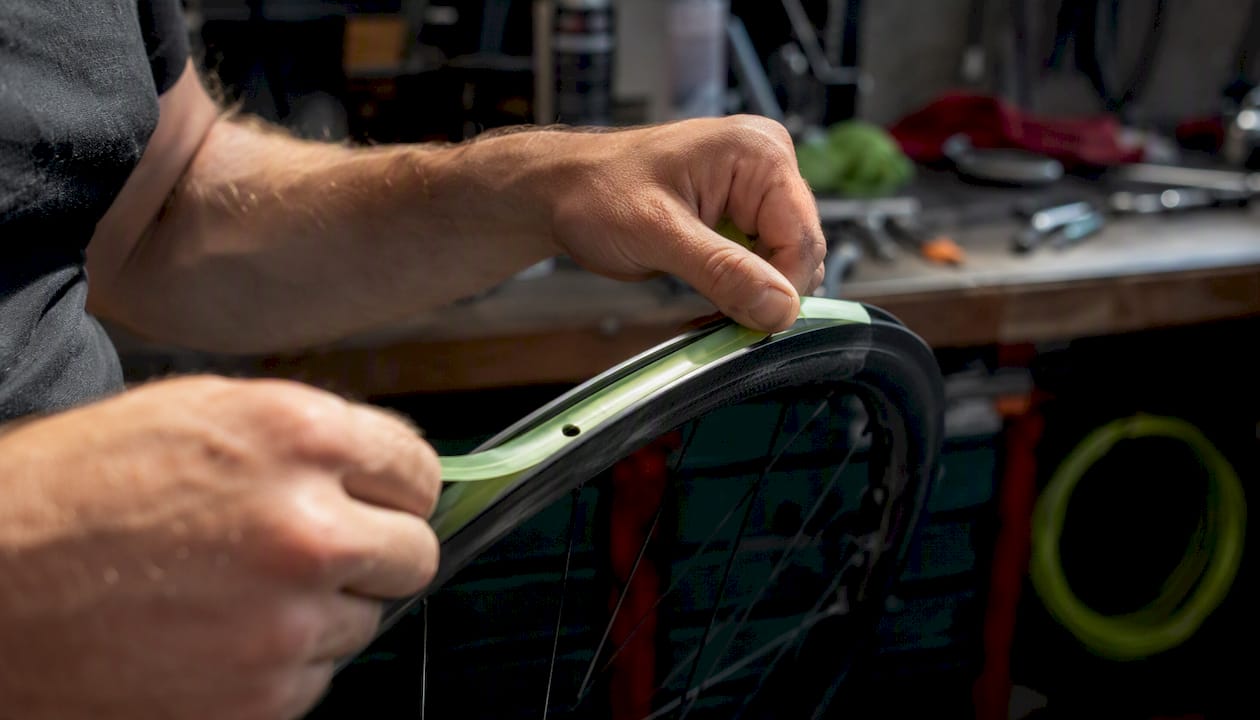
Choose tubeless rim tape that is 1–2 mm wider than your rim’s internal width. That single rule, backed by Stan’s product guidance and e*thirteen’s support documentation, covers the vast majority of road, gravel, and mountain bike setups. Tape that matches or slightly exceeds the rim bed width fills the channel completely, contacts the sidewall edges, and creates the airtight seal a tubeless system depends on.
- Measure first: use a digital caliper to measure the internal width of your rim (inside bead hook to inside bead hook).
- Pick the nearest width: choose tape 1–2 mm wider than that measurement as your starting point.
- Check roll length: a standard 10 m roll typically covers two to three wheels depending on rim diameter and tape width.
Key Takeaways
Choosing tape 1–2 mm wider than your rim’s internal width, confirmed against the rim maker’s own documentation, gives you the most reliable tubeless seal across road, gravel, and MTB setups.
| Point | Details |
|---|---|
| Core width rule | Choose tape 1–2 mm wider than your rim’s internal width as the default starting point. |
| Measure accurately | Use a digital caliper inside bead hook to inside bead hook for a precise reading. |
| Two layers when needed | Run two layers for tire pressures above 50 psi or rims with recessed spoke holes. |
| Roll length planning | A 10 m roll covers two to three single-layer wheels; double that usage for two-layer setups. |
| Sportfactoryproshop | Stocks tubeless tape, sealant, and valves so you can complete your full tubeless build in one order. |
Table of Contents
- What tubeless tape width does your rim actually need?
- How to measure rim internal width and decide on tape size
- When should you use two layers of tubeless tape?
- How to apply tubeless rim tape correctly
- Special cases: hookless rims, wide rims, and deep-section beds
- Which brands make the best tubeless tape?
- Gear up at Sportfactoryproshop for your tubeless build
- Sources
What tubeless tape width does your rim actually need?
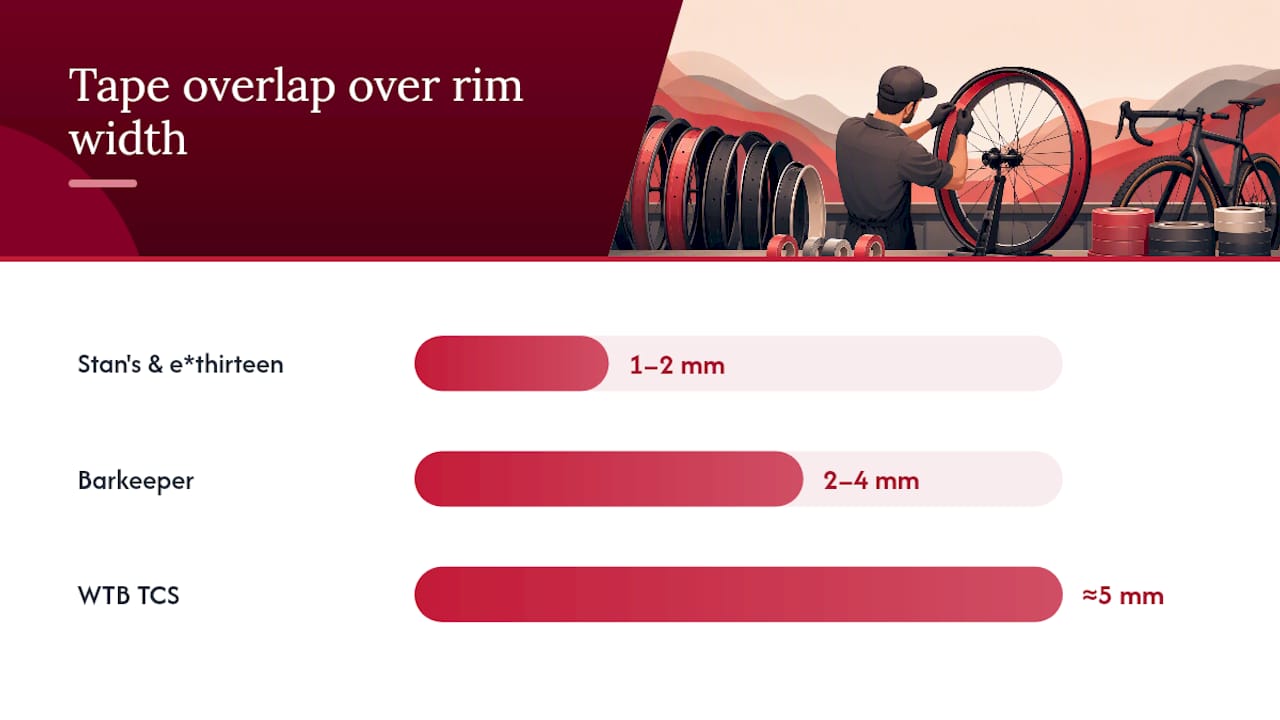
Manufacturer recommendations vary slightly. Stan’s and e*thirteen land at 1–2 mm over internal width. Barkeeper’s guidance suggests adding 2–4 mm. WTB’s TCS documentation recommends going roughly 5 mm wider, particularly for aggressive MTB use where a more generous overlap onto the sidewall improves durability. Present the 1–2 mm rule as your default, then bump up when your rim is borderline between two sizes or when you’re running high pressure.
| Rim Internal Width (mm) | Recommended Tape Width (mm) | Layers | Notes |
|---|---|---|---|
| 17–18 | 20–21 | 1× | Road/gravel; DT Swiss 21 mm tape fits this range |
| 20–21 | 23–25 | 1× | Gravel/XC; 25 mm tape works well at the upper end |
| 23–25 | 25–28 | 1× | Versatile range; 28 mm covers borderline 25 mm rims |
| 26–29 | 29–32 | 1× or 2× | Trail/enduro; consider 2× above 50 psi |
| 30–35 | 32–35 | 1× or 2× | Wide MTB/plus; choose wider tape or double layer |
| 38–42 | 40–42 | 2× | Plus/fat rims; multiple strips may be needed |
Borderline callouts:
- A 25 mm internal rim sits between 26 mm and 28 mm tape. Go with 28 mm to guarantee sidewall contact.
- A 29 mm internal rim is right at the edge of the 29–32 mm range. If you run above 50 psi, use two layers of 30 mm tape rather than one layer of 32 mm.
How to measure rim internal width and decide on tape size
Getting the measurement right takes about two minutes and prevents a wasted roll of tape.
- Remove the old tape or tire so the rim bed is fully exposed.
- Measure inside bead hook to inside bead hook using a digital caliper. Place the caliper jaws at the narrowest point of the rim channel, not at the outer rim edge. A steel ruler works in a pinch, but a caliper gives you the 0.5 mm precision that matters when you’re between sizes.
- Note the measurement and add 1–2 mm as your target tape width. If your rim is hookless, follow the rim maker’s specific tape width recommendation before applying the general rule.
- Cross-check with the manufacturer. ENVE’s support guidance recommends matching tape to the rim bed measurement and consulting rim-specific documentation when it exists. For ENVE wheels, that page lists exact widths by model.
- Confirm tape availability in your target width. If the exact size isn’t stocked, round up to the next available width rather than down.
Before you tape, prep the rim:
- Wipe the rim bed with isopropyl alcohol (90%+ concentration).
- Let it dry completely before applying tape.
- Check for burrs or rough spots that could puncture the tape from underneath.
When should you use two layers of tubeless tape?
One layer handles most setups. Two layers make sense in specific situations, and knowing when to use them saves you from a slow leak you can’t find.
Stan’s recommends two layers for applications above 50 psi, which covers most road bikes and some gravel setups running higher pressures. A second layer also helps on older rims with spoke holes that are slightly recessed or rough, where a single layer may not fully bridge the gap.
Use two layers when:
- Tire pressure exceeds 50 psi.
- The rim bed has visible spoke hole recesses deeper than 0.5 mm.
- You’ve had a slow leak from the rim bed that wasn’t caused by a valve or sealant issue.
- The rim manufacturer explicitly recommends it.
Downsides of two layers:
- Slightly tighter bead seating, which can make mounting the tire harder.
- Added weight (minor, but relevant for weight-conscious road builds).
- Risk of creating a high spot if the second layer isn’t centered perfectly.
Pro Tip: Apply the second layer centered over the first, not offset. An off-center second strip creates a raised ridge that can prevent the tire bead from seating evenly.
How to apply tubeless rim tape correctly
Clean application is what separates a setup that holds air for months from one that loses pressure overnight.
- Start opposite the valve hole. This puts the tape overlap away from the valve, reducing the chance of a leak at the most stress-prone point.
- Apply under light tension. Pull the tape taut as you lay it down, pressing firmly into the rim channel with your thumb. Tension keeps the tape flat and prevents bubbles.
- Smooth as you go. Use your thumbnail or a plastic tire lever to press the tape into the corners of the rim bed, especially at the sidewall edges.
- Overlap the starting point by 50–75 mm when you complete the loop. Cut cleanly.
- Pierce the valve hole cleanly using a sharp pick or a dedicated valve core tool. Push through from the inside of the rim, then insert the valve stem and tighten the locknut finger-tight.
- Inflate briefly to seat the tape before adding sealant. A quick burst to 20–30 psi presses the tape firmly against the rim bed.
- Check for bubbles or lifted edges. Press down any that appear before mounting the tire.
Common mistakes: wrinkles from insufficient tension, overlapping the valve hole instead of piercing it cleanly, and starting at the valve (which puts the seam at the highest-stress point).
Pro Tip: On rims that resist tape adhesion, warm the rim bed slightly with a heat gun on low for 10–15 seconds before applying. The warmth activates the adhesive faster and improves initial tack.
How much tape do you need per wheel?
A standard roll is 10–11 m long. For a 700c road or gravel wheel (roughly 2,100 mm circumference), one pass of tape uses about 2.2 m, leaving enough for three to four wheels per roll. A 29-inch MTB wheel uses closer to 2.3 m per pass, yielding three to four wheels from a 10 m roll. Wider tape (32 mm or above) often comes on 50 m rolls, which covers 20+ wheels and makes sense if you’re servicing a fleet or a shop.
- Single road/gravel wheel: ~2.2 m per layer.
- Single 29-inch MTB wheel: ~2.3 m per layer.
- Two-layer setup: double those figures, so a 10 m roll covers one to two wheels.
- Buy one extra roll if it’s your first tubeless conversion. Mistakes happen, and re-taping a rim after a failed first attempt uses another 2+ m.
Special cases: hookless rims, wide rims, and deep-section beds
The standard rule needs adjustment in a few specific scenarios.
Hookless rims require closer attention to manufacturer specs. ENVE, for example, publishes model-specific tape width recommendations because hookless bead geometry changes how the tape must seat. Following ENVE’s rim-specific guidance rather than the general rule is the safer approach. DT Swiss also maps tape widths to specific rim inner widths, which is worth consulting for their hookless models.
Very wide plus rims (30–42 mm internal) sometimes require tape widths that aren’t stocked at standard sizes. In those cases, two parallel strips of narrower tape, overlapped by 5–10 mm at the center, can substitute for a single wide strip. Keep the overlap centered over the spoke holes for maximum coverage.
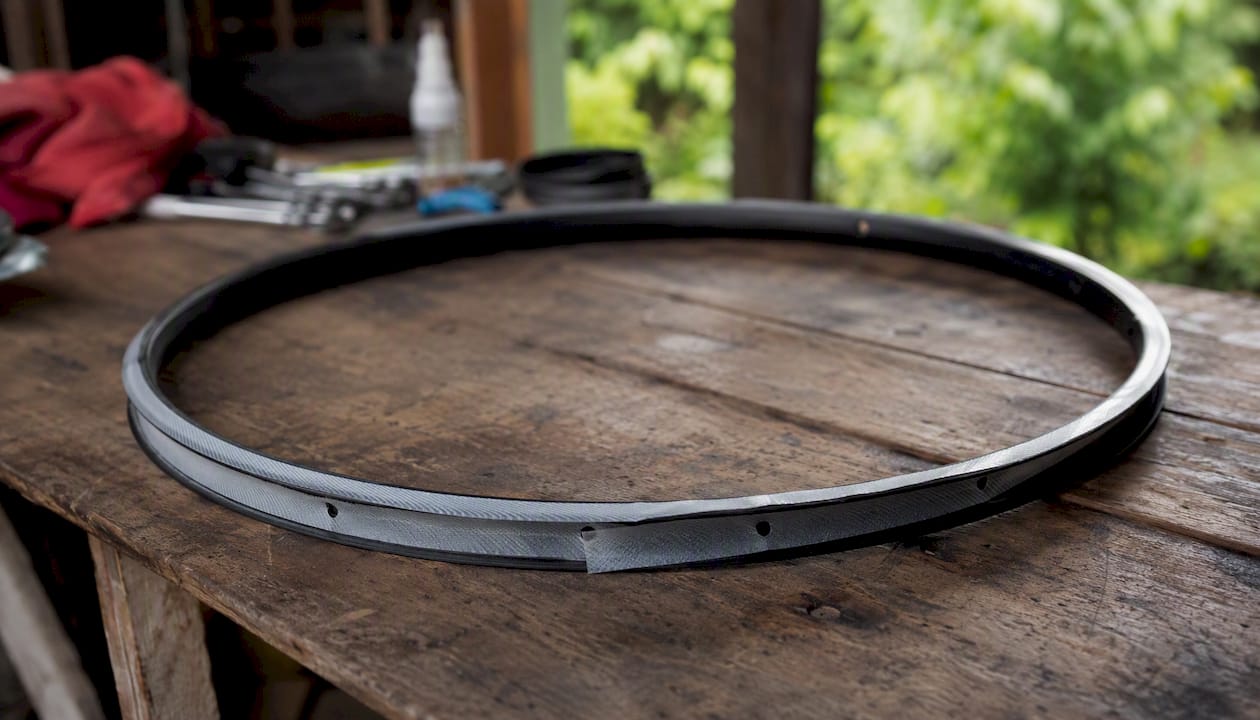
Pro Tip: On deep-section road rims, the tape must reach the full depth of the rim bed and contact both sidewalls. If your tape is even 1 mm short of the sidewall, air will find that gap under pressure. Measure the bed width at its deepest point, not at the rim’s outer edge.
Tubeless-ready vs. standard rims: tubeless-ready rims have a tighter bead seat and often shallower spoke holes, which means a single layer of tape is usually sufficient. Standard rims converted to tubeless may need two layers to fully seal the spoke holes.
Which brands make the best tubeless tape?
A few manufacturers stand out for width availability, adhesive quality, and roll options.
- Stan’s NoTubes offers widths from 21 mm to 35 mm on 10 m rolls, with a well-documented sizing guide and a strong track record across road and MTB. Their tape is semi-transparent, which helps with valve hole alignment.
- Muc-Off produces a stretch-resistant tape with aggressive adhesive, suited for rims that see a lot of flex or temperature variation. Available in multiple widths.
- WTB TCS tape runs from 24 mm to 50 mm, making it one of the widest-ranging options for plus and fat bike rims. WTB recommends choosing tape about 5 mm wider than inner rim width for their own rims.
- SILCA produces a premium tape with consistent thickness and strong adhesion, popular among road cyclists who prioritize a clean, lightweight setup.
Buying checklist:
- Correct width stocked for your rim’s internal measurement.
- Roll length sufficient for your number of wheels (10 m for one to two bikes; 50 m for a shop or fleet).
- Adhesive type matched to your rim material (some tapes bond better to carbon than aluminum).
- Semi-transparent tape if valve hole alignment is a concern on deep rims.
For mountain bike builds, prioritize tape with a thicker profile and stronger adhesive over lightweight options.
A practical perspective on tape width decisions
The 1–2 mm wider rule is the right starting point, but the honest truth is that going slightly wider than necessary almost never causes problems, while going too narrow almost always does. A tape that’s 3 mm wider than the internal width seats fine and seals reliably. A tape that’s 2 mm too narrow will lift off the sidewall under pressure and leak.
When in doubt between two sizes, choose the wider one. And if you’re setting up a rim for the first time and the tape doesn’t stick well on the first pass, don’t fight it. Pull it, clean the rim bed again with fresh isopropyl alcohol, and re-tape. A second attempt with a clean surface almost always works. The measurement and the prep matter more than the brand.
Gear up at Sportfactoryproshop for your tubeless build
Getting the tape width right is half the job. Having the right sealant and valves ready before you mount the tire is the other half.

Sportfactoryproshop stocks tubeless tape in the widths covered in this guide, alongside tubeless valves, sealant, and valve cores so you can complete the full setup in one order. Whether you’re converting a road wheelset or setting up a new MTB build, picking up tape, sealant, and valves together means no mid-install trips to the shop. Check current stock and bundle options at Sportfactoryproshop and get your tubeless setup done right the first time.
Sources
These are the primary sources used in this guide. When in doubt about a specific rim model, always consult the rim or wheel manufacturer’s documentation directly rather than relying on general rules.
- Tubeless Tape Width Recommendations
- TCS Rim Tape - Durable & Reliable Sealing Solution
- Barkeeper Tubeless Tape | Manufacturas GES
When your rim is hookless, high-pressure, or an unusual width, go to the rim maker’s support page first. General rules are a strong starting point; rim-specific documentation is the final word.