

Tubeless Puncture Repair for Road and MTB Riders
Posted by Matt Russ on 6th Aug 2026
Tubeless Puncture Repair for Road and MTB Riders
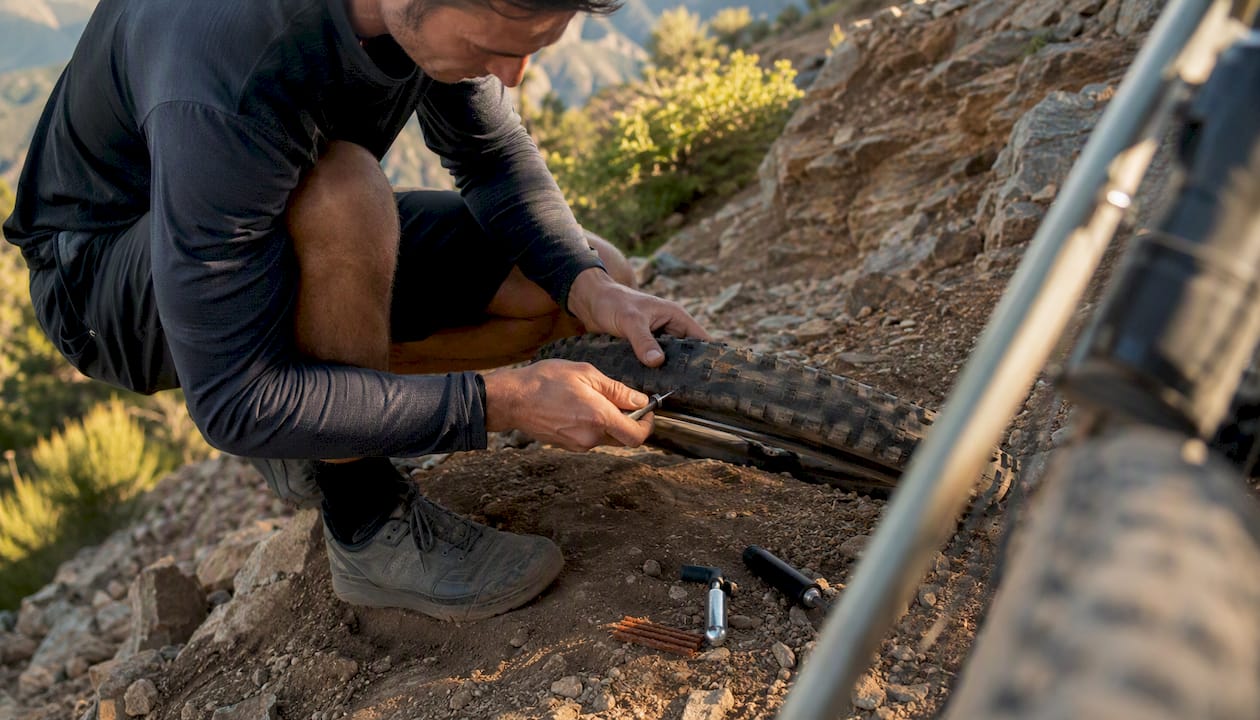
When sealant can’t close the hole, plug it. That single rule covers the majority of tubeless puncture repair situations you’ll face on the road or trail. Your essential kit: a preloaded plug tool or compact plug kit, a CO2 cartridge or mini pump, one spare inner tube, a valve core tool, and a small multitool.
- Preloaded plug tool or plug kit — the fastest way to get a plug in without fumbling with loose strips
- CO2 cartridge or mini pump — reinflate quickly after plugging; CO2 is faster for racing, a pump is more reliable for long rides
- Spare inner tube — your fallback when the hole or carcass is too damaged to plug reliably
- Valve core tool — lets you add sealant through the valve without removing the tire
- Small multitool or pliers — for gripping and seating the plug tool
Pro Tip: Position the puncture at the 6 o’clock position before inserting a plug. Gravity pools sealant around the hole, which helps the plug seat and reduces messy sealant spray during insertion.
One safety rule that overrides everything else: do not ride on a large sidewall gash. A plug cannot restore structural integrity to a cut carcass. If the sidewall is compromised, fit a tube for the ride home or call for support.
Key Takeaways
A properly installed plug in the tread area is a reliable, long-lasting repair for most tubeless punctures — but sidewall damage, bead failure, and high-pressure road use each require a different response.
| Point | Details |
|---|---|
| Plug tread punctures, not sidewalls | Plugs work for tread-area holes; sidewall cuts require a tube and often a tire replacement. |
| Road riders need mechanical-anchor plugs | At 70–100+ PSI, mechanical-anchor designs resist ejection; bacon strips are better suited to MTB and gravel pressures. |
| Position at 6 o’clock before inserting | Gravity pools sealant at the hole, improving plug seating and reducing messy spray. |
| A good plug can last for thousands of miles | Mechanics treat a properly fitted tread plug as a long-term repair, not just an emergency fix. |
| Sportfactoryproshop’s preloaded kit | The Sport Factory Tubeless Plug Kit is the recommended pick for road and MTB riders who need a fast, packable, field-ready solution. |
Table of Contents
- How to repair a tubeless puncture on the road or trail
- When should you plug, rely on sealant, or fit a tube?
- What should you carry in a tubeless repair kit?
- How to insert a plug correctly and make it hold
- When is it unsafe to ride on a repaired tubeless tire?
- What does expert testing say about plug reliability?
- An honest take on what actually works in the field
- The Sport Factory Tubeless Plug Kit: built for riders who can’t afford to stop
- Sources
How to repair a tubeless puncture on the road or trail
A clear, ordered workflow is what separates a two-minute fix from a 20-minute roadside struggle. The step-by-step process requires a plug kit, reamer or insert tool, and a CO2 or pump — and in most cases you never need to remove the tire from the rim.
Step-by-step plug repair
- Stop and locate the puncture. Listen for air hissing, look for sealant spitting or bubbling, and rotate the wheel slowly. If the object is still embedded, leave it in place until you’re ready to plug.
- Position the wheel. Rotate so the puncture sits at 6 o’clock. This pools sealant at the hole and makes insertion cleaner.
- Remove the object. Pull out the thorn, glass, or debris with pliers or your fingers. Work quickly — you want to plug before too much air escapes.
- Prepare the hole. If your tool requires it, ream the hole lightly to create a clean, consistent entry point. Avoid aggressive reaming that widens the hole unnecessarily or risks cutting through rim tape.
- Insert the plug. Push the plug tool straight into the hole at a slight inward angle, firm and steady. Drive it in until roughly 10–15mm of plug tail remains outside the tire.
- Withdraw the tool. Pull the insertion tool straight back out in one smooth motion. Do not twist or angle the tool on the way out — that can drag the plug back with it.
- Let sealant pool. Wait 10–15 seconds before inflating. This gives the sealant time to work with the plug material around the seal.
- Inflate slowly. Use CO2 or your pump to bring the tire back to a rideable pressure. For road tires, aim for at least 60–70 PSI before testing; for MTB or gravel, 25–35 PSI is usually enough to check the seal.
- Spin the wheel. Rotate the tire a few times to redistribute sealant around the plug.
- Check the repair. Watch and listen for any continued hissing. If pressure holds for 60 seconds, you’re good to ride.
When the tire is completely flat
A fully deflated tire can make it hard to locate the hole because sealant has spread everywhere. Inflate briefly with CO2 to get some pressure back, then rotate the wheel and watch for sealant bubbling. If the bead has unseated, you may need to reseat it before inflating — a few drops of soapy water around the bead helps it slide back into the rim channel.
Pro Tip: If sealant has dried over the hole and you can’t find the leak, run your fingers slowly around the tread while the tire has some pressure. You’ll often feel a slight air pulse before you see anything.
Field troubleshooting
- Plug inserted but still hissing: The plug may not be seated deep enough, or the hole is larger than the plug can fill. Try a second plug alongside the first, or fit a tube.
- Slow hiss from the valve area: The valve core may be loose. Use your valve core tool to snug it up — this is a surprisingly common source of pressure loss that has nothing to do with the tread.
- Multiple embedded thorns: Remove and plug each one individually. If there are more than two or three, assess whether the tire can hold pressure reliably; a tube fallback is often the smarter call.
- Persistent leak after two plugs: The hole is likely too large or the carcass is damaged. Fit the spare tube and get to a shop.
For road bikes running high pressure, a tube fallback is a reliable way to get home when multiple punctures or large holes prevent a solid plug repair. When fitting a tube into a sealant-coated tire, use a rag or glove to wipe the worst of the sealant from the inside of the tire before inserting — this reduces the chance of the tube slipping or bunching.
When should you plug, rely on sealant, or fit a tube?
Not every puncture needs a plug. Knowing which option to reach for first saves time and avoids unnecessary repairs.
Decision checklist
- Hole seals within 30 seconds of rotating the wheel: Sealant handled it. Top up sealant at home if you’ve lost a significant amount, and monitor pressure on the next ride.
- Hole is 2–4mm or smaller, tread area only: A single plug will almost always work. This is the most common scenario on gravel and MTB.
- Hole is larger than 4–6mm, tread area: Use two plugs or assess whether a tube is more reliable. Very large holes may need a boot (a piece of tire sidewall or a dollar bill placed inside) plus a tube.
- Sidewall cut of any size: Do not plug. Plugs are not designed to handle sidewall stress. Fit a tube and ride carefully, or stop riding entirely if the cut is deep.
- Bead or rim tape is damaged: Fit a tube and head to a shop. A compromised bead or rim tape means the tire cannot hold tubeless pressure safely.
- Sealant is dried out or insufficient: The tire may not seal even small holes. Carry a small sealant top-up bottle on longer rides.
Road vs MTB and gravel
Road tires typically run 70–100+ PSI, which puts far more stress on a plug than the 20–35 PSI common in MTB and gravel setups. At high pressure, a plug that isn’t mechanically anchored in the carcass can blow out before you reach full inflation. Expert testers recommend mechanical-anchored plug designs for road tires specifically because they balance speed, ease of use, and permanence while reducing the risk of a plug ejecting under pressure.
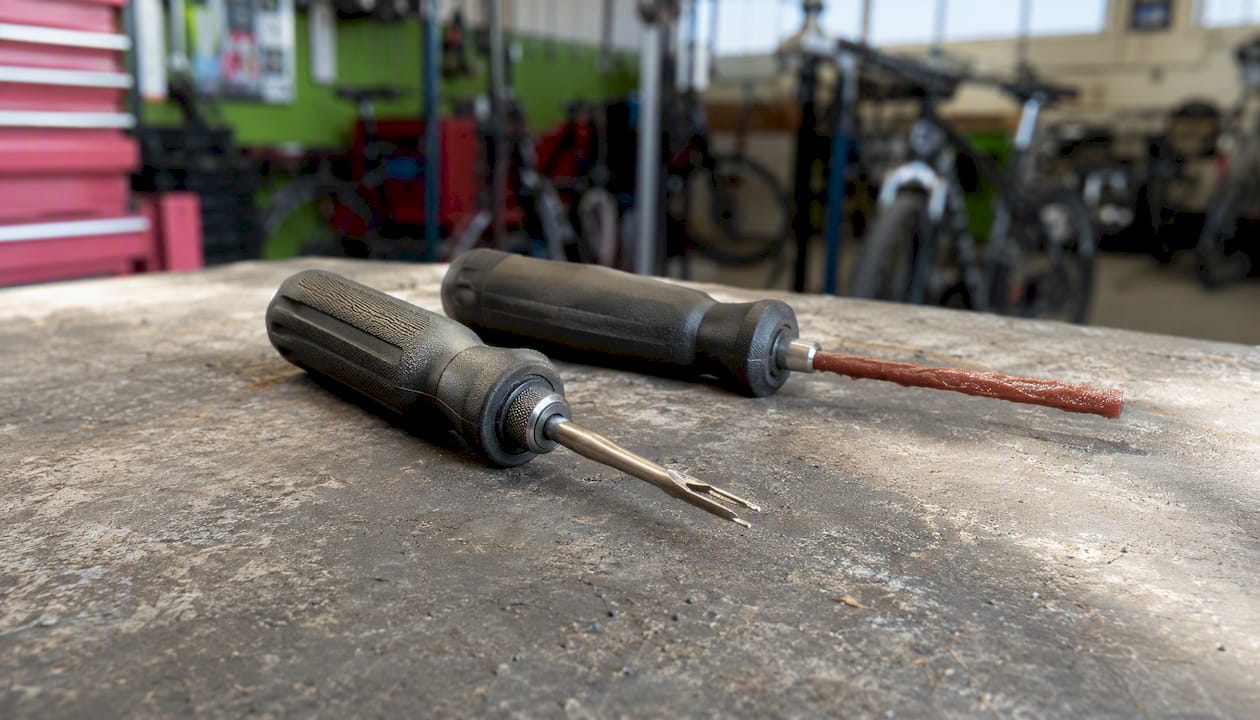
MTB and gravel riders have more flexibility. Bacon-strip style plugs (thin rubber strips threaded through the hole) work reliably at lower pressures and handle slightly irregular hole shapes well. At road pressures, they are less secure compared to mechanically anchored designs.
| Scenario | Best option | Notes |
|---|---|---|
| Small pinhole, sealant active | Sealant alone | Monitor pressure; top up sealant if needed |
| 2–4mm tread hole, MTB/gravel | Bacon strip or preloaded plug | Works well at 20–35 PSI |
| 2–4mm tread hole, road | Mechanical-anchor plug | Resists blowout at 70–100+ PSI |
| 4–6mm+ tread hole | Two plugs or tube | Assess carcass condition |
| Sidewall cut | Tube only | Never plug a sidewall |
| Damaged bead or rim tape | Tube + shop visit | Tubeless pressure cannot be held safely |
When an internal patch is needed — for a hole that plugs won’t seal reliably from the outside — that’s a shop job. Remove the tire, clean the inside, and apply a vulcanizing patch to the inner carcass surface.
What should you carry in a tubeless repair kit?
The goal is a kit light enough that you actually bring it, and complete enough that you can handle the most common failures. Standard kit lists consistently point to the same core items: a compact plug solution, CO2 or pump, valve core tool, and a spare tube.
Core kit checklist
- Preloaded plug tool or plug strips — preloaded tools deploy faster and reduce fumbling; loose bacon strips are lighter but require a separate insertion tool
- Reamer or insertion tool (if not built into your plug tool)
- CO2 cartridges (2) or mini pump — carry two CO2s if racing; a pump for training rides where you can take more time
- Valve core tool — doubles as a way to add sealant without removing the tire
- Spare inner tube — one tube, sized for your tire
- Small pliers or a multitool with pliers — for gripping plug tools and removing debris
- Nitrile gloves and a small wipe — sealant is messy; gloves keep your hands clean and improve grip
- Sealant top-up bottle (optional) — a 30ml bottle is enough for a field top-up on longer rides
Tool categories and what each does best
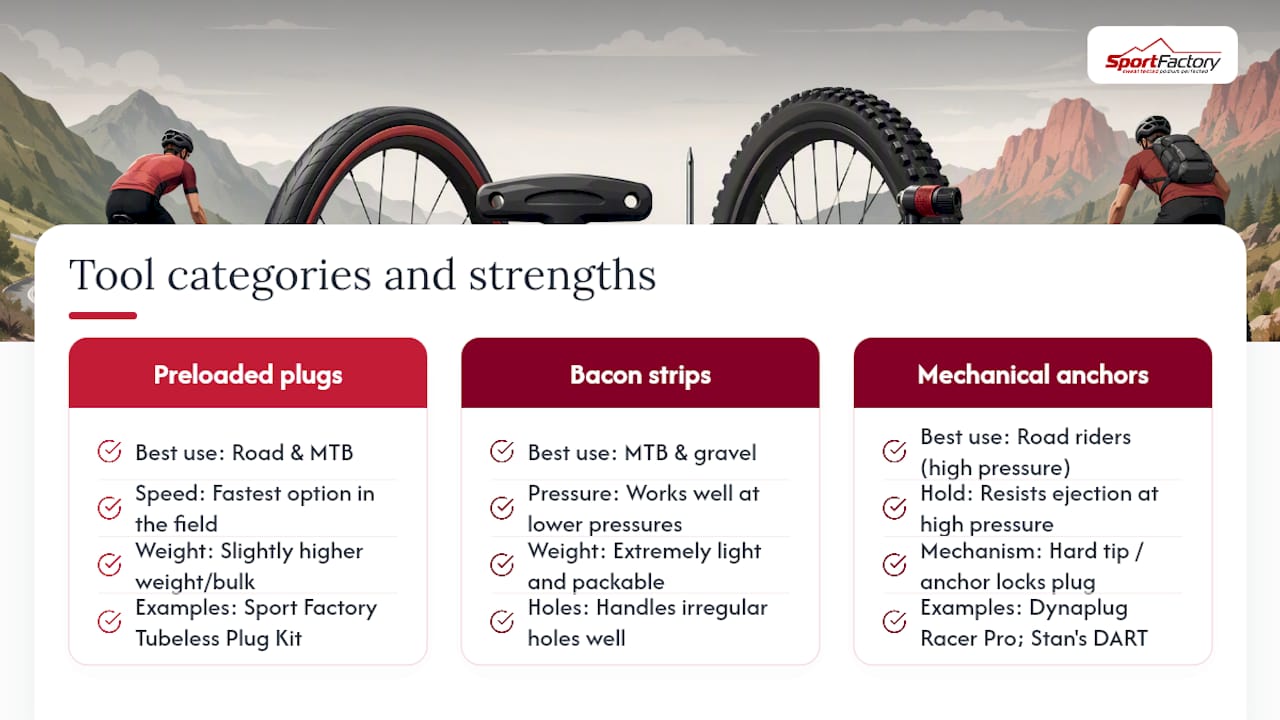
Preloaded deployable plugs (like the Sport Factory Tubeless Plug Kit) combine the plug and insertion tool in a single unit. You push and pull in one motion. They’re the fastest option in the field and work well for both road and MTB. The tradeoff is slightly higher weight and bulk compared to loose strips.
Bacon strips are thin rubber strips threaded through a needle-style tool. They’re extremely light and packable, and they handle irregular holes well at lower pressures. At road pressures, the mechanical hold is weaker, so they’re better suited to MTB and gravel.
Mechanical-anchored plugs (such as the Dynaplug Racer Pro or Stan’s DART Tool) use a harder tip or anchor mechanism that locks the plug into the carcass. This design resists ejection at high pressure, making it the preferred choice for road riders. The Dynaplug Racer Pro is a compact, brass-tipped option designed for road use; the Stan’s DART Tool uses a dart-style anchor that seats firmly in the carcass. The Blackburn Plugger Tubeless Repair Kit takes a slightly different approach, bundling plug strips with a reamer and insertion tool in a compact case that suits riders who prefer a more traditional plug-strip method with a dedicated tool.
Pro Tip: A preloaded, ready-to-deploy plug tool saves critical seconds and reduces user error on the road. Keep it somewhere you can grab it in under five seconds — bar ends, taped to the top tube, or in the top pocket of a jersey.
Packing for race vs training
For racing, minimize weight and maximize speed: one preloaded plug tool, two CO2 cartridges, one tube, and a valve core tool. Tape the plug tool to the frame or tuck it in a bar end. For training and gravel rides, a small saddle bag gives you room to carry a pump, extra plugs, sealant top-up, and gloves without the weight penalty mattering much.
How to insert a plug correctly and make it hold
Technique matters more than most riders expect. A plug inserted at the wrong angle or trimmed too early is a plug that fails.
Detailed insertion steps
- Clear the hole. Remove all debris. If a thorn broke off inside, use pliers to extract the tip. Leaving fragments behind prevents a clean seal.
- Assess whether to ream. Preloaded tools and mechanical-anchor designs generally don’t need reaming — the tip creates its own path. Bacon-strip tools with a needle inserter may benefit from a light ream on rough or irregular holes. Never ream aggressively; you’re creating a clean channel, not enlarging the hole.
- Check rim tape before inserting. If the object penetrated deep enough to reach the rim tape, inspect it. A torn rim tape means air will escape around the tape edge regardless of how well the plug seals the carcass.
- Insert at a slight inward angle. Push the tool in firmly, angling slightly toward the center of the tire (not perpendicular to the tread surface). This helps the plug anchor against the inside of the carcass rather than sitting flush with the outer surface.
- Drive to the correct depth. Leave 10–15mm of plug tail outside the tire. This tail is your confirmation that the plug is seated, and it gives you material to trim once the repair is confirmed.
- Withdraw cleanly. Pull the tool straight back in one smooth, firm motion. Twisting or angling the tool on the way out is the single most common cause of pulling the plug back out with the tool.
- Inflate slowly and check. Bring pressure up gradually. Watch the plug tail — if it’s being pushed outward, the plug is holding. If it’s being sucked inward, the anchor isn’t seated and you need to reinsert.
- Trim the tail. Once pressure holds for 60 seconds, trim the tail flush with the tire surface using scissors or a knife. Leave a small tail until you’re confident — an over-trimmed plug that retracts slightly can start to leak.
- Spin and recheck. Rotate the wheel to redistribute sealant, then hold pressure for another 60 seconds before riding.
Pro Tip: Don’t trim the plug tail at the roadside if you’re not certain the repair is holding. Ride a short distance at reduced pressure, stop, and check again before trimming and inflating to full pressure.
Common mistakes to avoid
- Over-trimming immediately — leaves no margin if the plug shifts slightly under pressure
- Twisting the tool on withdrawal — the most reliable way to pull the plug back out
- Skipping the bead and rim tape check — a plug won’t fix a leak that’s coming from the rim interface
- Inflating too fast — rapid inflation can eject a plug before sealant has had time to work with it
When is it unsafe to ride on a repaired tubeless tire?
A plug is a field repair, not always a permanent one. Knowing when to ride home carefully and when to stop entirely is a safety decision, not just a mechanical one.
Warning signs that mean stop riding
- Sidewall cut longer than a few millimeters — the sidewall flexes with every wheel rotation; a cut here will grow under load and can cause sudden deflation
- Visible carcass delamination — layers of the tire separating indicate structural failure; replace the tire
- Bulge or bubble in the tread or sidewall — a sign the carcass is broken internally; the tire can blow out without warning
- Bead damage or rim tape failure — the tire cannot hold tubeless pressure; fit a tube and ride gently to a shop
- More than two plugs in the same tire — multiple repairs in close proximity weaken the carcass; get a shop inspection before your next hard ride
Timeline for moving from field fix to permanent repair
A well-installed plug can last for thousands of miles in the tread area, and many mechanics treat a properly fitted plug as a long-term repair rather than a temporary one. That said, a shop inspection after any significant puncture is good practice. Have a mechanic check the inside of the carcass for hidden damage, especially after a high-speed impact or a large object strike.
For sidewall damage of any kind, the timeline is immediate: stop riding on the tire and replace it. Riding cautiously home on a tube is acceptable for a small sidewall nick if the carcass feels structurally sound, but that’s a judgment call made at low speed with constant attention to how the tire feels.
What does expert testing say about plug reliability?
The evidence on plug durability is more reassuring than many riders expect, with a few important caveats.
Tubeless sealant seals many small holes on its own, but once a puncture exceeds the sealant’s capacity, a plug fills the void with vulcanized rubber and acts as an effective secondary safety net. The key finding from testing and field experience is that a properly installed plug often lasts for a very long time, potentially the remaining life of the tire, not just until the next ride.
Myth-busting
- “Plugs always damage the tire.” Not accurate. A plug inserted cleanly into the tread carcass causes minimal additional damage beyond the original puncture. The plug material bonds with the carcass and sealant to create a durable seal.
- “Bacon strips are fine for high-pressure road tires.” This is where many riders get into trouble. Bacon strips work reliably at MTB and gravel pressures, but at road pressures (70–100+ PSI), the mechanical hold of a strip-style plug is weaker. Mechanical-anchor designs are the expert recommendation for road use because they resist ejection under high pressure.
- “Soapy water will fix a bead leak.” Soapy water helps seat a bead and locate a leak, but as , it does not substitute for a mechanical plug on larger punctures. It’s a diagnostic and bead-seating tool, not a repair.
What this means for your kit choice
For road riders, the practical implication is clear: carry a mechanical-anchor style plug tool, not just bacon strips. For MTB and gravel riders, either type works well, but a preloaded tool still wins on speed and simplicity. The difference between a two-minute repair and a 15-minute one often comes down to whether the tool is ready to deploy the moment you need it.
An honest take on what actually works in the field
There’s a tendency in cycling to treat tubeless repair as either completely foolproof or hopelessly complicated. Neither is accurate.
The reality is that tubeless puncture repair works extremely well for the punctures it’s designed to handle: tread-area holes from thorns, glass, and small rocks. A preloaded plug tool, a CO2, and a tube as backup covers the vast majority of situations you’ll encounter on a road ride or trail. The riders who struggle with tubeless repairs are usually the ones who haven’t practiced the technique before they need it, or who are carrying the wrong tool for their tire pressure.
The one area where tubeless repair genuinely falls short is sidewall damage, and that’s worth being direct about. No plug, no boot, and no amount of sealant makes a cut sidewall safe for continued riding at speed. The carcass is the structural element of the tire, and once it’s compromised, the repair is a get-home measure at best.
The kit recommendation here is straightforward: a preloaded mechanical-anchor plug tool for road riders, a preloaded or bacon-strip option for MTB and gravel, and always a spare tube. Keep the plug tool somewhere you can reach it in under five seconds. Practice the insertion once at home before you need it on the road.
The Sport Factory Tubeless Plug Kit: built for riders who can’t afford to stop
When you’re mid-race or deep into a gravel route, the difference between a two-minute fix and a DNF is having the right tool already in your hand. The Sport Factory Tubeless Plug Kit is Sportfactoryproshop’s pick for performance riders because it combines a preloaded, ready-to-deploy design with the packability to fit in a jersey pocket or bar end — no loose plugs to fumble with, no separate insertion tool to track down.

It works for both road and MTB setups, handles the tread-area punctures that end most rides, and pairs directly with the workflow in this guide. Pair it with a CO2 cartridge, a valve core tool, and a spare tube, and you have a complete field kit that weighs almost nothing. For riders who want to replace a tire that’s taken too much damage, Sportfactoryproshop also carries a curated selection of performance tires and wheel components suited to road, gravel, and MTB use.
View the Sport Factory Tubeless Plug Kit and the full repair accessories range at Sportfactoryproshop and build your kit before your next ride.
Sources
These sources informed the guidance and tool recommendations in this article:
- How to repair a tubeless punctured tyre | Step-by-step guide to plugging, patching and sewing tyres
- Best tubeless tyre puncture repair tools 2026: expert-tested | Cycling Weekly
- How to repair a tubeless tyre with a plug | Cyclist