

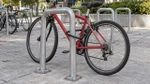
To Avoid Bike Theft Inspect Anchors First: Lock a Bike on a Rack That Stays Put
Posted by Matt Russ on 7th Oct 2026
To Avoid Bike Theft Inspect Anchors First: Lock a Bike on a Rack That Stays Put

The best way to lock a bike on a rack is to capture the rear triangle and rear wheel together with a quality U-lock looped around a solid, immovable anchor, then add a second lock for the front wheel. This two-lock approach is harder to defeat than a single cable, and it protects the frame and the most expensive wheel from quick theft. Before you lock up, always check that the rack itself is actually fixed to the ground.
TL;DR:
Bike Index reports roughly 2.4 million annual bike thefts in the United States, and 59% of stolen bikes were locked.
Reject racks that flex, lift, or twist, and inspect welded seams for signs of previous cutting or repair before trusting an anchor.
Choose a snug U lock with a shackle at least 13 millimeters thick; cables can be cut quickly and should only secure the front wheel.
For car racks, secure the frame to the mounting arm, lock quick release wheels, remove accessories, and check hitch limits and straps before driving.
Table of Contents
Why locking technique matters more than you think
Roughly 2.4 million bikes get stolen in the United States each year, and 59% of them were locked at the time, according to Bike Index’s 2025 theft report. That number tells us most victims used some lock, just not the right one in the right place.
A considerable number of bikes are stolen each year in the US, and many were locked when taken. (Bike Index) That gap between “locked” and “secure” is where most thefts happen.
Thieves favor speed. A quick-release front wheel can be popped off in seconds, leaving the lock closed around an empty fork while the rest of the bike walks away. Others lift bikes over short posts or cut through weak anchors instead of the lock itself. Protecting the frame and rear wheel together removes the easiest, fastest payout for an opportunistic thief and forces them to attack the lock directly, which takes longer and draws more attention.

How to check a rack before you trust it
Not every rack deserves your bike. Before locking up, give the anchor point a quick once-over.
-
Look for a rack that’s embedded in concrete or bolted through a heavy steel base, not a thin hollow post that flexes when you push it.
-
Check for welded seams wrapped in tape or grime, which can be a sign someone already cut through and patched the spot.
-
Avoid chain-link fencing, wooden railings, or anything you could lift, twist, or unscrew by hand.
-
Skip “wheel-bender” style racks that only grab a wheel from the side; these are often worse than no rack at all because they invite wheel theft without protecting the frame.
If the only rack available fails these checks, look for a legally parkable lamp post or sign pole nearby, carry the bike inside if you’re running a quick errand, or choose a different, more visible parking spot. A busy storefront window beats an empty alley every time.
The step-by-step method that actually works
This sequence, often called the modified Sheldon Brown method, is built around one idea: make it as hard as possible to separate the frame and rear wheel from the rack.
-
Back the bike into the rack so the rear triangle sits closest to the post or the end of the rack.
-
Pass your U-lock through the rear triangle, through the rear wheel, and around the rack frame or post in one closed loop.
-
Pull the bike snug against the anchor to remove slack, then lock it so the keyhole faces down or toward the frame.
-
Add a second lock, a cable or smaller U-lock, through the front wheel and frame to the same anchor point.
-
Keep the lock mechanism off the ground and tucked close to the bike rather than dangling or resting on pavement.
The modified Sheldon Brown method works because the primary lock protects the two components thieves target most: the frame and the rear wheel, which is usually the pricier of the two.
Pro Tip: If you only own one lock, always put it through the rear triangle and rear wheel first. A stolen front wheel is an inconvenience; a stolen frame is a new bike.

Picking the right lock, or combination of locks
Different locks solve different problems, and pairing two types usually beats relying on one.
-
U-locks remain the default choice for most riders; look for a shackle at least 13mm thick and sized to fit snugly around your rear triangle and rack, since extra room gives thieves leverage.
-
Hardened chains offer excellent resistance against cutting tools but add real weight, so they suit riders who park in one high-risk spot rather than those moving the bike all day.
-
Folding locks pack flat and flex around oddly shaped racks, landing as a solid mid-security option for commuters who value portability.
-
Cable locks should only serve as secondary protection; bolt cutters can defeat a cable in seconds, so never rely on one alone.
A commuter parking for eight hours at a transit stop needs a heavier primary lock than someone making a five-minute coffee stop, but the rear-triangle-first rule applies in both cases.
Locking a bike to a car rack without losing it
Hitch, tray, and roof racks each come with their own blind spots. A bike strapped to the back of a car can still be lifted off a tray rack or have its wheels removed while you’re inside a gas station.
-
Thread a cable or small lock through the frame and the rack’s mounting arm, not just around a wheel that detaches easily.
-
Use locking skewers or axle locks on quick-release wheels so they can’t be popped off while the bike sits exposed on the vehicle.
-
Remove bike computers, lights, and other clip-on accessories before leaving the car unattended, since those disappear fastest.
-
Before any drive, confirm your hitch rack’s weight limit and double-check every strap and arm is locked down, since a loose mount is a safety issue as much as a theft risk.
Roof racks add one more wrinkle: a bike up top is harder for a thief to reach quickly, but it’s also harder for you to check, so a glance in the mirror at every stop is worth the habit.
Quick checklist and the mistakes that cost riders their bikes
Most thefts trace back to a handful of avoidable habits. Fix these and you’ve closed off the easiest attacks.
-
Locking only the front wheel: always capture the frame and rear wheel in the main loop instead.
-
Leaving slack in the lock: pull the bike snug against the anchor so there’s no room to swing a tool.
-
Resting the lock on the pavement: raise it to hip height so leverage tools can’t get a grip.
-
Trusting a hollow or removable post: inspect the anchor first, every time, even at a rack you’ve used before.
-
Skipping a secondary lock: a second, smaller lock on the front wheel costs little and closes an easy gap.
Notes from the shop floor
We spend a lot of time talking with cyclists about gear that actually holds up, and locking technique comes up as often as tire pressure. A few things we’ve noticed matter in practice: practicing the locking sequence at home until it takes under a minute makes you far less likely to rush and leave slack at the rack. Minimizing leverage points, keeping the shackle tight and the mechanism tucked toward the frame, defeats more opportunistic attempts than any single lock upgrade. And if you’re hauling bikes by car, checking your hitch rack’s weight limit before you load up protects both your bike and your bumper.
What I tell every rider who asks
The riders who never get their bikes stolen aren’t the ones with the fanciest lock. They’re the ones who lock the frame and rear wheel to a solid anchor every single time, without exception, even for a two-minute stop. Build that habit and the rest is just details.
— Coach Matt
Where to find the right locking hardware
Once you know the method, the right parts make it easier to stick with. We carry components including skewers and hardware that pair well with locking skewers or axle locks, so quick-release wheels stay put even when you step away. Our tires selection also comes in handy if a wheel ever needs replacing after a theft attempt leaves a tire damaged.

For everyday carry, our main bike accessories page covers tools, lights, and maintenance gear that round out a solid security routine, from the multitool you’ll want for tightening skewers to lights that keep your bike visible while it’s parked. If you’re riding with others for extra peace of mind at busy racks, Conppi can help you find a cycling partner nearby so you’re not locking up solo. Browse our shop and build a kit that matches the method above.
FAQ
Can you lock a bike on a bike rack?
Yes, most public bike racks are designed for exactly this, as long as the rack is fixed to the ground. Always inspect the anchor first and run your primary lock through the frame and rear wheel rather than just one wheel.
How can I prevent my bike from being stolen from my bike rack?
Use a U-lock through the rear triangle and rear wheel, add a second lock for the front wheel, and choose a rack that’s embedded in concrete rather than a thin or removable post. Keeping the lock off the ground also makes it harder for thieves to get leverage with cutting tools.
How do I lock a bike to a car rack?
Thread a cable or small lock through the bike’s frame and the rack’s mounting arm, and use locking skewers or axle locks on quick-release wheels so they can’t be removed while parked. Check your hitch rack’s weight limit and strap tightness before driving, since a loose mount is both a security and a safety risk.
How do I secure my bike to a bike rack?
Back the bike into the rack, pass a U-lock through the rear triangle and rear wheel around a solid anchor, and pull it snug to remove slack. Add a secondary lock on the front wheel for a setup that covers both ends of the bike.